Imagine indulging in a rich, creamy chocolate pudding that actually supports your weight loss goals instead of sabotaging them.
Sounds too good to be true? This simple three ingredient recipe proves that healthy eating doesn’t mean giving up dessert.
With just a banana, cocoa powder, and milk, you can create a decadent treat that satisfies your sweet tooth while keeping your nutrition on track.
Why This Pudding is a Weight Loss Game-Changer
When you’re trying to lose weight, desserts often feel off limits. Traditional puddings are loaded with refined sugar, heavy cream, and artificial ingredients that spike your blood sugar and leave you craving more.
This healthy version flips the script entirely. By using naturally sweet banana as the base, you eliminate the need for added sugars while still getting that satisfying sweetness your taste buds crave.
The magic of this recipe lies in its simplicity and nutritional balance. Bananas provide natural sweetness along with potassium, fiber, and essential vitamins.
Cocoa powder delivers rich chocolate flavor plus antioxidants and mood-boosting compounds. Milk adds protein and calcium, creating a dessert that actually nourishes your body.
Best of all, this pudding is incredibly low in calories compared to traditional versions, making it the perfect guilt-free treat when you’re watching your waistline.
What Makes This Recipe Special
Unlike store bought puddings packed with preservatives and artificial flavors, this homemade version contains only real food ingredients you can pronounce.
There’s no mystery about what you’re putting into your body. The cooking process transforms these simple ingredients into a silky smooth dessert with a texture that rivals any fancy pudding you’d buy at the store.
The overnight refrigeration is key to achieving that perfect pudding consistency. As it chills, the mixture sets into a firm yet creamy texture that’s incredibly satisfying.
The cold temperature also enhances the chocolate flavor, making each spoonful taste even more indulgent. This make ahead nature makes it ideal for meal prep enthusiasts who want healthy desserts ready to grab throughout the week.
Ingredients You’ll Need
The beauty of this recipe is its minimalist approach. You need just three basic ingredients:
Main Ingredients:
- 1 medium ripe banana (the riper, the sweeter)
- 2 tablespoons unsweetened cocoa powder
- ½ cup milk (any variety works – dairy, almond, oat, or soy)
That’s it. No sugar, no eggs, no gelatin, no complicated ingredients. Just three pantry staples that transform into dessert magic.
Step by Step Instructions
Step 1: Blend the Ingredients
Start by peeling your banana and breaking it into chunks. Add the banana pieces, cocoa powder, and milk to a blender.
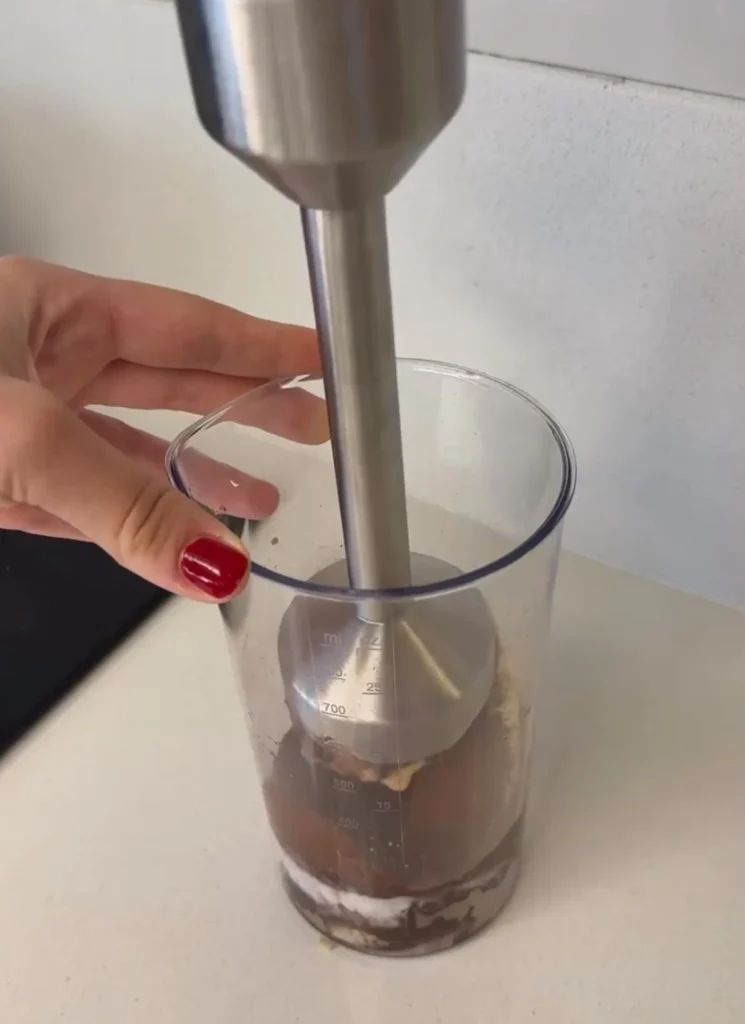
Blend everything together on high speed until the mixture is completely smooth and well combined. You should have a liquid mixture with no lumps of banana or cocoa powder remaining.
The mixture will look thin at this stage, but don’t worry that’s exactly what you want.
Step 2: Cook the Mixture
Pour the blended mixture into a small saucepan and place it on the stove over medium heat. Stir continuously as the pudding heats up.
This cooking step is crucial because it thickens the mixture and develops a deeper, more complex chocolate flavor.
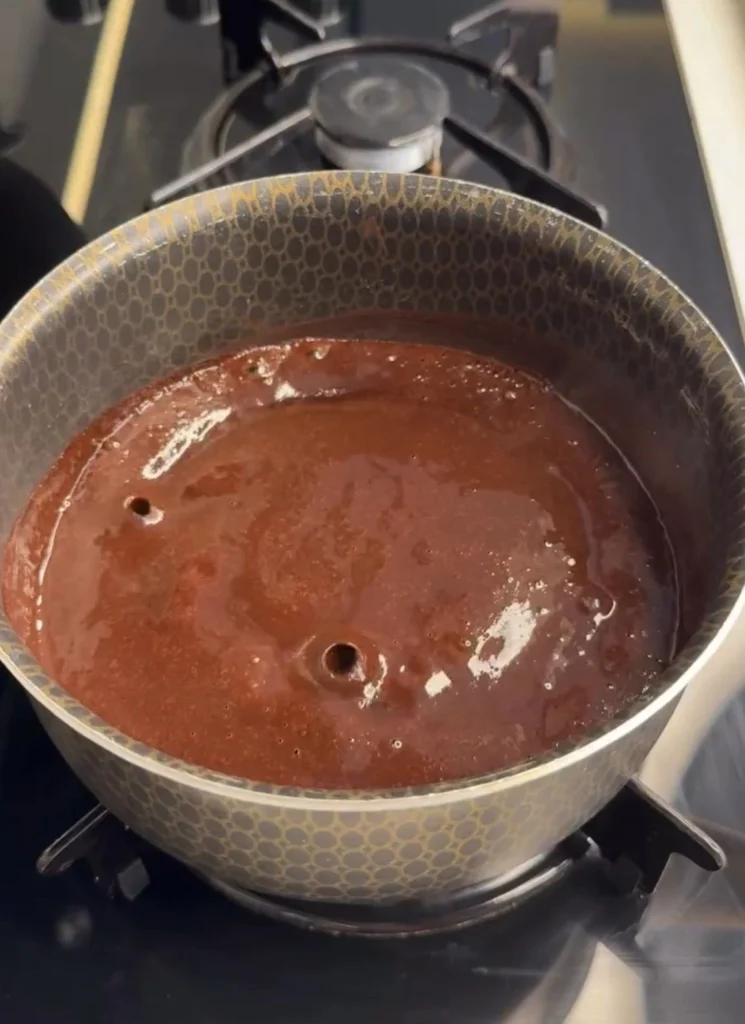
Keep stirring to prevent the pudding from sticking to the bottom of the pan or forming lumps. You’ll notice the mixture start to thicken after a few minutes. Continue cooking and stirring until it reaches a consistency similar to thick cream or melted chocolate. This usually takes about 5-7 minutes.
Step 3: Prepare the Bowl
While your pudding is still hot, prepare your serving bowl with a simple trick that will make your life easier later.
Take a clean bowl and wet the inside with water, swirling it around to coat all surfaces. Pour out the excess water, leaving the bowl slightly damp.
This moisture creates a barrier between the pudding and the bowl, making it incredibly easy to remove the pudding later for unmolding or serving. It’s a professional technique that prevents sticking without adding any oil or butter.
Step 4: Transfer and Chill
Carefully pour the hot pudding into your prepared wet bowl. Smooth the top with a spoon if desired. Allow the pudding to cool at room temperature for about 15-20 minutes, then cover the bowl with plastic wrap or a lid.
Place the pudding in the refrigerator and let it chill overnight, or for at least 6-8 hours. This extended chilling time is essential for the pudding to set properly and develop its signature firm yet creamy texture.
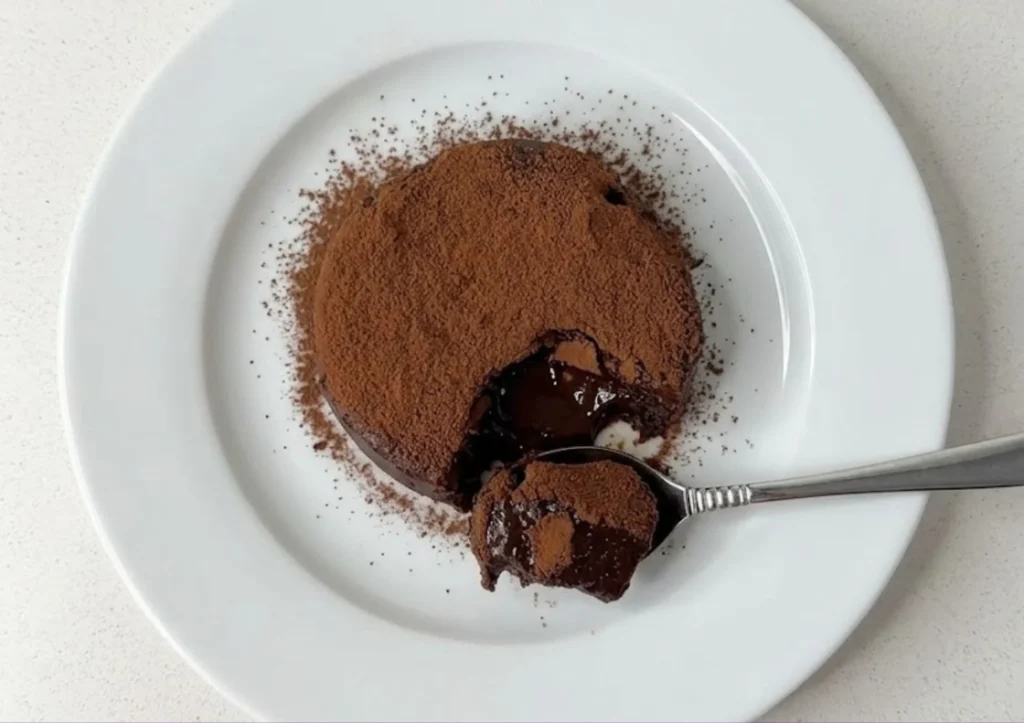
Step 5: Serve and Enjoy
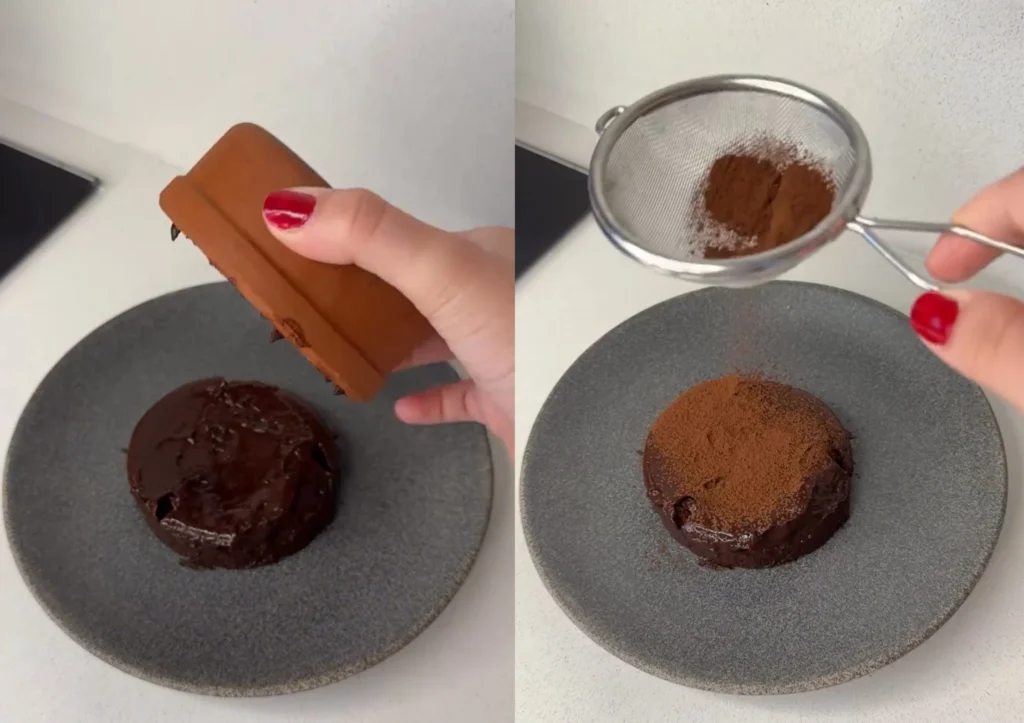
The next day, your pudding will be perfectly set and ready to enjoy. You can serve it directly from the bowl, or if you wet the bowl as instructed, you can easily unmold it onto a plate for a more elegant presentation. The pudding should hold its shape beautifully and have a smooth, glossy surface.
Nutritional Benefits That Support Weight Loss
This pudding isn’t just delicious it’s designed to support your weight loss journey in multiple ways. First, the banana provides resistant starch, especially if it’s slightly underripe, which helps you feel fuller longer.
The fiber in bananas also promotes healthy digestion and helps regulate blood sugar levels, preventing the energy crashes that often lead to unhealthy snacking.
Cocoa powder is a nutritional powerhouse packed with flavonoids, powerful antioxidants that support heart health and may even boost metabolism. It also contains theobromine, a natural compound that can help suppress appetite and improve mood two crucial factors when you’re trying to stick to a healthy eating plan.
The milk adds a dose of protein, which is essential for maintaining muscle mass during weight loss. Protein also increases satiety, helping you feel satisfied after eating. If you choose a low-fat or plant-based milk option, you can keep the calorie count even lower while still getting all the benefits.
Customization Options
While this basic recipe is absolutely delicious as-is, you can customize it to suit your preferences:
Flavor Variations:
- Add a dash of vanilla extract for extra depth
- Stir in a pinch of cinnamon for warmth
- Mix in a teaspoon of instant coffee for mocha flavor
- Add a few drops of peppermint extract for mint chocolate
Texture Additions:
- Top with fresh berries for added nutrients
- Sprinkle with crushed nuts for healthy fats and crunch
- Add a dollop of Greek yogurt for extra protein
- Garnish with shredded coconut for tropical flair
Milk Alternatives:
- Use almond milk for fewer calories
- Try coconut milk for a richer, creamier texture
- Choose oat milk for extra fiber
- Opt for soy milk for more protein
Tips for Best Results
To ensure perfect pudding every time, keep these tips in mind:
Use ripe bananas with brown spots for maximum sweetness. The riper the banana, the less likely you’ll feel the need to add extra sweeteners.
Choose high quality unsweetened cocoa powder for the best chocolate flavor. Dutch processed cocoa gives a smoother, less bitter taste, while natural cocoa powder provides a more intense chocolate hit.
Don’t skip the cooking step. While you could technically eat this mixture raw, cooking it transforms the texture and flavor dramatically. The heat activates the starches in the banana, helping the pudding set properly, and it mellows the raw cocoa taste.
Be patient with the chilling time. While it might be tempting to dig in after just a few hours, the overnight rest allows the pudding to reach its ideal texture. The extended chill time also allows the flavors to meld together beautifully.
Storage and Meal Prep
This pudding is perfect for meal prepping your desserts for the week. Store it in an airtight container in the refrigerator for up to 4 days.
You can make individual portions by dividing the mixture into small jars or ramekins before refrigerating, creating grab-and-go desserts that are portion-controlled and ready whenever a craving hits.
For variety throughout the week, consider making multiple batches with different flavor add-ins. This way, you’ll have several dessert options to choose from, preventing boredom and helping you stick to your healthy eating plan.
The Best 3 Ingredient Chocolate Pudding for Weight Loss: Guilt Free Dessert Heaven
Ingredients
- Main Ingredients
- 1 medium ripe banana
- 2 tablespoons unsweetened cocoa powder
- ½ cup milk any variety: dairy, almond, oat, or soy milk
- For Preparation
- Water for wetting the bowl
Instructions
- Step 1: Blend the Ingredients
- Peel the banana and break it into chunks
- Add banana pieces, cocoa powder, and milk to a blender
- Blend on high speed until completely smooth
- Ensure no lumps of banana or cocoa powder remain
- The mixture will be liquid at this stage
- Step 2: Cook the Mixture
- Pour the blended mixture into a small saucepan
- Place on the stove over medium heat
- Stir continuously to prevent sticking
- Cook for 5-7 minutes until the mixture thickens
- The pudding should reach a thick cream consistency
- Continue stirring throughout the cooking process
- Step 3: Prepare the Serving Bowl
- Take a clean bowl and wet the inside with water
- Swirl water around to coat all surfaces
- Pour out excess water, leaving the bowl slightly damp
- This prevents the pudding from sticking
- Step 4: Transfer the Pudding
- Carefully pour the hot pudding into the prepared wet bowl
- Smooth the top with a spoon if desired
- Allow to cool at room temperature for 15-20 minutes
- Step 5: Chill Overnight
- Cover the bowl with plastic wrap or a lid
- Place in the refrigerator
- Chill for at least 6-8 hours or overnight
- The pudding will set and develop the perfect texture
- Step 6: Serve and Enjoy
- Remove from refrigerator when ready to serve
- Serve directly from the bowl, or unmold onto a plate
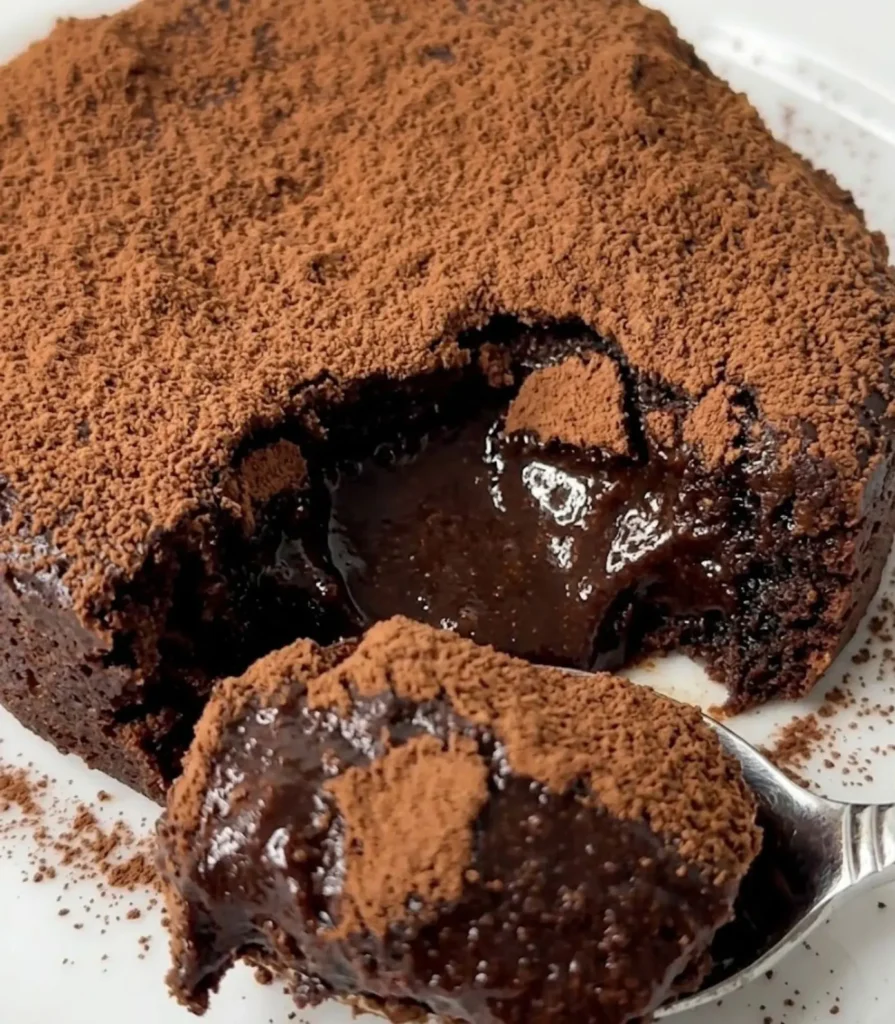
- The pudding should hold its shape beautifully
- Enjoy your guilt-free chocolate dessert!
Yes! Frozen bananas work wonderfully in this recipe. Thaw them first and drain any excess liquid before blending. Frozen bananas can actually make the pudding even creamier.
While this pudding is much healthier than traditional versions, bananas do contain natural sugars. People with diabetes should monitor their portion sizes and consider it as part of their overall carbohydrate intake for the day. Consult with your healthcare provider about incorporating it into your meal plan.
Technically yes, but cooking significantly improves the texture and flavor. Raw versions will be thinner and less pudding-like. If you prefer raw, add a tablespoon of chia seeds to help thicken it.
If your pudding hasn’t set properly, it likely needed more cooking time. Next time, cook the mixture a bit longer until it’s noticeably thicker. You can also blend in a teaspoon of cornstarch before cooking to help with thickening.
Absolutely! Simply use your favorite plant-based milk like almond, oat, soy, or coconut milk. The recipe works perfectly with any milk alternative.
The entire recipe contains approximately 150-180 calories depending on the milk you use, making it an incredibly light dessert option. Using unsweetened almond milk keeps it on the lower end.
If you prefer a sweeter pudding, try using a very ripe banana first. If you still want more sweetness, add a teaspoon of honey, maple syrup, or your preferred sweetener. Keep in mind this will increase the calorie count.
Wetting the bowl creates a thin moisture barrier that prevents the pudding from sticking. This makes it easy to unmold the pudding for a prettier presentation, though it’s completely optional if you plan to serve directly from the bowl.
Cooking Tips
- Use ripe bananas with brown spots for maximum natural sweetness
- Choose high-quality unsweetened cocoa powder for best flavor
- Don’t skip the cooking step – it transforms the texture
- Be patient with overnight chilling for best results
- Stir constantly while cooking to prevent lumps
Serving Suggestions
- Top with fresh berries (strawberries, blueberries, raspberries)
- Add a dollop of Greek yogurt for extra protein
- Sprinkle with crushed nuts for healthy fats
- Garnish with shredded coconut
- Drizzle with a small amount of honey or maple syrup
Customization Options
Flavor Variations
- Add ½ teaspoon vanilla extract for depth
- Mix in a pinch of cinnamon for warmth
- Add 1 teaspoon instant coffee for mocha flavor
- Include a few drops of peppermint extract for mint chocolate
Milk Alternatives
- Almond milk – Fewer calories, nutty flavor
- Coconut milk – Richer, creamier texture
- Oat milk – Extra fiber content
- Soy milk – Higher protein option
Storage Instructions
- Refrigerator: Store in airtight container for up to 4 days
- Meal Prep: Divide into individual jars or ramekins
- Portion Control: Make grab-and-go desserts for the week
- Variations: Make multiple batches with different flavors
Nutritional Information (Approximate)
- Calories: 150-180 per recipe (depending on milk choice)
- Protein: 5-7g
- Fiber: 4-5g
- Sugar: 15g (natural sugars from banana)
- Fat: 2-4g (depending on milk choice)
- Carbohydrates: 30-35g
Health Benefits
- Natural sweetness from banana – no added sugar needed
- High in potassium supports heart health
- Rich in antioxidants from cocoa powder
- Good source of fiber promotes healthy digestion
- Low in calories compared to traditional puddings
- Protein content helps maintain satiety
- No artificial ingredients or preservatives
Why This Recipe Supports Weight Loss
- Uses natural banana sweetness instead of refined sugar
- Low calorie count (150-180 calories per serving)
- High fiber content keeps you feeling full longer
- Protein helps maintain muscle mass during weight loss
- Satisfies chocolate cravings without derailing diet goals
- No guilt associated with eating dessert
- Perfect for portion-controlled meal prep
Best Practices
- Always use ripe bananas for optimal sweetness
- Wet the bowl to make unmolding easier
- Allow full chilling time for proper texture
- Store in airtight containers to maintain freshness
- Make ahead for convenient healthy desserts
Dietary Information
- Vegetarian: Yes
- Can be Vegan: Yes (use plant-based milk)
- Gluten-Free: Yes
- Dairy-Free Option: Yes (use non-dairy milk)
- Nut-Free: Yes (if using non-nut milk)
- Weight Loss Friendly: Yes
Final Thoughts
This three ingredient chocolate pudding proves that healthy eating doesn’t have to be boring or restrictive. It’s a testament to the fact that with the right ingredients and techniques, you can create desserts that satisfy your cravings while supporting your weight loss goals.
The simplicity of this recipe makes it accessible for anyone, regardless of cooking skill level, while its delicious taste makes it something you’ll actually look forward to eating.
Whether you’re actively trying to lose weight, maintain a healthy lifestyle, or simply want a better dessert option, this chocolate pudding delivers on all fronts.
It’s proof that the best desserts are often the simplest ones, made with real ingredients that nourish your body while delighting your taste buds. Give it a try tonight, and discover your new favorite guilt-free treat!