When you think of kebabs, you probably imagine firing up the grill and standing outside in the heat. But what if you could achieve that same smoky, delicious flavor and tender texture right in your oven?
This one pan chicken kebab recipe transforms a traditionally labor intensive meal into an effortless weeknight dinner that the whole family will love.
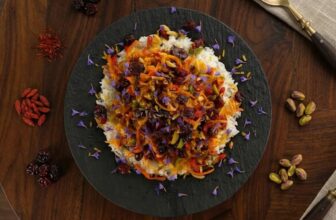
With juicy marinated chicken, perfectly roasted potatoes, and colorful vegetables all cooked together on a single tray, this recipe delivers maximum flavor with minimal cleanup.
Why This Recipe Will Become Your Go-To Dinner
Traditional kebabs require special equipment, outdoor space, and constant attention. This oven baked version eliminates all those hassles while delivering equally impressive results.
The genius of this recipe lies in its layered cooking technique. By starting with covered baking, you trap moisture and ensure everything cooks evenly. Then, removing the cover for the final browning creates those irresistible caramelized edges everyone loves.
The combination of chicken breast and potatoes makes this a complete meal in one pan. You’re getting protein, carbohydrates, and plenty of vegetables without needing to prepare multiple side dishes.
It’s the kind of recipe that makes weeknight cooking feel manageable, even on your busiest days. Plus, the presentation is so beautiful that it looks like you spent hours in the kitchen when the reality is far simpler.
What Makes These Kebabs Special
Unlike grilled kebabs where timing can be tricky and ingredients cook at different rates, this oven method ensures everything comes out perfectly cooked at the same time.
The yogurt-based sauce is the secret weapon here. Yogurt contains natural enzymes that tenderize the chicken while adding a subtle tangy flavor that complements the spices beautifully.
The oil in the sauce helps conduct heat and creates that gorgeous golden crust you want on your kebabs.
The arrangement of ingredients on the tray isn’t random either. Placing the onions in the center allows them to caramelize and infuse the entire dish with their sweet, savory flavor.
The potatoes get a head start with their own seasoning, ensuring they’re perfectly crispy on the outside and fluffy inside. The cherry tomatoes and bell peppers add pops of color and fresh flavor that brighten the entire dish.

Ingredients You’ll Need
This recipe uses straightforward ingredients you can find at any grocery store:
Main Ingredients:
- Chicken breast (about 1.5-2 pounds, cut into 1-inch cubes)
- 4-5 medium russet or Yukon gold potatoes, cubed
- 1 large onion, cut into wedges
- 1 green bell pepper, cut into chunks
- Cherry tomatoes (about 1 cup)
- Wooden or metal skewers
For the Sauce:
- ½ cup vegetable oil
- ½ cup water
- 2 tablespoons plain yogurt (full-fat works best)
- 1 teaspoon tomato paste
- Spices to taste (suggested: salt, black pepper, paprika, garlic powder, cumin)
For the Potatoes:
- ¼ cup vegetable oil
- Spices to taste (salt, black pepper, paprika, garlic powder)
Additional Supplies:
- Parchment paper (also called greaseproof paper)
Step-by-Step Instructions
Step 1: Prepare the Potatoes
Start by cubing your potatoes into bite sized pieces, roughly 1 to 1.5 inches. In a large bowl, toss the potato cubes with a quarter cup of vegetable oil and your chosen spices.
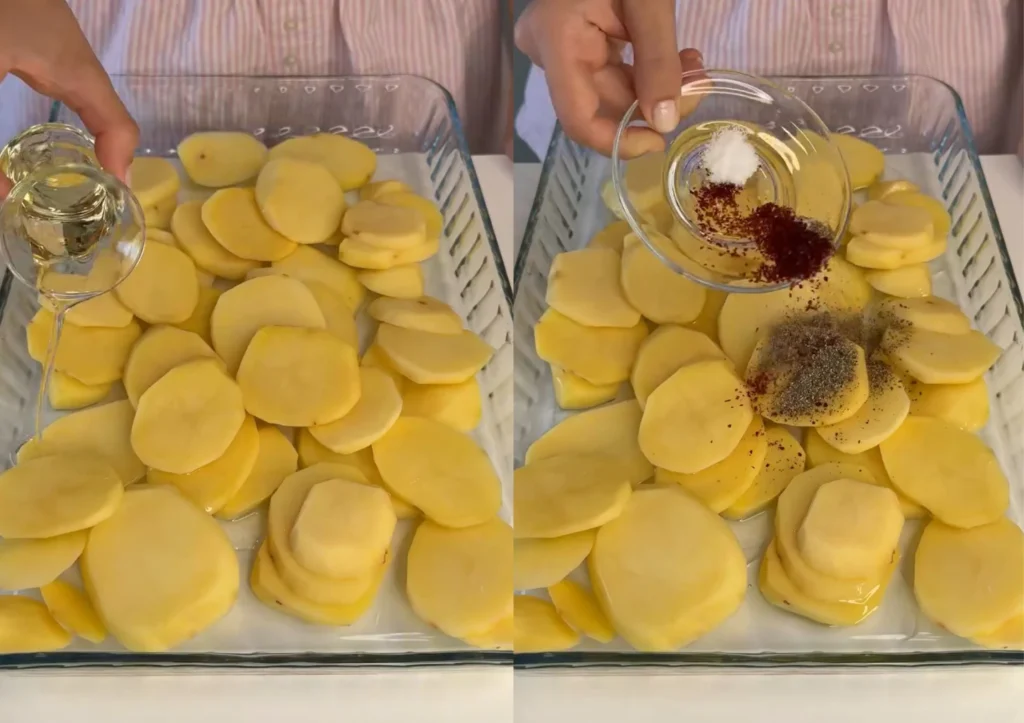
Make sure every piece is well coated. The oil helps the potatoes crisp up beautifully in the oven, while the spices create a flavorful crust. Spread the seasoned potatoes evenly on a large baking sheet or roasting pan, leaving space in the middle for the onions.
Step 2: Add the Onions
Cut your large onion into thick wedges, keeping some of the layers together so they don’t fall apart during cooking.
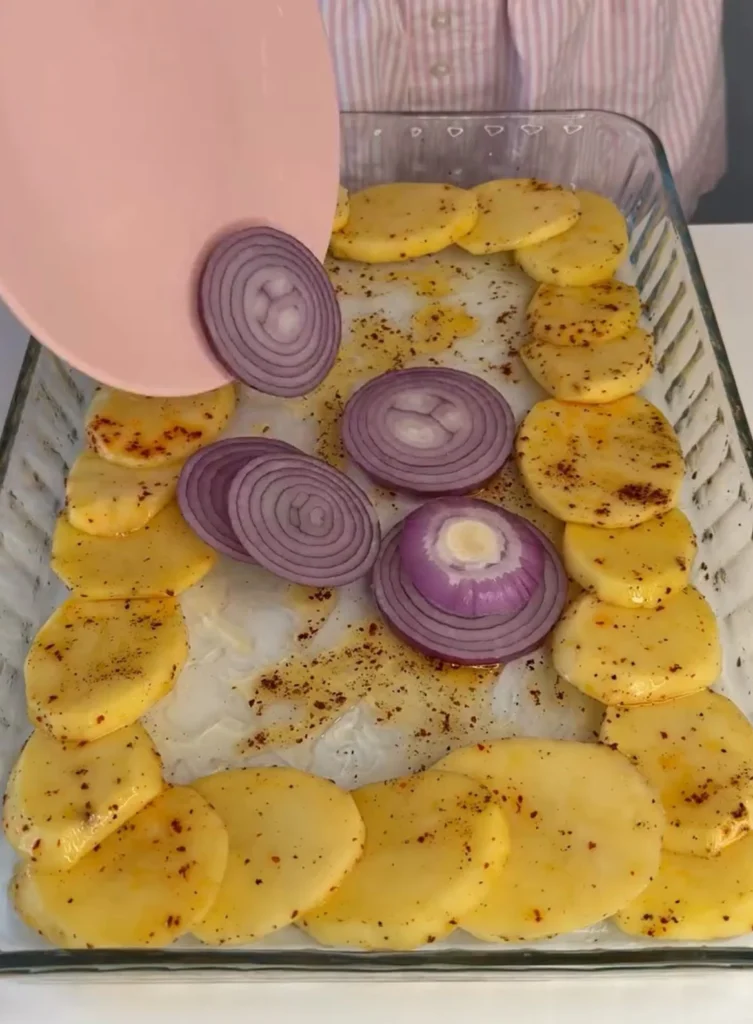
Arrange these onion wedges in the center of your tray, right in the middle of the potatoes. As the onions cook, they’ll release moisture and sweetness that flavors everything around them. They also act as a flavorful bed for the chicken skewers.
Step 3: Prepare the Chicken Sauce
In a medium bowl, combine the half cup of oil, half cup of water, two tablespoons of yogurt, and one teaspoon of tomato paste.
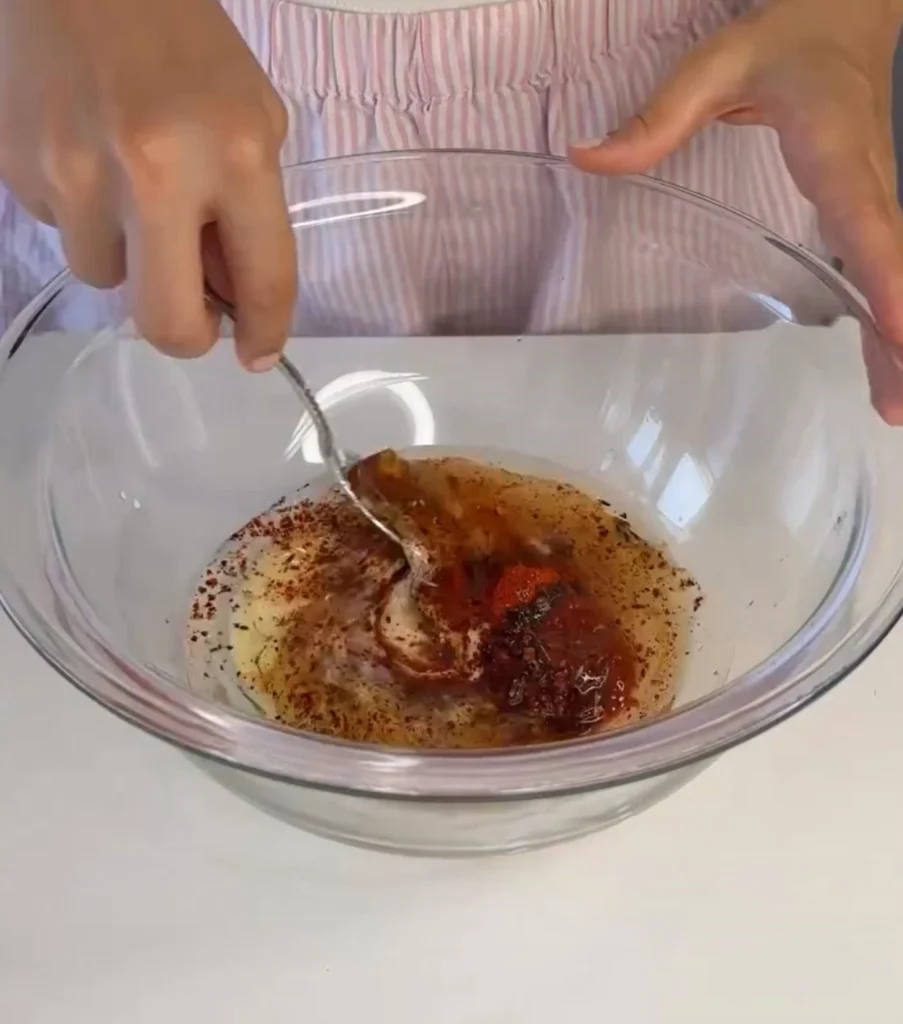
Add your chosen spices generously. Common choices include salt, black pepper, paprika for color and mild heat, garlic powder for savory depth, and cumin for an earthy, warm note.
Whisk everything together until you have a smooth, well combined sauce. The consistency should be like a thin marinade that will coat the chicken pieces beautifully.
Step 4: Skewer the Chicken
Cut your chicken breast into uniform cubes, approximately one inch each. This ensures even cooking. If using wooden skewers, soak them in water for at least 15 minutes beforehand to prevent burning.
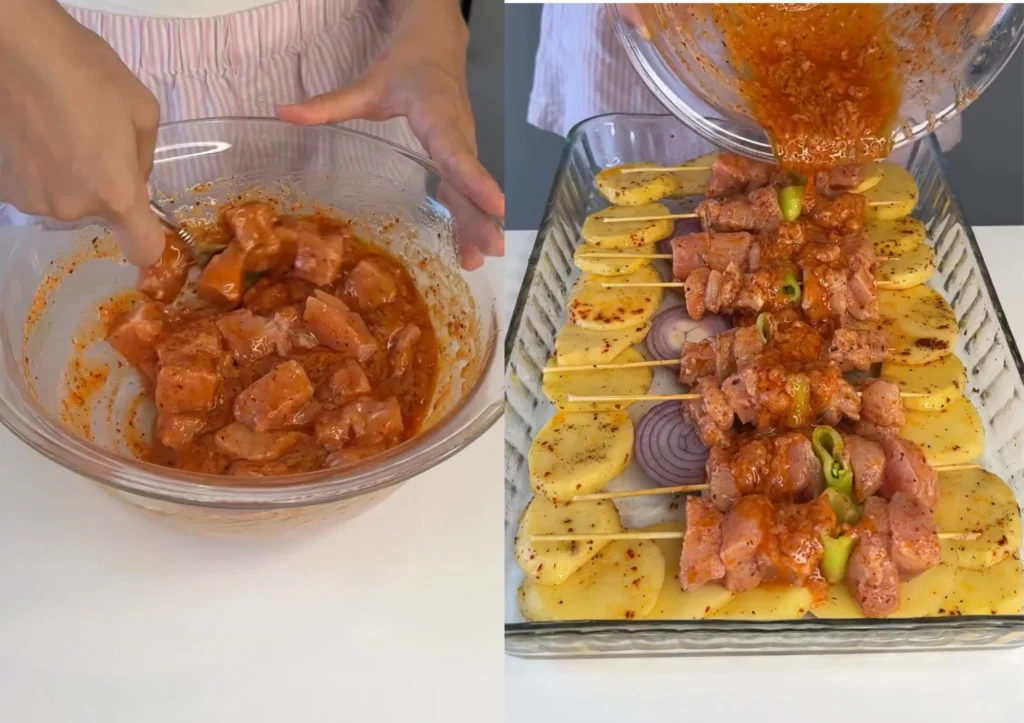
Thread the chicken cubes onto the skewers, leaving a small gap between pieces for even heat circulation. Once all your chicken is skewered, generously brush or pour the prepared sauce over every piece, making sure each kebab is well coated.
You can also marinate the chicken in the sauce for 30 minutes to an hour before skewering for even more flavor.
Step 5: Arrange Everything on the Tray
Place the sauced chicken skewers on top of the onions in the center of your tray. The skewers can rest directly on the onions, which will keep them slightly elevated and allow heat to circulate underneath.

Now add your vegetables: scatter the cherry tomatoes around the tray and tuck chunks of green bell pepper between the potatoes and near the chicken. The colorful arrangement isn’t just pretty; it ensures every bite has a variety of flavors and textures.
Step 6: Cover and Bake
Preheat your oven to 400°F (200°C). Cover the entire baking sheet tightly with parchment paper. You want to create a sealed environment that will trap steam and moisture, essentially braising the chicken and vegetables while they bake.
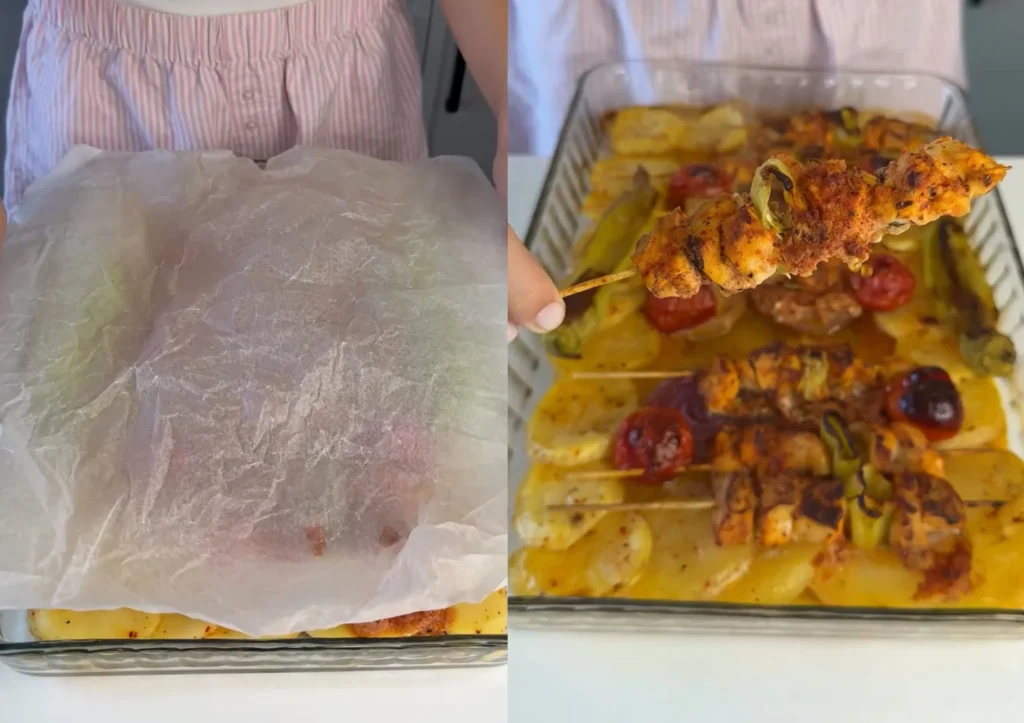
This step is crucial for juicy, tender chicken. Place the covered tray in the preheated oven and bake for 40 minutes. Don’t peek during this time let the magic happen undisturbed.
Step 7: Uncover and Brown
After 40 minutes, carefully remove the tray from the oven. The parchment paper will be very hot and steamy, so use caution when peeling it back.
Remove and discard the parchment paper. Return the uncovered tray to the oven and continue baking for an additional 10-15 minutes, or until the chicken develops a beautiful golden-brown color on top and the potatoes are crispy at the edges. Keep an eye on it during this final browning phase to prevent burning.
Step 8: Serve and Enjoy
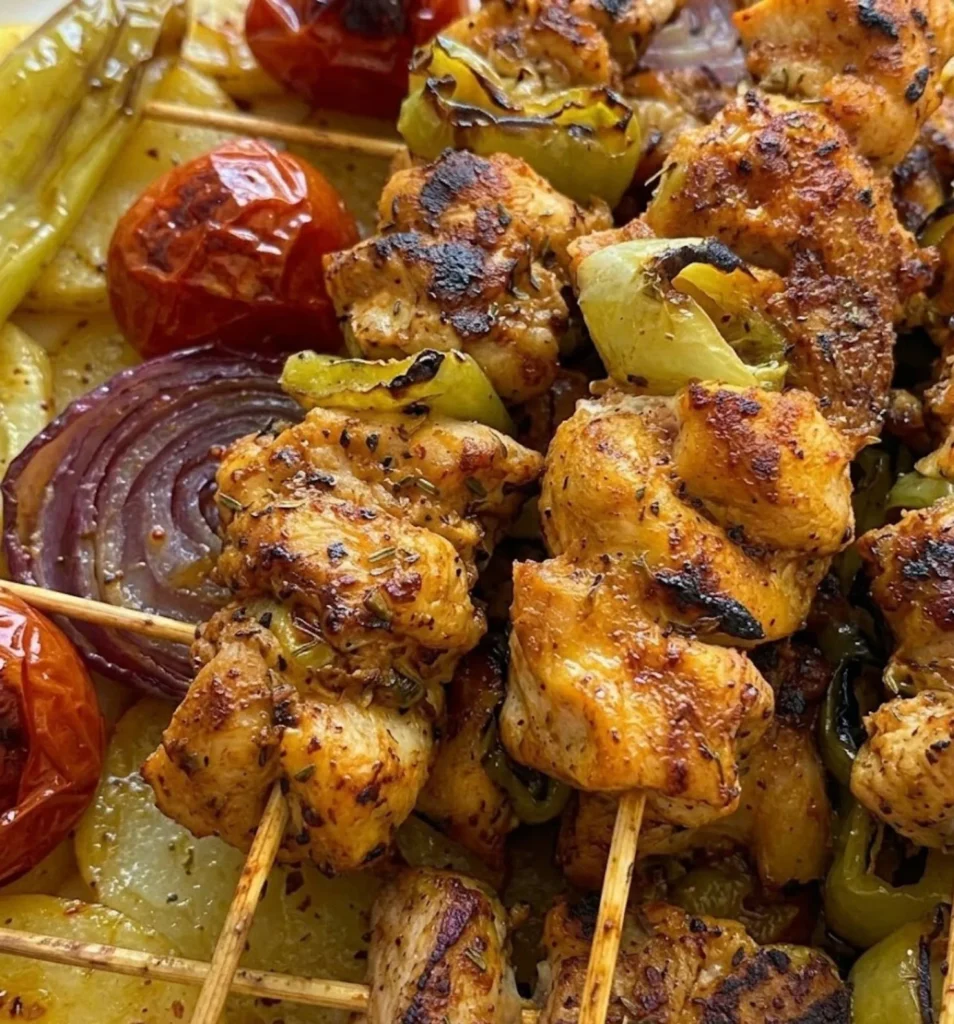
Remove from the oven and let rest for 5 minutes before serving. The chicken should be cooked through (internal temperature of 165°F), the potatoes tender inside with crispy outsides, and the vegetables perfectly roasted.
Serve the kebabs right on the skewers for an authentic presentation, with the roasted potatoes and vegetables alongside.
Serving Suggestions and Variations
These kebabs are incredibly versatile and can be served in numerous ways:
Classic Presentation: Serve the kebabs with warm pita bread, tzatziki sauce, and a fresh cucumber-tomato salad. Add some hummus on the side for a complete Mediterranean-inspired meal.
Rice Bowl Style: Remove the chicken from the skewers and serve over fluffy basmati rice or bulgur wheat. Drizzle with tahini sauce and top with fresh parsley or cilantro.
Wrap It Up: Use the chicken and vegetables as a filling for warm tortillas or flatbreads. Add lettuce, pickled vegetables, and your favorite sauce for an easy handheld meal.
Side Dish Ideas: While this is a complete meal on its own, you can elevate it with additional sides like tabbouleh, fattoush salad, garlic sauce (toum), or roasted eggplant dip (baba ganoush).
Tips for Perfect Results Every Time
Chicken Preparation: Always use chicken breast at room temperature for more even cooking. Pat the chicken dry before adding to the sauce to help it absorb the marinade better. If you have time, marinate the chicken for 30 minutes to 2 hours before cooking.
Potato Selection: Russet potatoes will give you a fluffier interior, while Yukon gold potatoes have a creamier texture. Both work excellently in this recipe. Cut them uniformly so they cook at the same rate.
Skewer Strategy: Don’t overcrowd the skewers. Leave small gaps between chicken pieces to allow heat circulation. If using wooden skewers, the soaking step is essential to prevent charring.
Temperature Control: An oven thermometer is helpful to ensure your oven is truly at 400°F. Ovens can vary significantly in actual temperature versus what the dial shows.
Don’t Skip the Cover: The parchment paper creates a steam environment that keeps everything moist. Aluminum foil can work in a pinch, but parchment is preferred as it won’t react with acidic ingredients.
Storage and Meal Prep
This recipe is excellent for meal prepping. The kebabs keep well in the refrigerator for up to 4 days in an airtight container. To reheat, place in a 350°F oven for 10-15 minutes until warmed through. You can also remove the chicken from the skewers and reheat in the microwave for quick lunches.
For make-ahead convenience, prepare the chicken with the sauce and the seasoned potatoes up to 24 hours in advance. Keep them refrigerated separately, then assemble and bake when ready to eat.

One Pan Oven Baked Chicken Kebabs: The Ultimate Easy Dinner Recipe
Ingredients
- Main Ingredients
- 1.5-2 lbs chicken breast cut into 1-inch cubes
- 4-5 medium potatoes russet or Yukon gold, cubed
- 1 large onion cut into wedges
- 1 green bell pepper cut into chunks
- 1 cup cherry tomatoes
- Wooden or metal skewers
- For the Chicken Sauce
- ½ cup vegetable oil
- ½ cup water
- 2 tablespoons plain yogurt full-fat preferred
- 1 teaspoon tomato paste
- Spices to taste salt, black pepper, paprika, garlic powder, cumin
- For the Potatoes
- ¼ cup vegetable oil
- Spices to taste salt, black pepper, paprika, garlic powder
- Additional Supplies
- Parchment paper greaseproof paper
Instructions
- Step 1: Prepare and Season the Potatoes
- Cut potatoes into 1 to 1.5-inch cubes
- Place potato cubes in a large bowl
- Add ¼ cup vegetable oil and spices
- Toss until all pieces are well coated
- Spread potatoes evenly on a large baking sheet
- Leave space in the middle for onions
- Step 2: Add the Onions
- Cut large onion into thick wedges
- Keep some layers together so they don’t fall apart
- Arrange onion wedges in the center of the tray
- Place them in the middle of the potatoes
- Step 3: Make the Chicken Sauce
- In a medium bowl, combine ½ cup oil and ½ cup water
- Add 2 tablespoons yogurt and 1 teaspoon tomato paste
- Add spices generously (salt, pepper, paprika, garlic powder, cumin)
- Whisk everything together until smooth and well combined
- The sauce should have a thin marinade consistency
- Step 4: Prepare and Skewer the Chicken
- Cut chicken breast into uniform 1-inch cubes
- If using wooden skewers, soak in water for 15 minutes first
- Thread chicken cubes onto skewers
- Leave small gaps between pieces for even cooking
- Generously brush or pour sauce over all chicken pieces
- Make sure each kebab is well coated
- Optional: Marinate for 30 minutes to 2 hours for extra flavor
- Step 5: Arrange Everything on the Tray
- Place sauced chicken skewers on top of the onions in the center
- Skewers should rest on the onions for elevation
- Scatter cherry tomatoes around the tray
- Tuck bell pepper chunks between potatoes and near chicken
- Ensure colorful, even arrangement
- Step 6: Cover and Bake
- Preheat oven to 400°F (200°C)
- Cover entire baking sheet tightly with parchment paper
- Create a sealed environment to trap steam and moisture
- Place covered tray in preheated oven
- Bake for 40 minutes without opening
- Do not peek during this time
- Step 7: Uncover and Brown
- Carefully remove tray from oven after 40 minutes
- Use caution with hot, steamy parchment paper
- Remove and discard parchment paper
- Return uncovered tray to oven
- Bake for additional 10-15 minutes
- Continue until chicken is golden-brown on top
- Watch closely to prevent burning
- Step 8: Rest and Serve
- Remove from oven when chicken reaches 165°F internal temperature
- Let rest for 5 minutes before serving
- Chicken should be white throughout with no pink
- Potatoes should be crispy outside, tender inside
- Vegetables should be perfectly roasted
- Serve kebabs on skewers with roasted vegetables
Absolutely! Chicken thighs are more forgiving and won’t dry out as easily. They may need an extra 5-10 minutes of cooking time. Just ensure they reach an internal temperature of 165°F.
You can use aluminum foil, though parchment is preferred. Make sure to seal it well around the edges to trap the steam. In a pinch, you can use a lid or another baking sheet placed on top.
Yes! Zucchini, mushrooms, red onions, or eggplant all work beautifully. Just cut them into similar-sized pieces so everything cooks evenly.
Use a meat thermometer to check that the thickest part of the chicken reaches 165°F. The chicken should also be white throughout with no pink remaining, and juices should run clear.
Yes! Simply arrange the marinated chicken pieces directly on the tray with the vegetables. The presentation won’t be as dramatic, but the flavor will be just as delicious.
A combination of paprika, cumin, garlic powder, onion powder, black pepper, and salt creates a well-rounded flavor. You can also add cayenne for heat, turmeric for color, or dried herbs like oregano and thyme.
The chicken freezes well for up to 3 months. The potatoes may become slightly grainy when frozen and thawed, but they’re still edible. Freeze in portion-sized containers for easy reheating.
Absolutely! It’s one of the best meal prep recipes because everything cooks together and stays fresh for several days. Portion into individual containers with the chicken, potatoes, and vegetables.
Cooking Tips
- Use room temperature chicken for even cooking
- Cut potatoes uniformly for consistent cooking
- Don’t overcrowd skewers – leave gaps between pieces
- Soak wooden skewers for at least 15 minutes
- Parchment paper is essential for moisture retention
- Use meat thermometer to check doneness (165°F)
- Pat chicken dry before coating with sauce
Serving Suggestions
Classic Style
- Serve with warm pita bread and tzatziki sauce
- Add cucumber-tomato salad on the side
- Include hummus for dipping
Rice Bowl
- Remove chicken from skewers
- Serve over basmati rice or bulgur wheat
- Drizzle with tahini sauce
- Top with fresh parsley or cilantro
Wrap Style
- Use chicken and vegetables as filling for tortillas
- Add lettuce and pickled vegetables
- Include your favorite sauce
Side Dishes
- Tabbouleh salad
- Fattoush salad
- Garlic sauce (toum)
- Baba ganoush
Customization Options
Protein Variations
- Chicken thighs: More forgiving, won’t dry out easily (add 5-10 minutes cooking time)
- Beef: Use sirloin or tenderloin cubes
- Lamb: Traditional option for authentic flavor
- Shrimp: Reduce cooking time significantly
Vegetable Options
- Zucchini chunks
- Mushrooms (whole or halved)
- Red onions
- Eggplant cubes
- Yellow squash
- Red or yellow bell peppers
Spice Blends
- Mediterranean: Paprika, cumin, garlic powder, oregano
- Spicy: Add cayenne pepper or red pepper flakes
- Middle Eastern: Cumin, coriander, turmeric, cinnamon
- Smoky: Smoked paprika, chipotle powder
Storage Instructions
- Refrigerator: Store in airtight container for up to 4 days
- Freezer: Chicken freezes well for up to 3 months (potatoes may change texture)
- Reheating: Place in 350°F oven for 10-15 minutes
- Microwave: Remove chicken from skewers, reheat in 1-minute intervals
- Meal Prep: Portion into individual containers with chicken, potatoes, and vegetables
Make-Ahead Instructions
- Prepare chicken with sauce up to 24 hours in advance
- Season potatoes and refrigerate separately
- Store both covered in refrigerator
- Assemble and bake when ready to eat
- Marinate chicken for 30 minutes to 2 hours for best flavor
Nutritional Information (Approximate per serving)
- Calories: 450-500
- Protein: 35-40g
- Carbohydrates: 35-40g
- Fat: 18-22g
- Fiber: 4-5g
- Sodium: Varies based on seasoning
Equipment Needed
- Large baking sheet or roasting pan
- Mixing bowls (2-3)
- Whisk or fork
- Wooden or metal skewers
- Parchment paper
- Meat thermometer (recommended)
- Cutting board and knife
Why This Recipe Works
- One-pan cooking: Everything cooks together for easy cleanup
- No grill needed: Perfect oven method for year-round cooking
- Complete meal: Protein, carbs, and vegetables all in one
- Moisture retention: Covered baking keeps chicken juicy
- Perfect browning: Uncovered finish creates caramelization
- Meal prep friendly: Makes great leftovers for the week
Common Mistakes to Avoid
- Overcrowding the skewers (prevents even cooking)
- Not soaking wooden skewers (leads to burning)
- Skipping the parchment paper cover (chicken dries out)
- Opening oven during first 40 minutes (releases steam)
- Cutting vegetables unevenly (inconsistent cooking)
- Not checking internal temperature (risk of undercooking)
Dietary Information
- High Protein: Excellent source of lean protein
- Gluten-Free: Naturally gluten-free recipe
- Dairy: Contains yogurt (can substitute with dairy-free yogurt)
- Low Carb Option: Reduce or omit potatoes, add more vegetables
- Meal Prep Friendly: Perfect for weekly meal planning
- Family Friendly: Kid-approved flavors
Pro Tips for Restaurant Quality
- Marinate chicken for at least 1 hour for maximum flavor
- Use high-quality spices for better taste
- Don’t skip the resting time after baking
- Arrange kebabs for Instagram-worthy presentation
- Serve immediately for best texture and temperature
- Garnish with fresh herbs like parsley or cilantro
Final Thoughts
This one pan oven-baked chicken kebab recipe proves that you don’t need a grill or complicated techniques to create restaurant-quality meals at home.
The combination of tender, flavorful chicken, crispy potatoes, and perfectly roasted vegetables makes this a winner for family dinners, meal prep, or even entertaining guests.
The best part? Cleanup is minimal with everything cooking on a single tray. Give this recipe a try, and it might just become your new favorite way to make chicken for dinner!