Imagine serving a breakfast so visually striking that your family and friends will think you spent hours in the kitchen.
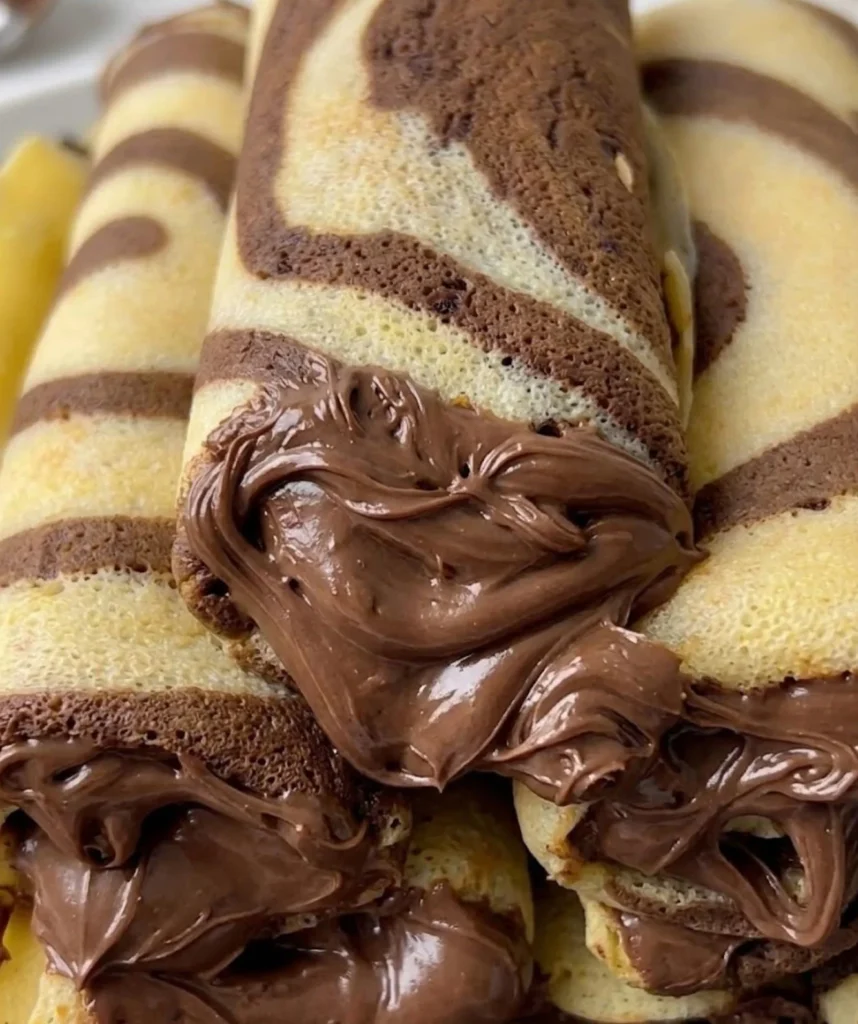
Zebra crepes deliver exactly that wow factor with their mesmerizing swirled pattern of vanilla and chocolate, yet they require just a handful of basic ingredients and one clever technique.
This eye catching dish proves that impressive cooking doesn’t have to be complicated. With a simple batter and a two-step pouring method, you’ll create restaurant-quality crepes that look like edible art.
The Magic Behind Zebra Crepes
Zebra crepes get their distinctive striped appearance from a creative layering technique that combines plain and chocolate batters in the same pan.
Unlike traditional crepes where you make each one separately, this method creates one large, dramatically patterned crepe by pouring two different colored batters in a specific sequence. As the batters cook together, they create natural swirls and stripes reminiscent of a zebra’s coat, hence the name.
The beauty of this recipe lies not just in its visual appeal but in its versatility. You can serve zebra crepes for breakfast, brunch, dessert, or even as a special snack.
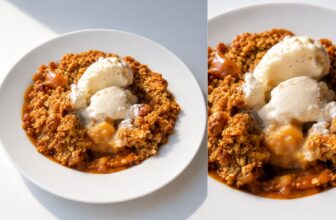
They’re equally delicious rolled up with Nutella, topped with fresh berries and whipped cream, or simply dusted with powdered sugar. The subtle sweetness and delicate chocolate flavor make them appealing to both kids and adults, making this a true crowd pleaser.
Why This Recipe Works
The key to successful zebra crepes is understanding the science behind the technique. The batter itself is a classic crepe recipe that’s thin enough to spread quickly across the pan but thick enough to hold its shape.
By dividing the batter and adding cocoa to just a portion of it, you create two contrasting mixtures that cook at slightly different rates, allowing for that beautiful marbled effect.
The heat control is crucial here. Medium-low heat ensures the batters cook gently without burning, giving you time to pour in layers and watch the pattern develop.
The chocolate mixture goes in first because it needs a slight head start to set before the plain batter spreads over it. This creates definition in your stripes rather than letting everything blend into a muddy brown.
Ingredients You’ll Need
This recipe uses pantry staples you likely already have on hand:
For the Main Batter:
- 2 large eggs
- 1 tablespoon granulated sugar
- 2 cups whole milk (or any milk you prefer)
- 1½ cups all-purpose flour
- 1 tablespoon vegetable oil (or melted butter)
For the Chocolate Mixture:
- 1 cup of the prepared plain batter (set aside)
- 1 tablespoon unsweetened cocoa powder
- 1 tablespoon milk
That’s it! Seven ingredients total, most of which you probably have in your kitchen right now. The simplicity of the ingredient list makes this recipe accessible and budget-friendly.
Step by Step Instructions
Step 1: Make the Basic Crepe Batter
In a large mixing bowl, crack your two eggs and add the tablespoon of sugar. Whisk them together until the mixture becomes slightly frothy and the sugar starts to dissolve.
This initial whisking incorporates air into the eggs, which will help create lighter crepes. Next, pour in the two cups of milk and the tablespoon of oil, whisking continuously to combine everything smoothly.
Gradually add the flour to your liquid mixture, whisking constantly to prevent lumps from forming. Start with about half a cup at a time, incorporating each addition fully before adding more.
Continue whisking until you have a smooth, thin batter with the consistency of heavy cream. If you notice any lumps, you can strain the batter through a fine mesh sieve, though thorough whisking usually eliminates this need.
Step 2: Create the Chocolate Batter
Pour one cup of your prepared plain batter into a separate bowl or measuring cup. This will become your chocolate portion.
Add one tablespoon of unsweetened cocoa powder and one tablespoon of milk to this reserved batter. Whisk vigorously until the cocoa powder is completely dissolved and the mixture is smooth with no lumps.
The cocoa should turn the batter a rich chocolate brown color. Set this aside where you can easily reach it during cooking.
Step 3: Prepare Your Pan
This step is critical for success. Place a non-stick skillet or crepe pan (approximately 10-12 inches in diameter works well) over medium-low heat.
Let it heat for several minutes until it’s evenly hot. You can test the temperature by flicking a tiny drop of water onto the surface; if it sizzles and evaporates immediately, your pan is ready.
Lightly grease the pan with a small amount of butter or oil, wiping out any excess with a paper towel. You want just a thin film to prevent sticking. Too much oil will cause the batters to slide around instead of setting properly.
Step 4: Create the Zebra Pattern
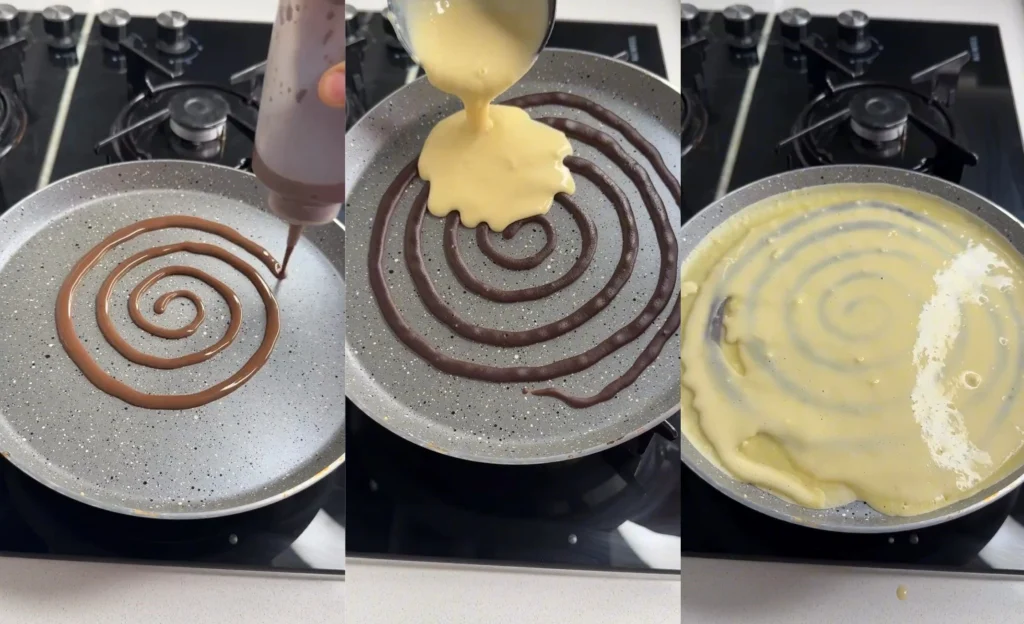
Now for the fun part! Working quickly but carefully, pour a small amount of your chocolate batter into the center of the hot pan about 2-3 tablespoons.
Let it cook for just a few seconds, maybe 5-10 seconds maximum. You’ll see the edges start to set slightly. The chocolate batter doesn’t need to cook completely; it just needs a head start.
Immediately after those few seconds, pour the plain vanilla batter over and around the chocolate center. Use about ½ to ¾ cup of batter, depending on your pan size.
Pour it in a circular motion, starting from the center and working outward, or simply pour it all at once and quickly tilt the pan in a circular motion to spread the batter evenly across the entire surface. As you tilt, you’ll see the chocolate and vanilla batters begin to swirl together, creating that signature zebra striping.
Step 5: Cook and Flip
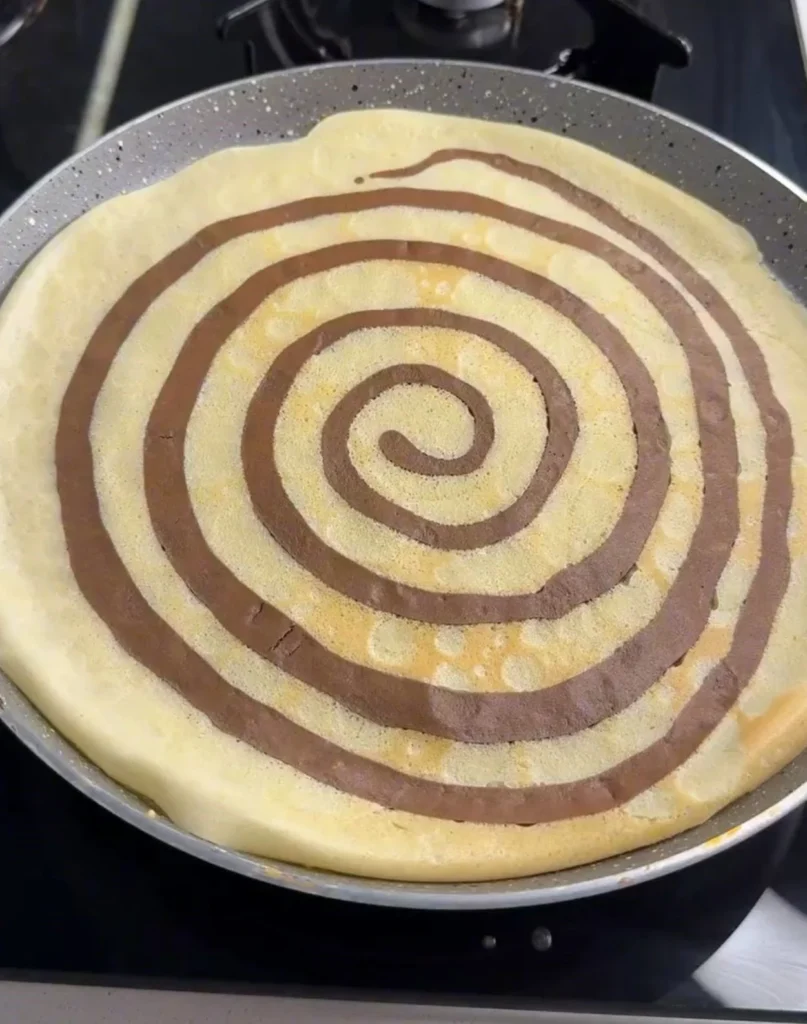
Keep the heat at medium low and let the crepe cook undisturbed for about 2-3 minutes. You’ll know it’s ready to flip when the edges start to look dry and slightly golden, and you can easily slide a spatula underneath without the batter sticking. The top should look mostly set with just a slight sheen remaining.
Using a large spatula or by carefully lifting the edge with your fingers and flipping quickly, turn the crepe over to cook the other side. This side will only need about 1-2 minutes since it’s already partially cooked. You’re just looking to set the batter completely and add a touch of golden color.
Step 6: Repeat and Serve
Slide your finished zebra crepe onto a large plate. Repeat the process with the remaining batter, remembering to use your chocolate mixture first each time, followed by the plain batter. You should get approximately 3-4 large zebra crepes from this recipe, depending on your pan size.
As you work, you might need to adjust your heat slightly if you notice the crepes cooking too quickly or too slowly. Also, give your chocolate batter a quick stir between crepes, as the cocoa can settle to the bottom.
Serving Suggestions
The beauty of zebra crepes is that they’re delicious served in so many ways:
Sweet Options:
- Roll them up with Nutella or chocolate hazelnut spread
- Fill with fresh strawberries, blueberries, or sliced bananas
- Top with whipped cream and a drizzle of chocolate syrup
- Dust with powdered sugar and serve with maple syrup
- Spread with cream cheese filling and roll into elegant pinwheels
- Layer with vanilla pudding or pastry cream for a napoleon-style dessert
Simple and Classic:
- Just fold in quarters and dust with powdered sugar
- Serve with a pat of butter and a squeeze of lemon juice
- Roll with a simple cinnamon-sugar butter filling
Tips for Perfect Results Every Time
Batter Consistency: Your batter should be thin enough to easily spread across the pan but not so watery that it runs everywhere. Think of heavy cream or a slightly melted milkshake consistency.
Pan Temperature: This is the most common issue people encounter. If your pan is too hot, the chocolate batter will cook instantly and you won’t have time to add the plain batter before it sets completely. Too cool, and your crepes will be thick and rubbery instead of thin and delicate.
Practice Makes Perfect: Your first zebra crepe might not be perfect, and that’s okay! The second and third ones will turn out better as you get a feel for the timing and technique.
Cocoa Powder Quality: Use high-quality unsweetened cocoa powder for the best chocolate flavor and color. Dutch-processed cocoa gives a deeper, darker color, while natural cocoa powder offers a more intense chocolate taste.
Pan Size Matters: A larger pan creates thinner, more delicate crepes with more dramatic patterns. A smaller pan will give you thicker crepes with bolder stripes.
Storage and Make-Ahead Options
Zebra crepes can be made ahead and stored for later enjoyment. Let them cool completely, then stack them with pieces of parchment paper between each crepe to prevent sticking. Store in an airtight container in the refrigerator for up to 3 days. To reheat, warm them gently in a dry skillet over low heat or microwave for 10-15 seconds.
You can also freeze zebra crepes for up to 2 months. Stack them with parchment paper between each one, place in a freezer bag, and freeze flat. Thaw in the refrigerator overnight before serving.

Stunning Zebra Crepes: The Show Stopping Breakfast That’s Easier Than You Think
Ingredients
- For the Main Batter
- 2 large eggs
- 1 tablespoon granulated sugar
- 2 cups whole milk or milk of choice
- 1½ cups all-purpose flour
- 1 tablespoon vegetable oil or melted butter
- For the Chocolate Mixture
- 1 cup of the prepared plain batter set aside from main batter
- 1 tablespoon unsweetened cocoa powder
- 1 tablespoon milk
- For Cooking
- Butter or oil for greasing the pan
Instructions
- Step 1: Make the Basic Crepe Batter
- Crack 2 eggs into a large mixing bowl
- Add 1 tablespoon sugar to the eggs
- Whisk together until slightly frothy and sugar starts to dissolve
- Pour in 2 cups milk and 1 tablespoon oil
- Whisk continuously to combine smoothly
- Gradually add 1½ cups flour, about ½ cup at a time
- Whisk constantly to prevent lumps
- Continue whisking until batter is smooth and thin
- Consistency should be like heavy cream
- Strain through fine-mesh sieve if any lumps remain
- Step 2: Create the Chocolate Batter
- Pour 1 cup of prepared plain batter into a separate bowl
- Add 1 tablespoon unsweetened cocoa powder
- Add 1 tablespoon milk
- Whisk vigorously until cocoa is completely dissolved
- Ensure mixture is smooth with no lumps
- Batter should be rich chocolate brown color
- Set aside within easy reach for cooking
- Step 3: Prepare Your Pan
- Place 10-12 inch non-stick skillet or crepe pan over medium-low heat
- Let pan heat for several minutes until evenly hot
- Test temperature by flicking tiny drop of water on surface
- Water should sizzle and evaporate immediately when ready
- Lightly grease pan with small amount of butter or oil
- Wipe out excess with paper towel
- Leave only a thin film to prevent sticking
- Step 4: Create the Zebra Pattern
- Pour 2-3 tablespoons chocolate batter into center of hot pan
- Let it cook for only 5-10 seconds (edges should just start to set)
- Chocolate batter needs slight head start, not full cooking
- Immediately pour ½ to ¾ cup plain vanilla batter over chocolate
- Pour in circular motion from center outward
- Or pour all at once and quickly tilt pan in circular motion
- Spread batter evenly across entire pan surface
- Watch chocolate and vanilla swirl together creating zebra stripes
- Keep heat at medium-low throughout
- Step 5: Cook and Flip
- Let crepe cook undisturbed for 2-3 minutes
- Edges should look dry and slightly golden
- Top should look mostly set with slight sheen remaining
- Test by sliding spatula underneath – should lift easily
- Use large spatula to flip crepe over
- Or carefully lift edge with fingers and flip quickly
- Cook second side for 1-2 minutes only
- Second side just needs to set and get light golden color
- Step 6: Repeat and Serve
- Slide finished zebra crepe onto large plate
- Repeat process with remaining batter
- Always use chocolate mixture first, then plain batter
- Should yield 3-4 large zebra crepes
- Stir chocolate batter between crepes (cocoa settles)
- Adjust heat if cooking too quickly or slowly
- Serve immediately while warm
Cooking Tips
- Batter should be thin like heavy cream consistency
- Medium-low heat is crucial – prevents burning while allowing pattern formation
- Practice makes perfect – first crepe may not be ideal
- Use high-quality unsweetened cocoa powder for best results
- Larger pan creates thinner, more delicate crepes
- Wait only 5-10 seconds after chocolate pour before adding plain batter
- Don’t skip greasing pan between each crepe
Serving Suggestions
Sweet Options
- Roll with Nutella or chocolate hazelnut spread
- Fill with fresh strawberries, blueberries, or sliced bananas
- Top with whipped cream and chocolate syrup drizzle
- Dust with powdered sugar and serve with maple syrup
- Spread with cream cheese filling and roll into pinwheels
- Layer with vanilla pudding for napoleon-style dessert
Classic Simple Serves
- Fold in quarters and dust with powdered sugar
- Serve with butter and lemon juice squeeze
- Roll with cinnamon-sugar butter filling
- Top with fresh berries and yogurt
Customization Options
Batter Variations
- Vanilla extract: Add ½ teaspoon to plain batter for extra flavor
- Cinnamon: Add ¼ teaspoon to plain batter
- Orange zest: Add 1 teaspoon for citrus note
- Almond extract: Add ¼ teaspoon for nutty flavor
Milk Alternatives
- 2% or skim milk: Lighter option
- Almond milk: Dairy-free, slightly nutty
- Oat milk: Creamy, naturally sweet
- Coconut milk: Rich, tropical flavor
- Soy milk: High protein option
Chocolate Variations
- Dutch-processed cocoa: Deeper, darker color
- Natural cocoa powder: More intense chocolate taste
- Add espresso powder: ½ teaspoon for mocha flavor
Storage Instructions
- Refrigerator: Cool completely, stack with parchment paper between crepes
- Store in airtight container for up to 3 days
- Freezer: Stack with parchment paper, place in freezer bag
- Freeze flat for up to 2 months
- Thaw in refrigerator overnight
- Reheating: Warm in dry skillet over low heat for 30 seconds per side
- Or microwave for 10-15 seconds
Make-Ahead Instructions
- Batter can be made night before and refrigerated
- Batter benefits from resting time
- Stir well before using (flour settles to bottom)
- Bring to room temperature or add splash of milk if too thick
- Cooked crepes can be made 1-2 days ahead
- Store properly with parchment paper between layers
Troubleshooting Guide
Lumpy Chocolate Batter
- Whisk more vigorously
- Sift cocoa powder before adding
- Add milk slowly while whisking continuously
Zebra Pattern Not Showing
- Pour plain batter sooner after chocolate (5-10 seconds only)
- Use more contrast between batters
- Ensure chocolate batter hasn’t fully set before adding plain
Crepes Sticking to Pan
- Increase amount of butter or oil for greasing
- Ensure pan is properly heated before starting
- Use better quality non-stick pan
Crepes Too Thick
- Add more milk to thin batter (1 tablespoon at a time)
- Pour less batter into pan
- Tilt pan more quickly to spread batter thinner
Crepes Tearing When Flipping
- Cook first side longer before flipping
- Ensure edges are fully set and dry
- Use larger spatula for better support
Equipment Needed
- Large mixing bowl (2)
- Whisk
- Measuring cups and spoons
- 10-12 inch non-stick skillet or crepe pan
- Large spatula
- Paper towels
- Ladle or measuring cup for pouring batter
Nutritional Information (Approximate per crepe)
- Calories: 280-320
- Protein: 10-12g
- Carbohydrates: 40-45g
- Fat: 8-10g
- Fiber: 2-3g
- Sugar: 8-10g
Why This Recipe Works
- Two-batter technique: Creates stunning visual pattern
- Timing is key: Chocolate gets head start for stripe definition
- Medium-low heat: Allows time for pattern formation
- Thin consistency: Spreads easily for delicate crepes
- Simple ingredients: Uses basic pantry staples
- Impressive presentation: Looks professional but easy to make
Pro Tips for Success
- Have both batters ready and within reach before starting
- Keep heat consistent at medium-low throughout cooking
- Don’t wait too long between chocolate and plain batter pours
- Tilt pan confidently for even batter distribution
- First crepe is practice – second will be better
- Stir chocolate batter frequently (cocoa settles)
- Use room temperature eggs for smoother batter
Special Occasion Ideas
- Mother’s Day brunch: Serve with fresh berries and champagne
- Birthday breakfast: Top with candles and whipped cream
- Valentine’s Day: Heart-shaped presentation with strawberries
- Weekend treat: Make with kids for fun family activity
- Brunch party: Set up toppings bar for guests to customize
Dietary Information
- Vegetarian: Yes
- Can be made vegan: Use plant-based milk and egg replacer
- Contains gluten: Yes (all-purpose flour)
- Contains dairy: Yes (can substitute with non-dairy milk)
- Nut-free: Yes (unless using almond milk)
Time-Saving Tips
- Prepare batter the night before
- Use blender for faster mixing
- Keep pan at consistent temperature
- Have all toppings ready before cooking
- Cook multiple crepes if you have multiple pans
- Recruit helper to manage toppings while you cook
Perfect Pairings
- Fresh fruit salad
- Hot coffee or cappuccino
- Fresh orange juice
- Bacon or sausage for savory contrast
- Greek yogurt with honey
- Mixed berry compote
Cocoa powder can be stubborn to dissolve. Make sure you’re whisking vigorously, and consider sifting the cocoa powder first. You can also add the milk slowly while whisking to help incorporate the cocoa more smoothly.
Absolutely! Whole milk gives the richest flavor, but you can use 2%, skim, almond milk, oat milk, or any milk alternative. The texture might be slightly different, but the recipe will still work.
A well-seasoned cast iron skillet or a regular pan will work, but you’ll need to use more butter or oil to prevent sticking. Make sure to grease the pan between each crepe.
Yes! The batter actually benefits from resting. You can make it the night before and refrigerate it. Just give it a good stir before using, as the flour may settle to the bottom.
The most common issue is waiting too long to add the plain batter after the chocolate. The chocolate mixture should only cook for 5-10 seconds before you add the vanilla batter. Also, make sure you’re using enough contrast between the two batters.
For an egg-free version, you can try using a commercial egg replacer or a flax egg (1 tablespoon ground flaxseed mixed with 3 tablespoons water per egg). The texture will be slightly different, but it should still work.
Zebra crepes should be thin enough to fold easily but sturdy enough to hold fillings. They’re typically thinner than pancakes but slightly thicker than paper-thin French crepes.
Definitely! This recipe doubles or triples easily. Just make sure to keep your chocolate and plain batters in separate containers and maintain the same ratios when dividing them.
Final Thoughts
Zebra crepes are proof that impressive food doesn’t require professional training or exotic ingredients. With just basic pantry staples and a simple two-step pouring technique, you can create a breakfast dish that looks like it came from a fancy brunch restaurant.
The stunning visual presentation combined with the delicious chocolate vanilla flavor makes these crepes perfect for special occasions, weekend breakfasts, or any time you want to add a little culinary magic to your morning.
Once you master the basic technique, you’ll find yourself making these beautiful crepes again and again, experimenting with different fillings and toppings to keep things exciting. Give them a try, and prepare to impress!