As the mercury rises and the sun beats down, there’s nothing quite as satisfying as a cold, sweet treat. But most store bought popsicles are little more than frozen sugar water and artificial dyes. What if you could have all that icy satisfaction with zero guilt?
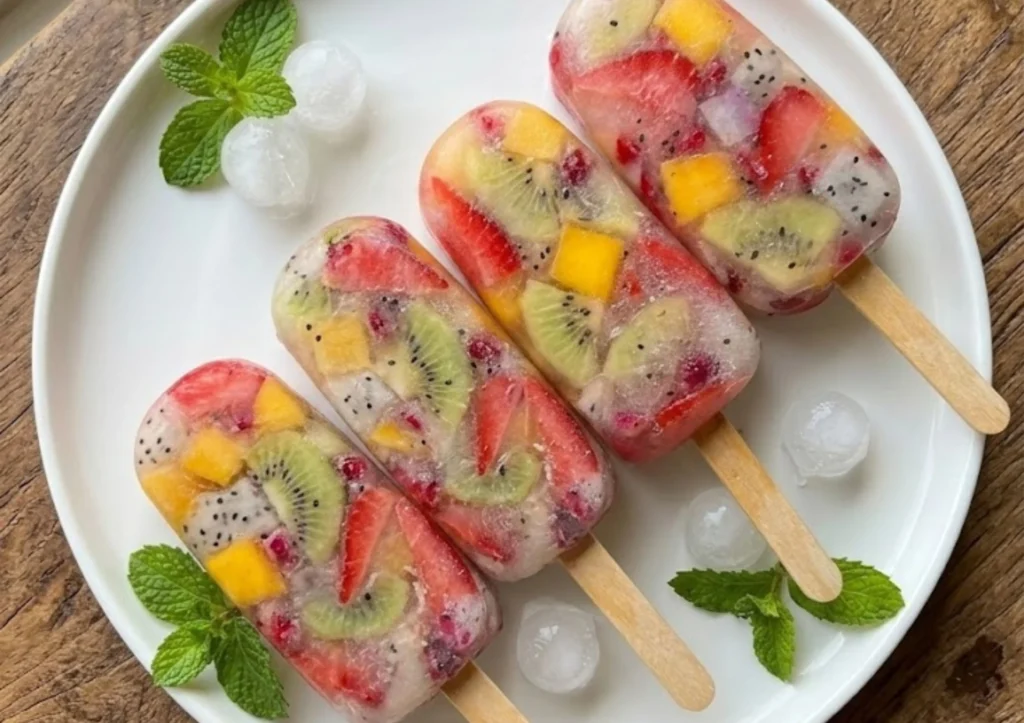
Enter the Rainbow Fruit Popsicle. This isn’t just a snack; it’s a vibrant, nutrient dense celebration of summer’s best bounty. And the “secret” ingredient that binds it all together without a drop of plain water? Fresh Coconut Water.
Whether you’re looking for a healthy snack for your kids or a low calorie way to stay hydrated after a workout, these popsicles are the perfect solution. They are naturally vegan, gluten free, and incredibly easy to make. Let’s break down how to create these beautiful, frozen gems in your own kitchen.
Why You’ll Love These Popsicles
Zero Added Sugars: The sweetness comes entirely from the fruit and the natural electrolytes of coconut water.
Nutrient-Dense: Every bite is packed with vitamins A and C, fiber, and antioxidants.
Hydration Powerhouse: Coconut water is nature’s Gatorade, providing potassium and magnesium to help you beat the heat.
Endlessly Customizable: Use whatever is ripe at your local farmer’s market or grocery store.
The Ingredient List
To create that stunning rainbow effect, we recommend a mix of colors and textures.
The Liquid Base: 16–20 oz Fresh Coconut Water (The “secret” binder).
The “Green”: 1 Kiwi, peeled and diced.
The “Red”: 4–5 Strawberries, hulled and finely chopped.
The “Yellow”: 1 medium Mango, diced into small cubes.
The “White/Pink”: 1/2 Dragon Fruit, peeled and cubed.
The “Jewels”: 1/4 cup Pomegranate seeds.
The Step by Step Method
1. Prep Your Fruits The key to a beautiful popsicle is a consistent chop. Aim for small, bite-sized pieces about 1/4-inch to 1/2-inch wide. This ensures that every bite contains a variety of flavors and that the popsicle remains structurally sound.
2. Fill the Molds Distribute your chopped fruit evenly among your popsicle molds. Don’t be afraid to pack them in! The more fruit you add, the more colorful and textured your final result will be.
3. Add the Secret Binder Pour the coconut water into each mold, filling them almost to the top (leave about 1/4-inch of space for expansion as they freeze). Gently tap the molds on your countertop to release any trapped air bubbles.
4. The Deep Freeze Insert your popsicle sticks and place the tray in the freezer. For the best results, freeze them overnight or for a minimum of 8 to 10 hours. This slow freeze ensures the coconut water and fruit become one solid, refreshing unit.
Serving Tip: The Easy Release
Struggling to get your popsicles out of the mold? Don’t pull too hard or you might pull the stick right out! Simply run the outside of the mold under lukewarm water for 10 15 seconds. This will slightly melt the outer layer of the popsicle, allowing it to slide out effortlessly.

Summer Refresher: No Added Sugar Rainbow Fruit Popsicles
Ingredients
- The Liquid Base: 2 cups Fresh Coconut Water The “secret” natural binder
- The Fruit Rainbow:
- 1 Kiwi peeled and finely diced
- 1/2 cup Strawberries hulled and chopped
- 1 medium Mango peeled and diced
- 1/4 cup Pomegranate seeds
- 1/2 cup Dragon Fruit peeled and cubed
Instructions
- Fruit Preparation: Wash and peel all seasonal fruits. Chop them into uniform, small pieces (approx. 1/4 inch) to ensure they fit easily into the molds.
- Layering the Molds: Fill each popsicle mold with a mixture of the chopped fruits. Pack them relatively tightly to create a dense, colorful “mosaic” look.
- Adding the Binder: Pour the coconut water into the molds, covering the fruit completely. Leave a small gap (about 1/4 inch) at the top to allow for expansion during freezing.
- Eliminating Air: Gently tap the molds on the counter to remove any air bubbles trapped between the fruit pieces.
- Setting the Sticks: Insert the popsicle sticks or the mold lids.
- The Deep Freeze: Place the molds in the freezer for at least 8 to 10 hours, though overnight is recommended for the most solid set.
- Easy Release: To serve, dip the bottom of the mold in room-temperature water for 10 seconds to loosen the popsicle.
Yes! Frozen fruit works perfectly. In fact, using frozen fruit can sometimes speed up the freezing process of the popsicle itself. Just make sure the pieces are small enough to fit comfortably in your molds.
If your fruit isn’t quite at peak ripeness, you can stir a teaspoon of honey or agave nectar into the coconut water before pouring it into the molds. However, the natural sweetness of the mango and pomegranate usually does the trick!
For the best flavor and texture, we recommend eating them within 2 to 3 weeks. Beyond that, they may start to develop ice crystals (freezer burn), which affects the mouthfeel.
Absolutely! These are much safer than traditional hard candies or sugary popsicles. Just ensure the fruit pieces are chopped small to avoid any choking hazards for younger children.
You certainly can, but coconut water is the “secret” because it’s clear (allowing the fruit colors to pop) and provides that unique, light hydration that juice lacks.