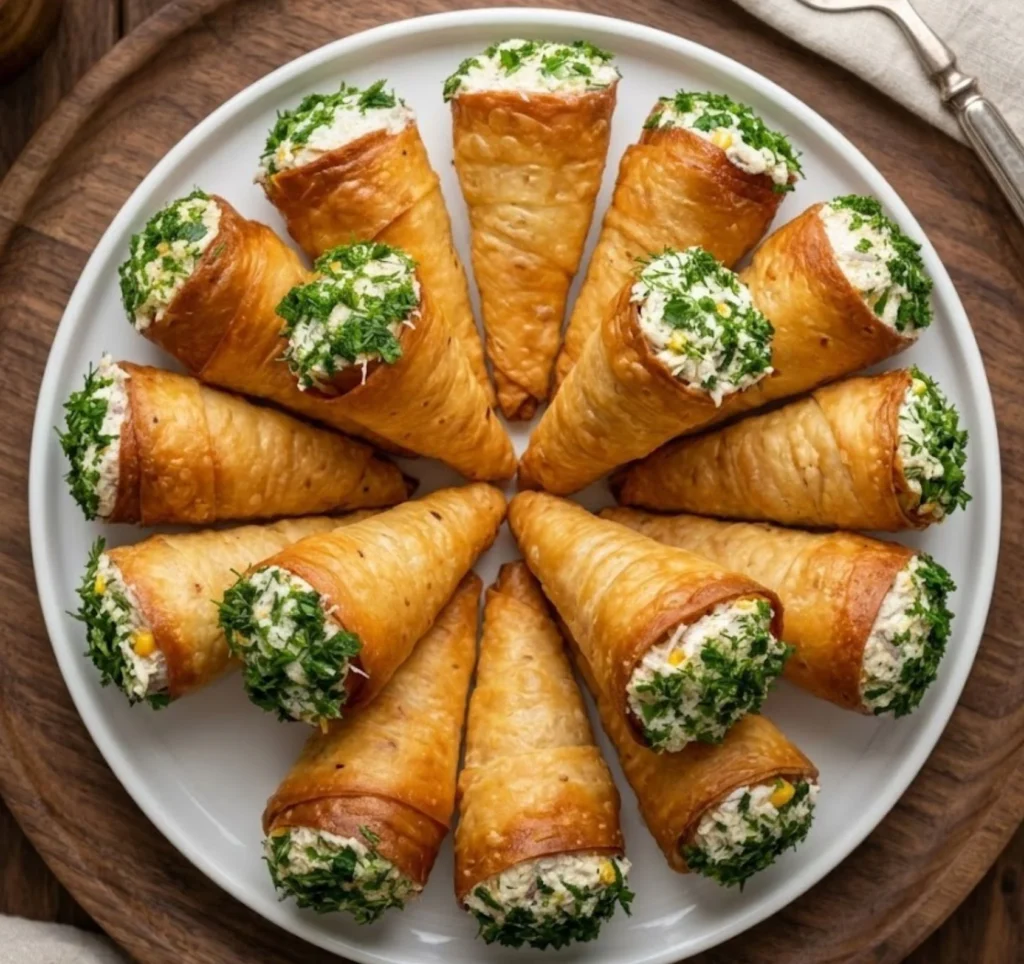
When it comes to entertaining, the best snacks are the ones that combine high impact crunch with a portable, “hand held” design. We’ve all seen standard wraps and sliders, but if you want to truly wow your guests at your next game night or family gathering, it’s time to level up to Crispy Savory Hand Cones.
This recipe is a masterclass in texture. It takes a soft, thin flatbread and transforms it into a shatteringly crisp vessel, which is then packed with a creamy, protein rich filling.
The secret? A double dose of crunch once from the baked cone and again from a surprise addition of crushed potato chips mixed right into the filling. It’s fun, customizable, and ready in a flash.
Why These Crispy Cones Work
The beauty of this appetizer lies in its structural engineering. By shaping flatbread into cones, you create a deep pocket that holds a substantial amount of filling without the mess of a traditional taco or open-faced sandwich.
The Shell: We use thin flatbread (Lavash), which has the perfect thickness to become crisp without being tough.
The Protein Punch: A combination of shredded chicken and tuna ensures every bite is satisfying and savory.
The Texture Secret: Mixing crushed chips into a creamy mayo-yogurt dressing creates a “crunch in every-bite” experience that is addictive.
Ingredients
To make these cones at home, you’ll need a few pantry staples and some fresh additions.
For the Crispy Shells:
Thin Flatbread (Lavash or Thin Flour Tortillas): Cut into halves.
Neutral Oil (Vegetable or Avocado Oil): For brushing or frying.
Toothpicks: To secure the shape during cooking.
For the Savory Filling:
Cooked Chicken: Shredded or finely diced.
Canned Tuna: Drained and flaked.
Sweet Corn: Canned or thawed from frozen.
Mushrooms: Finely chopped.
Potato Chips: A mix of shredded/crushed pieces (save some for the final toss).
The Creamy Dressing:
Plain Greek Yogurt: For a tangy, protein rich base.
Mayonnaise: For richness and flavor.
The Step by Step Method
1. Constructing the Cones
Take your half-circle of flatbread and roll it into a cone shape, ensuring the bottom tip is tightly closed so the filling won’t leak out. Secure the flap with a toothpick.
2. Achieving the Crunch
You have two paths to perfection here:
The Baked Method (Healthier): Arrange the cones on a baking sheet. Brush them lightly with oil and bake at 350°F (180°C) for 8–10 minutes. Keep an eye on them; they should be a beautiful golden brown and firm to the touch.
The Fried Method (Classic): Heat oil in a deep pan and fry the cones until they are uniform gold and shatteringly crisp. Drain on paper towels.
3. The “Secret Sauce” Filling
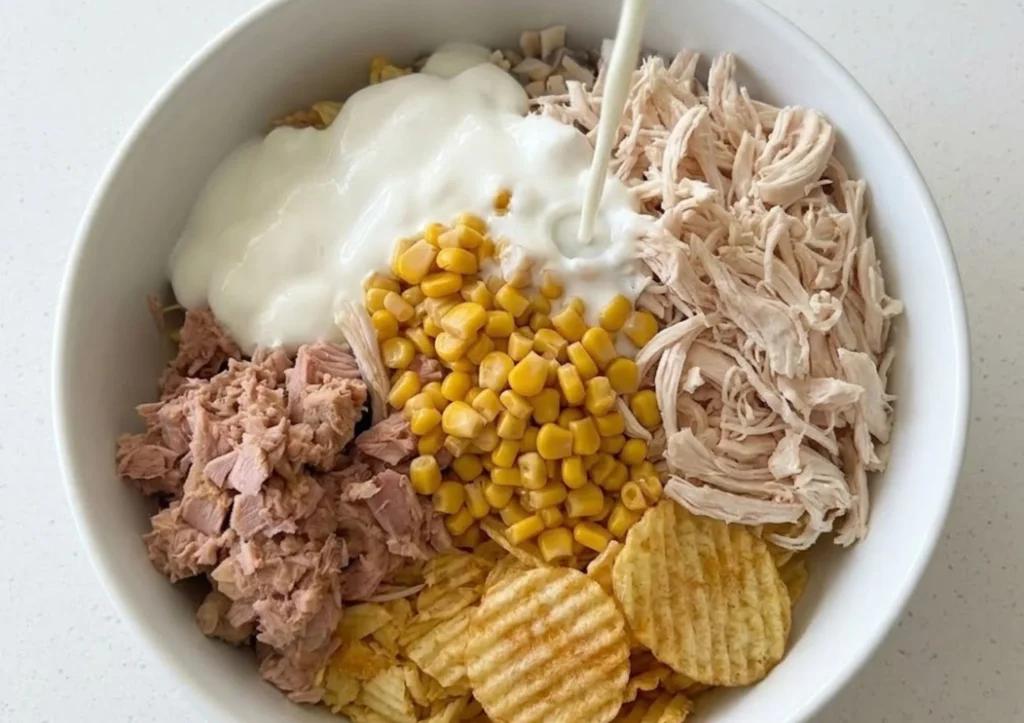
In a large mixing bowl, combine the shredded chicken, tuna, sweet corn, chips and chopped mushrooms. Stir in the Greek yogurt and mayonnaise until the mixture is creamy and well combined.
4. The Final Assembly
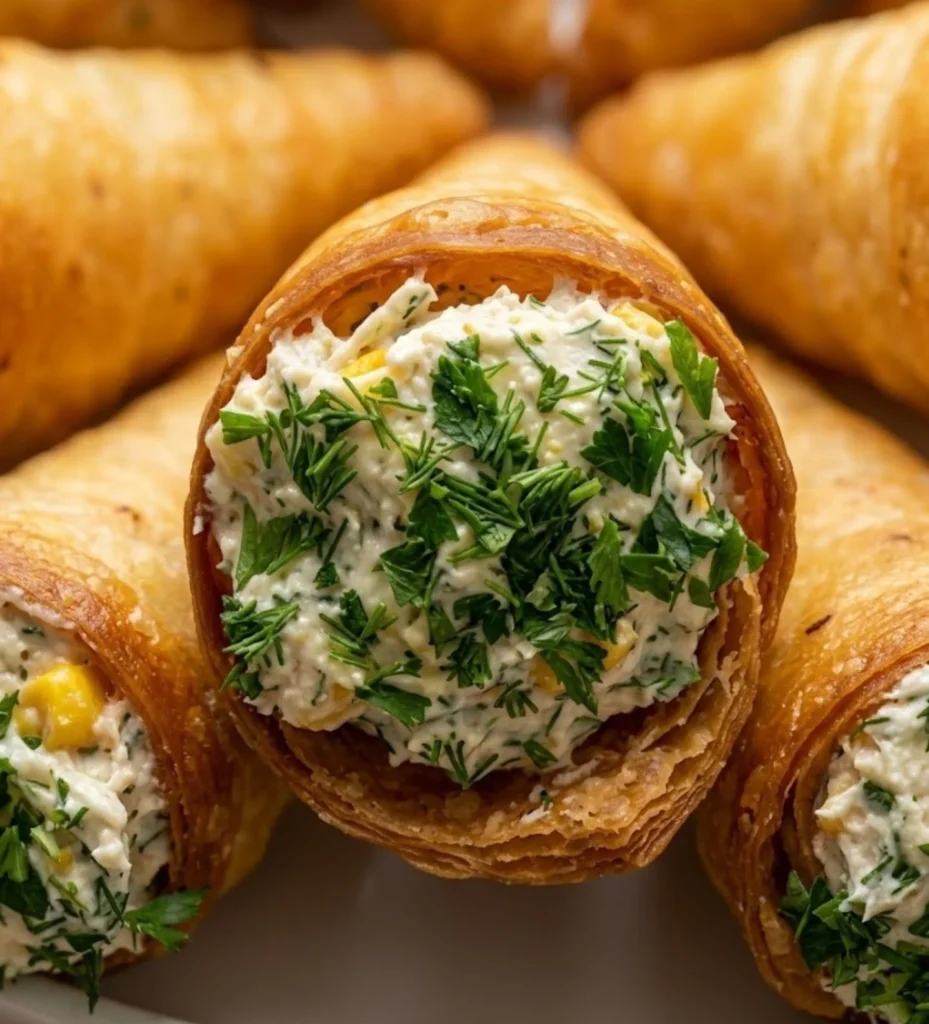
Pro Tip: To prevent the chips from getting soggy, do not add them until you are ready to serve. Just before filling the cones, toss in a generous handful of crushed potato chips. Stir quickly and spoon the mixture into the prepared crispy cones.

Party Appetizer: Ultra Crispy Savory Hand Cones
Ingredients
- The Crispy Shells:
- 4 Thin Flatbreads Lavash or thin Flour Tortillas, cut in half.
- 1 tbsp Neutral Oil Vegetable or Avocado oil for brushing.
- 8 –10 Toothpicks to secure shape.
- The Creamy Savory Filling:
- 1 cup Cooked Chicken shredded or finely diced.
- 1 small can 5 oz Tuna (drained and flaked).
- 1/2 cup Sweet Corn canned or thawed.
- 1/2 cup Mushrooms finely chopped.
- 1/2 cup Potato Chips shredded/crushed.
- The Dressing:
- 1/4 cup Plain Greek Yogurt.
- 2 tbsp Mayonnaise.
Instructions
- Form the Cones
- Roll: Take a flatbread half and roll it tightly into a cone shape, ensuring the bottom tip is closed.
- Secure: Use a toothpick to pin the outer flap to the body of the cone so it doesn’t unroll.
- The Crisp Factor
- Method A (Bake): Preheat oven to 350°F (180°C). Brush the cones lightly with oil and bake for 8–10 minutes until golden and rigid.
- Method B (Fry): Heat oil in a pan and deep-fry the cones for 1–2 minutes until golden brown. Drain on a paper towel.
- Mix the Filling
- Combine: In a large bowl, mix the shredded chicken, flaked tuna, corn, and mushrooms.
- Dress: Stir in the Greek yogurt and mayonnaise until the mixture is creamy and well-incorporated.
- The Final Crunch & Assembly
- Timing is Everything: Just seconds before serving, stir the crushed potato chips into the creamy mixture.
- Fill: Remove the toothpicks from the crispy cones. Spoon the filling into each cone until full.
- Serve: Serve immediately while the shells are warm and the chips inside are still crunchy.
Yes! Look for the “thin” or “low carb” varieties of tortillas, as they crisp up more effectively in the oven. Standard thick tortillas may stay a bit chewy.
Absolutely. You can mix the chicken, tuna, veggies, and dressing up to 24 hours in advance. Just remember: Wait until the very last second to add the crushed chips and fill the cones to maintain that signature crunch.
Once the cones are baked or fried, they will hold their shape. Wait about 60 seconds for them to cool slightly, then gently twist the toothpick before pulling it out. The slight twist helps it slide out of the crisp bread without cracking it.
Definitely. Skip the chicken and tuna and replace them with chickpeas, diced hard boiled eggs, or extra sautéed mushrooms. The yogurt mayo base works perfectly with almost any savory protei
You can use a crumpled piece of aluminum foil to create “nests” for the cones to sit in while they bake, or use a muffin tin turned upside down to prop them up.
Pro Tip
To keep the cones perfectly upright on a serving platter, fill a shallow bowl with dried lentils or rice and “nestle” the tips of the cones into the grains. It creates a stunning, professional restaurant style presentation!