When it comes to romantic gestures, few things carry the weight of a hand crafted dessert. While a dozen roses are a classic gift, they eventually fade.
But a Red Velvet Rose Crepe Cake? That is an experience a delicate, layered, and visually stunning masterpiece that looks like a blooming flower and tastes like a decadent dream.
This isn’t just a cake; it’s a structural marvel. By using the flexibility of thin, French style crepes and a stabilized whipped cream filling, you can “sculpt” a dessert that captures the intricate petals of a rose.
Whether you’re celebrating an anniversary, Valentine’s Day, or simply want to elevate your dessert game, this guide will show you how to turn a few pantry staples into a show stopping edible bouquet.
The Architecture of the “Rose” Shape
The secret to this cake’s striking appearance isn’t complicated pastry work it’s the Spiral-Stacking Technique.
The Petals: Traditional cakes are stacked vertically. This rose cake is built horizontally. By laying crepes side by side in a long line and rolling them up, you create the “heart” of the rose.
The Layering: Once the center is formed, additional crepes are wrapped around the core, each one acting as a new layer of petals.
The Color Palette: The addition of red food coloring and a hint of cocoa creates that deep, romantic crimson hue synonymous with a red velvet rose.
Ingredients
This recipe makes one large, impressive rose cake.
For the Red Velvet Crepes:
Milk: 2.5 cups (approx. 500 ml).
Eggs: 3 large.
All-Purpose Flour: 2 cups (approx. 250 grams).
Unsweetened Cocoa Powder: 2 tablespoons (for that subtle chocolate undertone).
Granulated Sugar: 2 tablespoons.
Neutral Oil: 3 tablespoons (Vegetable or Canola oil).
Salt: A pinch.
Red Food Coloring: 1 tablespoon (gel or liquid).
For the Velvety Cream Filling:
Heavy Whipping Cream: 1 cup (approx. 200 ml).
Cold Milk: 1 cup.
Whipped Cream Mix: 2 standard packages (often found as “Dream Whip” or similar stabilized topping mixes).
Step by Step Cooking Method
1. Whisk the Crimson Batter
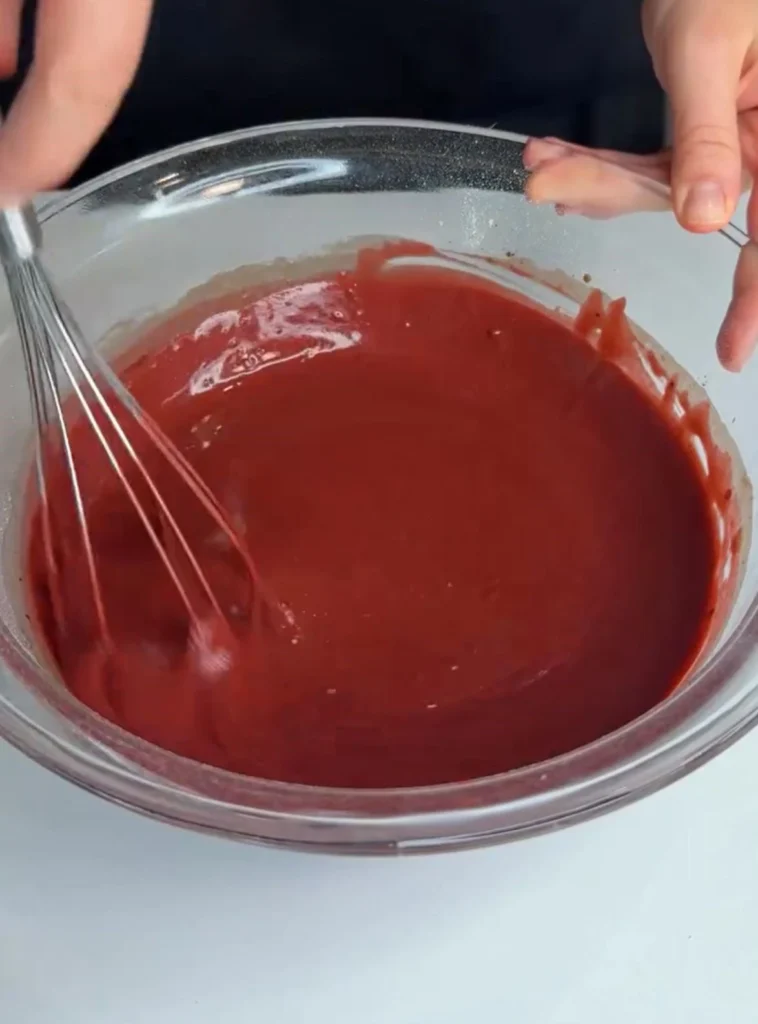
In a large mixing bowl, combine the milk, eggs, and oil. Gradually whisk in the flour, cocoa powder, sugar, and salt. Use a hand whisk or an immersion blender to ensure the batter is perfectly smooth with no lumps. Stir in the red food coloring until the batter is a vibrant, deep red.
2. The Crepe Sizzle
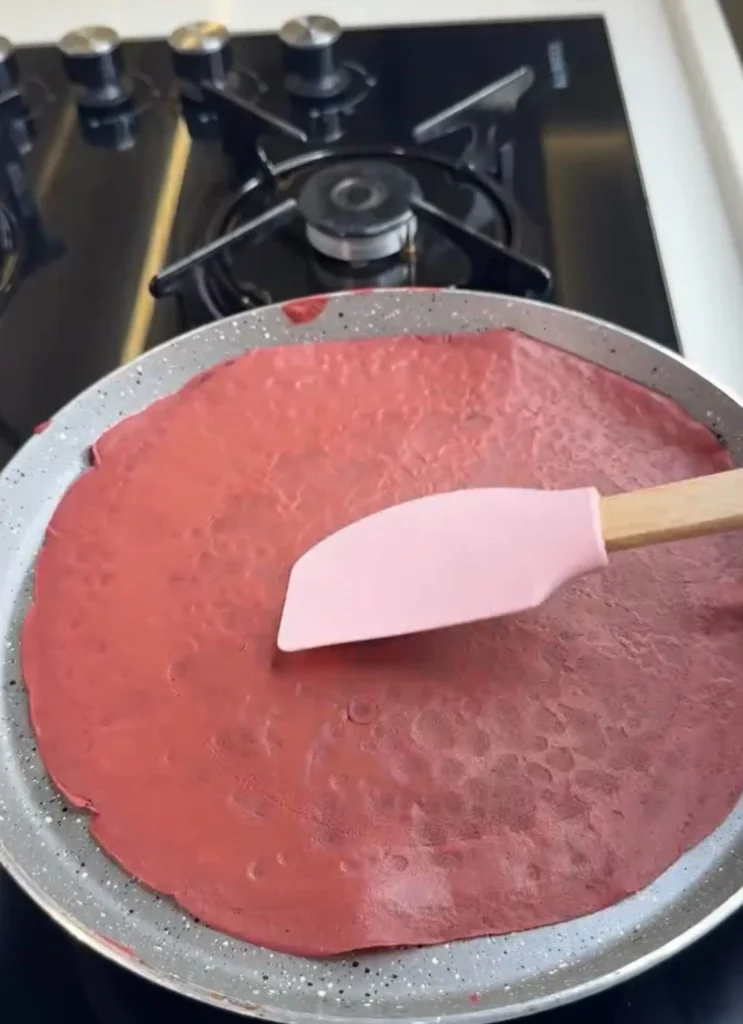
Heat a non-stick skillet or crepe pan over medium low heat. Lightly grease the pan for the first crepe. Pour a small ladle of batter into the center and swirl the pan to create a very thin, even layer. Cook for about 45–60 seconds per side. Repeat until all the batter is used. Stack the crepes and let them cool completely.
3. Whip the Stabilized Filling
In a cold bowl, combine the heavy cream, cold milk, and the whipped cream packages. Whip on high speed until stiff peaks form. The cream must be sturdy enough to act as “glue” for the rose petals.
4. Construct the Rose Core
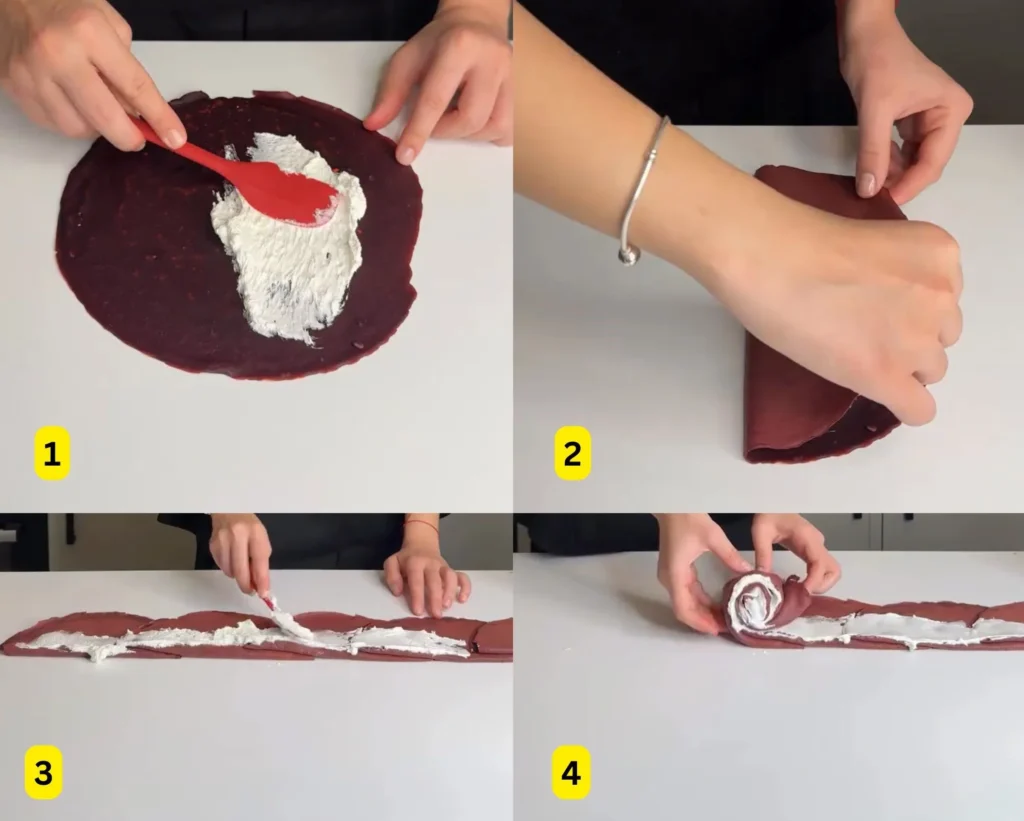
Lay out three cooled crepes in a horizontal line, overlapping them slightly at the edges. Spread a thin, even layer of cream across the middle of the crepes. Carefully roll them up tightly into a cylinder. Place this cylinder upright in the center of your serving board.
5. Layer the Petals
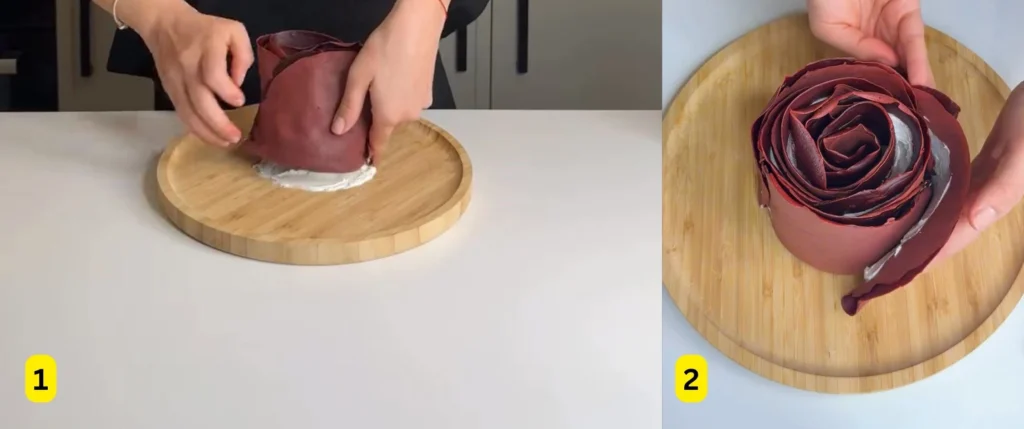
Spread cream on a single crepe and wrap it around your center cylinder. Continue this process, overlapping each new crepe with the previous one, working your way outward. As the cake grows, the “petals” will naturally start to fan out at the top, creating the bloom effect.
6. The Setting Phase
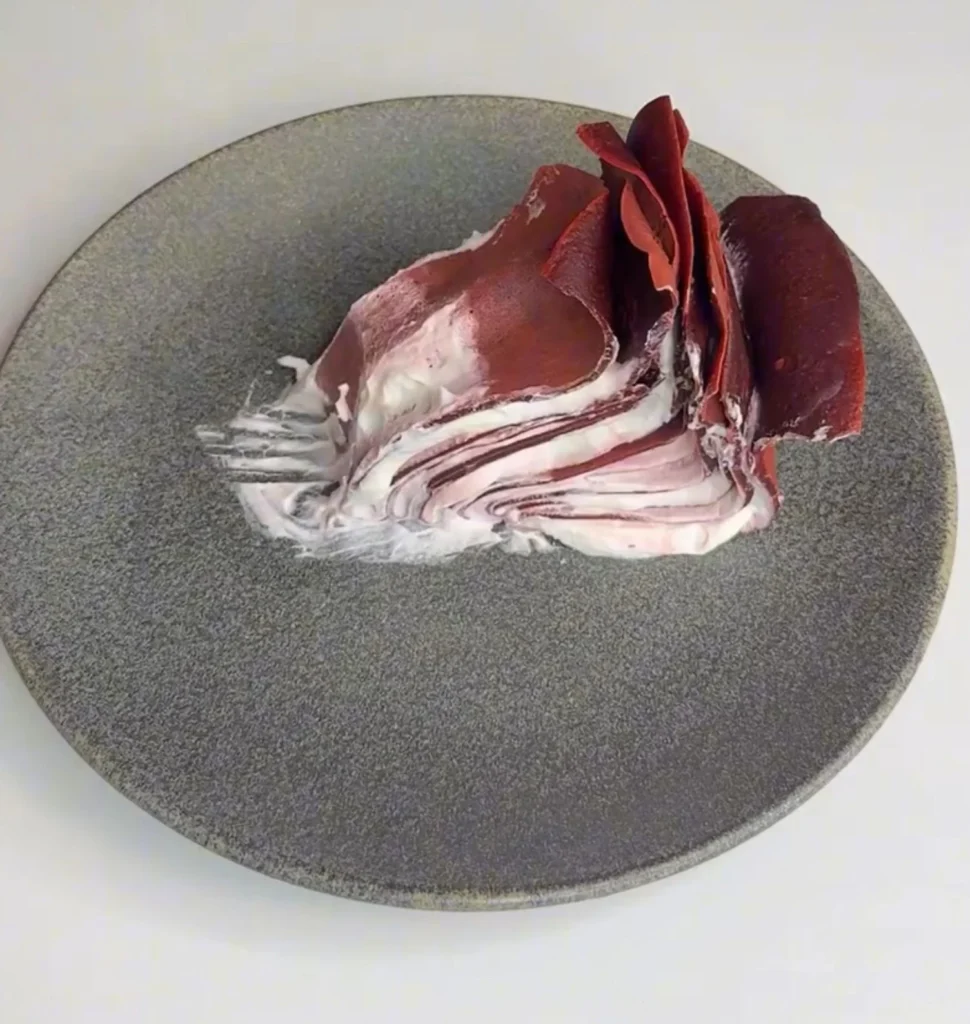
This is the most important step! Place the cake in the refrigerator for at least 2 hours. This allows the cream to firm up and the crepes to soften and meld together, making it easy to slice without the “petals” falling apart.

Master the Art of the Red Velvet Rose Crepe Cake
Ingredients
- The Red Velvet Crepes:
- 2.5 cups 500 ml Milk
- 3 Large Eggs
- 2 cups 250g All-Purpose Flour
- 2 tbsp Unsweetened Cocoa Powder
- 2 tbsp Granulated Sugar
- 3 tbsp Neutral Oil Vegetable or Canola
- A pinch of Salt
- 1 tbsp Red Food Coloring
- The Stabilized Cream Filling:
- 1 cup 200 ml Heavy Whipping Cream
- 1 cup Cold Milk
- 2 packages Whipped Cream Stabilizer/Mix e.g., Dream Whip
Instructions
- Whisk the Crimson Batter
- Mix: Combine milk, eggs, and oil in a large bowl.
- Sift: Gradually whisk in flour, cocoa powder, sugar, and salt until perfectly smooth.
- Color: Stir in the red food coloring until the batter is a deep, uniform crimson.
- Cook the "Petals"
- Sear: Heat a non-stick skillet over medium-low heat. Pour a thin layer of batter and swirl to coat the pan.
- Flip: Cook for 45–60 seconds per side. Repeat until all batter is used.
- Cool: Stack the crepes and let them cool completely before assembly.
- Whip the Filling
- Aerate: In a chilled bowl, combine heavy cream, cold milk, and whipped cream mix.
- Stiff Peaks: Beat on high speed until the cream is stiff and holds its shape.
- Construct the Rose Core
- Align: Lay three crepes in a horizontal row, overlapping the edges slightly.
- Spread: Apply a thin layer of cream across the center of the row.
- Roll: Roll the crepes tightly into a cylinder and stand it upright on a serving plate.
- Assemble the Bloom
- Wrap: Spread cream on individual crepes and wrap them one by one around the center cylinder.
- Fan: Overlap the edges as you go, allowing the tops to fan out slightly to mimic blooming petals.
- Set and Serve
- Chill: Refrigerate for at least 2 hours. This is essential for the structure to “lock” so the cake can be sliced cleanly.
Yes! You can make the crepes 24 hours in advance. Just stack them with pieces of parchment paper in between to prevent sticking and keep them in an airtight container in the fridge.
This usually happens if the crepes are too thick or if they were overcooked and became crispy. Ensure your batter is thin (like heavy cream) and only cook the crepes until they are just “set.”
Absolutely. Thinly sliced strawberries can be placed on the cream before rolling to add a fresh, fruity pop that complements the red velvet flavor perfectly.
A standard 8-inch or 10-inch non-stick skillet works perfectly. The key is using low heat so the crepes don’t brown, which would hide the beautiful red color.
Pro Tip
To achieve the most realistic rose look, slightly ruffle the top edges of the outer crepes as you wrap them. This creates the “torn” look of natural flower petals and adds beautiful organic texture to your centerpiece.