There is something undeniably satisfying about a dish that looks intimidatingly fiery but tastes like a masterclass in balanced flavor.
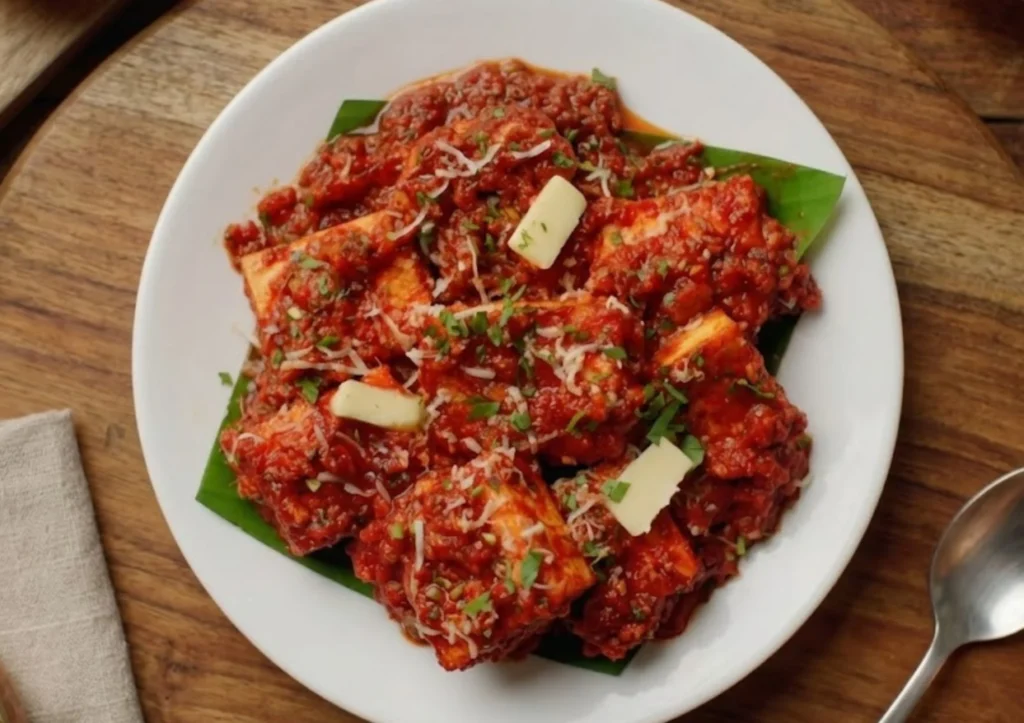
If you are looking for a show stopping appetizer or a vibrant main course that brings the heat without burning your palate, look no further than the Chili Garlic Pan Seared Cottage Cheese Skillet.
This dish is a vegetarian’s dream a rustic, “skillet pan-style” preparation where thick slabs of golden seared cottage cheese (Paneer) are smothered in a rich, crumbly, and aromatic chili garlic paste.
Inspired by the bold flavors of street side skillet cooking, this recipe takes humble ingredients and transforms them into a restaurant quality experience right in your home kitchen.
In this blog, ensuring you can find everything you need at your local grocery store while maintaining the authentic, soul satisfying taste of this skillet delight.
The Secret to the “Red Hot” Flavor (Without the Burn)
A common misconception when looking at this dish is that it is impossibly spicy. The secret lies in the Dried Kashmiri Red Chilies.
These chilies are prized not for their heat, but for their incredible, vibrant red pigment and a mild, almost fruity sweetness. By using these as the base of our paste, we get that gorgeous “lava red” look while keeping the dish accessible to everyone.
We then balance this with creamy yogurt to add tang and “roundness” to the spices, and a tiny pinch of sugar to tie the savory, garlicky, and spicy notes together.
Ingredients Guide
For the best results, use fresh, high quality dairy and aromatics. You can find these at stores like Whole Foods, Trader Joe’s, or any international market.
1. The Chili-Garlic Paste (The Soul of the Dish)
Dried Kashmiri Red Chilies: 15 pieces. (If you can’t find these, use mild dried Guajillo chilies).
Garlic: A large handful (about 20–25 cloves), coarsely chopped.
Ginger: a 1-inch piece, peeled.
Green Chilies: 3 (Serrano or Thai bird’s eye adjust based on your heat preference).
Water: For soaking and blending.
2. The Star Ingredients
Indian Cottage Cheese (Paneer): 12.5 oz (350g). Look for firm blocks in the specialty cheese section.
Neutral Oil: 4–5 tablespoons (Avocado, Canola, or Grapeseed oil).
3. The Skillet Seasoning
Plain Whole Milk Yogurt: 1/3 cup, well-whisked (this prevents curdling).
Garam Masala: 1/2 teaspoon.
Red Chili Powder: 1 teaspoon (use Cayenne for extra heat or Paprika for mild).
Sugar: 1 small pinch (the “flavor balancer”).
Salt: To taste.
Fresh Cilantro: Both the leaves and the stems (chopped separately).
Lemon Wedges & Chaat Masala: For the final garnish.
Step by Step Instructions
Step 1: Preparing the Chili Paste
De seed and Soak: Cut the tops off your dried red chilies and shake out the seeds. Soak them in hot water for 30–45 minutes until they become soft and plump.
Blend: Place the soaked chilies into a high-speed blender with the 1-inch piece of ginger, 3 green chilies, and a small splash of water. Blend until you have a perfectly smooth, vibrant red paste.
Step 2: Searing the Cheese Slabs
The “Slab” Technique: Instead of cutting the cottage cheese into small cubes immediately, cut the block into three or four large, thick slabs. This makes it much easier to flip and ensures an even golden crust without breaking the cheese.
The Sear: Heat a non-stick pan with a tablespoon of oil. Place the slabs in and cook on medium heat until the bottom is a deep golden brown. Flip carefully and repeat on the other side.
Rest and Cut: Once seared, move the slabs to a cutting board. Let them cool slightly, then cut them into thick rectangular batons or cubes.
Step 3: Building the Skillet Masala
Sauté Garlic: In a large skillet or wide pan, heat 3 tablespoons of oil. Add the coarsely chopped garlic and sauté for 1 minute until fragrant but not browned.
Cook the Paste: Add your blended red chili paste and a pinch of salt. Sauté this on medium heat.
Incorporate Yogurt: Add the whisked yogurt, garam masala, and red chili powder.
The “Crumbly” Stage: Cook the mixture for 7–8 minutes, stirring frequently. You are waiting for the oil to separate from the paste and the texture to become slightly “crumbly” and deep in color. If it gets too dry, add a tablespoon of hot water.
Balance: Add the pinch of sugar and adjust the salt. Stir in a little more hot water to reach a “coating” consistency thick enough to stick to the cheese but not a dry paste.
Step 4: The Final Toss
Cilantro Stems: Stir in the chopped cilantro stems. These provide a fresh, crunchy “bite” that the leaves alone don’t offer.
The Coating: Add your seared cheese batons to the skillet. Gently toss and fold the cheese into the masala until every piece is completely “clothed” in the red chili-garlic mixture.
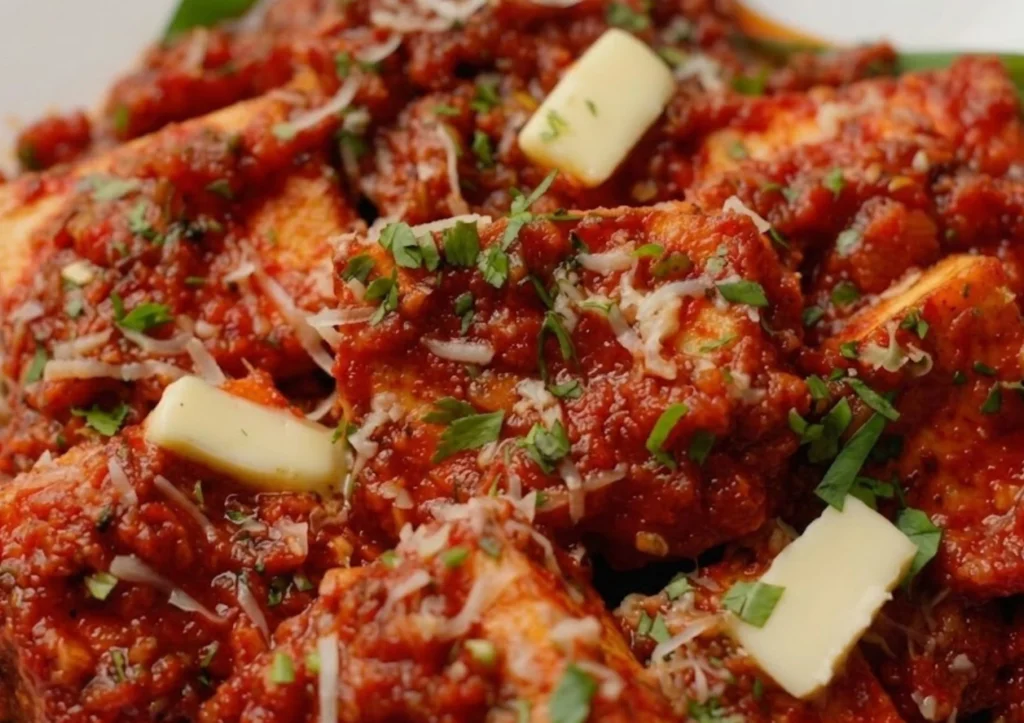
Finish: Garnish with fresh cilantro leaves. Serve hot directly from the skillet.

Easy Pan Seared Indian Cottage Cheese Skillet: The Spicy Chili Garlic Sensation
Ingredients
- The Red "Lava" Paste:
- 15 Dried Kashmiri Red Chilies de-seeded and soaked in hot water
- 1- inch Ginger peeled
- 3 Green Chilies Serrano or Thai Bird’s Eye
- Small splash of water
- The Searing Foundation:
- 12.5 oz 350g Indian Cottage Cheese (Paneer), cut into thick slabs
- 4 –5 tbsp Neutral Oil
- A large handful of Garlic 20–25 cloves, coarsely chopped
- The Skillet Finish:
- 1/3 cup Plain Whole Milk Yogurt well-whisked
- 1/2 tsp Garam Masala
- 1 tsp Red Chili Powder or Paprika
- 1 pinch Sugar & Salt to taste
- Fresh Cilantro leaves and chopped stems separated
- Lemon wedges & Chaat Masala for garnish
Instructions
- Prep the Paste: Soak de-seeded dried red chilies in hot water for 45 minutes. Blend with ginger and green chilies until a smooth, vibrant red paste forms.
- Sear the Cheese: Heat 1 tbsp oil in a non-stick pan. Place the large cheese slabs in the pan and sear until golden brown on both sides.
- The Baton Cut: Move seared slabs to a board. Once slightly cooled, cut into thick rectangular batons.
- Sauté the Aromatics: In a wide skillet, heat the remaining oil. Add the chopped garlic and sauté for 1 minute until fragrant.
- Cook the Chili Base: Pour in the red chili paste and salt. Cook on medium heat for 2–3 minutes.
- The Emulsion: Lower the heat and stir in the whisked yogurt, garam masala, and chili powder.
- The Crumbly Stage: Sauté for 7–8 minutes until the oil separates and the masala looks dark and slightly “crumbly.” Add a splash of hot water if it becomes too dry.
- Balance the Flavor: Add a pinch of sugar to round out the spices. Stir in the chopped cilantro stems for a fresh crunch.
- The Final Fold: Add the seared cheese batons to the skillet. Gently toss until the cheese is thoroughly coated in the masala.
- Garnish & Serve: Turn off the heat. Sprinkle with cilantro leaves, a squeeze of lemon, and a dash of tangy Chaat Masala.
Absolutely! This chili-garlic masala is incredibly versatile. It works beautifully with large cremini mushrooms, shrimp, or even hard-boiled eggs. If using chicken, ensure it is fully cooked before tossing it in the final masala.
It looks spicier than it is! Because we use Kashmiri chilies, the primary sensation is one of deep, earthy flavor rather than sharp heat. If you are very sensitive to spice, simply remove all the seeds from the green and red chilies before blending.
If you add cold, un-whisked yogurt to a hot pan, it will instantly curdle into white specks, ruining the smooth texture of the sauce. Whisking it until smooth and bringing it closer to room temperature prevents this “splitting.”
For an appetizer, serve it as is with toothpicks. For a full meal, it pairs perfectly with soft flatbreads like Rumali Roti, Flour Tortillas, or even inside a brioche bun for a spicy “Indian-style” grilled cheese sandwich.
Yes! You can make the chili-garlic paste and store it in an airtight jar in the fridge for up to a week, or freeze it in ice cube trays for an instant flavor bomb whenever you need it.
Pro Tips for Skillet Perfection
Don’t Skimp on Oil: This specific recipe requires a bit more oil than a standard stir fry. The oil is what “cooks” the raw chili paste and carries the flavor of the garlic into the cheese.
The “Tawa” Experience: If you have a cast-iron skillet, use it! The way cast iron retains heat creates a slight char on the masala that adds a smoky dimension you won’t get from stainless steel.
Finish with Acid: Just before eating, squeeze a fresh lemon wedge over the cheese and sprinkle a dash of Chaat Masala (tangy street food spice). The acidity cuts through the richness of the cheese and the intensity of the garlic.
Pro Tip
Always whisk the yogurt thoroughly before adding it to the hot skillet. If you add it straight from the tub, the temperature shock will cause it to curdle, resulting in white specks instead of a smooth, velvety sauce.