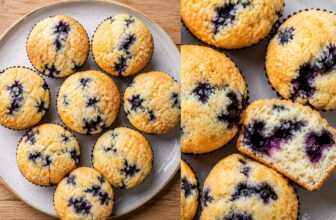
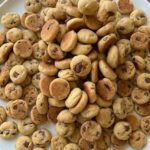
There is something about a miniature version of a beloved thing that makes it approximately ten times more appealing than the original. Mini pancakes.
Tiny pies. Bite sized cheesecakes. And now these XXS Cookies. Small in size, enormous in flavor, and completely impossible to eat just one of.
These are the little chocolate chip cookies that are going to quietly take over your kitchen, your cookie jar, and the hearts of everyone you share them with.
What makes these cookies special isn’t just their size though their tiny, perfectly portioned form is genuinely half the appeal.
It’s the combination of ingredients that gives them a flavor depth that most standard chocolate chip cookie recipes simply don’t achieve.
The addition of molasses to the dough is the secret move that sets these apart from every other small batch cookie recipe you’ve tried. Molasses adds a warm, slightly caramel like richness to the background of the cookie not sweet enough to taste like gingerbread, not overwhelming, just a quiet, complex undertone that makes you take another bite trying to figure out exactly why these taste so good.
They bake in just 10 minutes. They come out of the oven soft and slightly underdone-looking and that is exactly right. By the time they cool on the pan, they firm up into the perfect texture: slightly crispy on the outside, tender and chewy in the center, with pockets of melted chopped chocolate in every single bite. These are weeknight cookies. Weekend cookies. Lunchbox cookies. Holiday tin cookies. Every-occasion cookies.
Let’s make them.
Why This Cookie Recipe Works So Well
Most classic American chocolate chip cookie recipes call for brown sugar as their primary sweetener and the reason is that brown sugar contains molasses, which is what gives classic cookies their characteristic chewiness, depth of flavor, and slightly darker color.
This recipe takes that principle a step further by using regular granulated white sugar plus a dedicated tablespoon of pure molasses added separately.
This approach gives you precise control over the molasses flavor and moisture content in a way that pre mixed brown sugar doesn’t.
The result is a cookie that has all the warmth and chewiness of a brown sugar cookie while maintaining a slightly lighter, crisper edge the best of both worlds in one tiny package.
The chopped chocolate rather than standard chocolate chips is another detail worth noting. When you chop a chocolate bar into irregular pieces, you get a range of chunk sizes some large, some tiny, some almost powdery that distribute through the dough differently than uniform chips do.
The result is more interesting, more varied chocolate in every bite, with thin shards of chocolate that almost melt into the dough and larger chunks that stay distinct and gooey. It’s a small change that makes a noticeable difference.
Ingredients
Here’s everything you need all simple, all accessible at any grocery store across the U.S.:
- 7 tablespoons unsalted butter, at room temperature (100 grams — must be fully softened, not melted)
- ½ cup granulated white sugar (100 grams)
- 1 tablespoon pure molasses (Grandma’s Original or Brer Rabbit brands are widely available)
- 1 large egg
- 1½ cups all-purpose flour, measured carefully (controlled — spoon into measuring cup and level off, don’t scoop directly)
- 1 teaspoon baking powder
- 1 packet semi-sweet or dark chocolate bar, roughly chopped into irregular pieces (approximately 3.5 oz / 100 grams)
A Note on Room Temperature Butter
This detail matters more than most people realize. The recipe specifically calls for butter at room temperature not cold, not melted, but genuinely softened to the point where you can press a finger into it and leave an indent.
Room temperature butter creams properly with sugar, trapping air in the mixture that gives the cookies a slightly lighter, more tender texture.
Cold butter won’t cream it’ll just clump. Melted butter makes the cookies spread too flat and lose their shape. Set your butter out at least 30 to 45 minutes before you begin, or cut it into small cubes to speed up the softening process.
Step by Step Instructions
Step 1 Preheat your oven
Preheat your oven to 350°F (180°C) with both the top and bottom heating elements active this is standard bake mode, not convection. Allow the oven to fully preheat before your cookies go in. Full, even preheat is critical for consistent results in a 10-minute bake window.
Step 2 Cream the butter and sugar
In a large mixing bowl, combine the room temperature butter and granulated sugar. Beat together with a hand mixer or stand mixer on medium speed for 2 to 3 minutes until the mixture is pale, fluffy, and noticeably lighter in color. This creaming step is what builds the base texture of the cookie don’t rush it.
Step 3 Add the molasses and egg
Add the tablespoon of pure molasses to the creamed butter and sugar and mix until fully incorporated the mixture will turn a warm golden brown color.
Add the egg and beat again until everything is smooth, combined, and uniform. Scrape down the sides of the bowl with a spatula to make sure everything is evenly mixed.
Step 4 Add the dry ingredients
Add the flour and baking powder to the bowl. Mix on low speed just until the flour disappears into the dough and no dry streaks remain.
Do not overmix at this stage overworking the flour develops gluten and makes cookies tough rather than tender. Stop mixing the moment the dough comes together.
Step 5 Fold in the chopped chocolate
Add the roughly chopped chocolate pieces to the dough and fold them in gently with a spatula until evenly distributed throughout. The irregular sizes of the chopped chocolate will vary throughout the dough this is exactly what you want.
Step 6 Portion into XXS cookies
Line a baking sheet with parchment paper. Using a small teaspoon or a mini cookie scoop, portion the dough into very small balls these are XXS cookies, so keep them genuinely small, roughly the size of a large marble or a rounded teaspoon of dough.
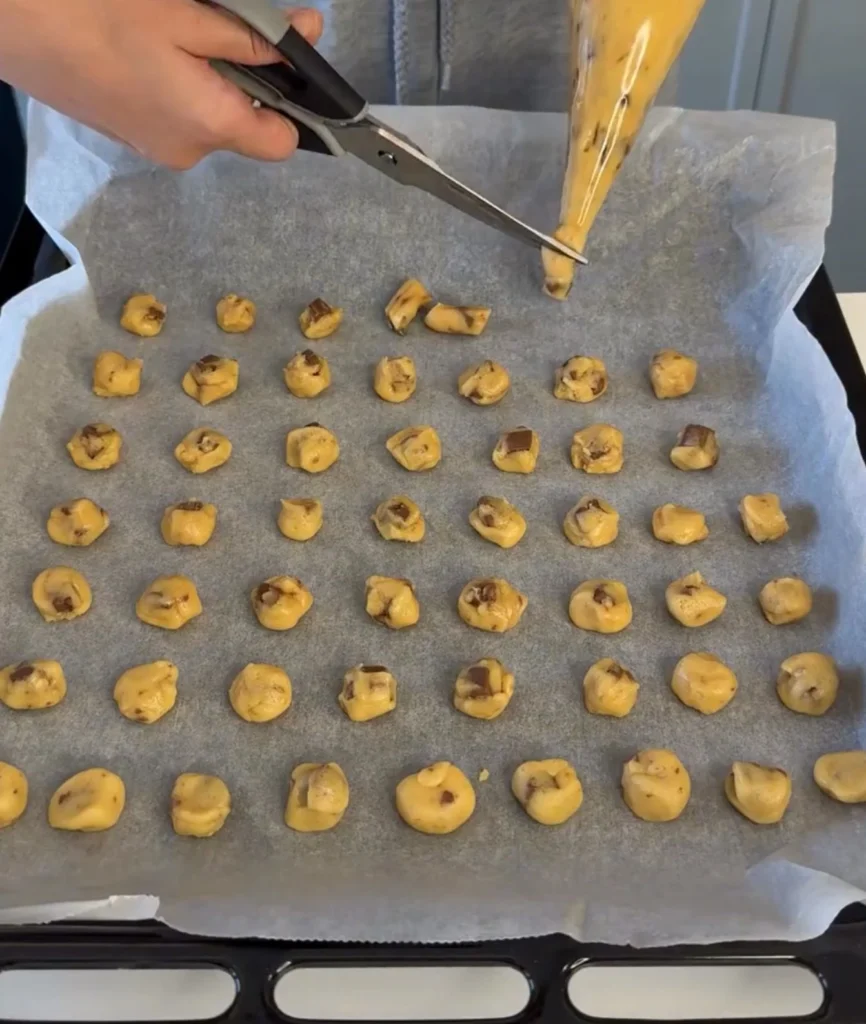
Place them on the lined baking sheet with about 1.5 inches of space between each one they will spread slightly but not dramatically.
Step 7 Bake for exactly 10 minutes
Place the baking sheet on the center rack of your fully preheated oven and bake for exactly 10 minutes. Watch them carefully with a 10 minute window at 350°F, the difference between perfectly baked and over-baked is just a minute or two.
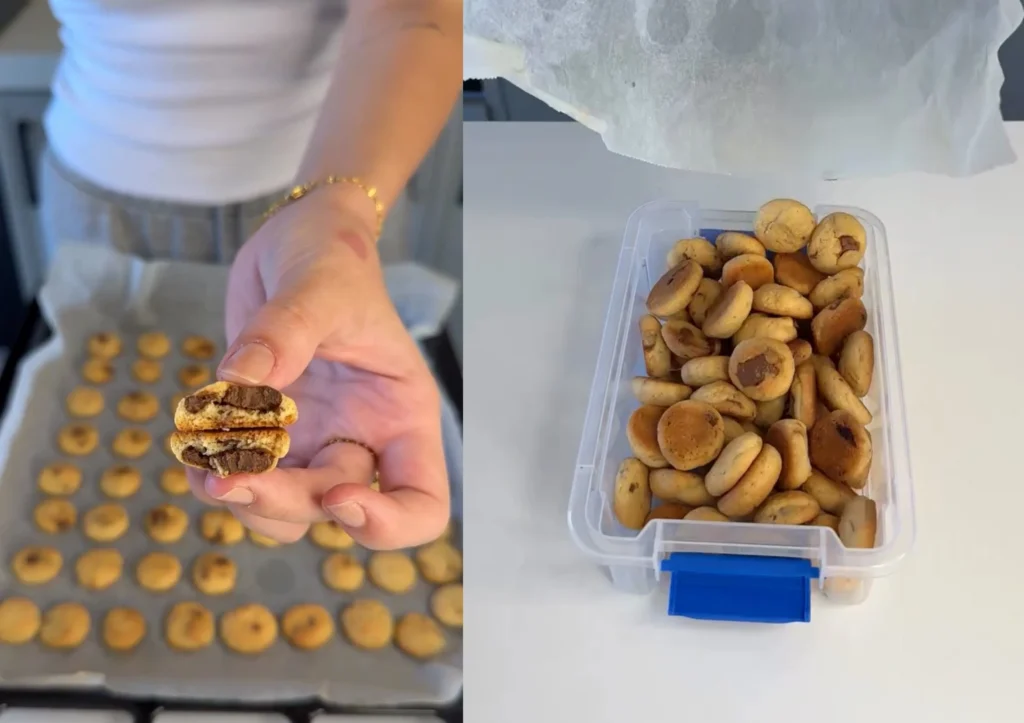
The cookies are done when the edges are just set and very lightly golden. The centers will look soft, slightly underdone, and almost puffy this is correct and intentional. Do not overbake.
Step 8 Cool on the pan and watch the magic happen
Remove the baking sheet from the oven and place it on a wire rack. Do not move the cookies off the pan immediately.
As they cool over the next 5 to 10 minutes they will firm up from soft and puffy to perfectly set, slightly crispy on the edges, and chewy in the center. This transformation happens entirely during the cooling process. Once fully cooled, transfer to a wire rack or serve directly.
Tips for Perfect XXS Cookies
Measure flour carefully — spoon it into your measuring cup and level off with a straight edge rather than scooping directly from the bag. Scooping compacts the flour and adds up to 20% more than the recipe calls for, resulting in dry, crumbly cookies.
Keep cookie portions consistently small — uneven sizing means some cookies overbake while others are underdone within the same 10-minute window.
Don’t skip the cooling time on the pan — the cookies finish setting during this time and pulling them off too early can cause them to fall apart.
Use a good quality semi-sweet or bittersweet chocolate bar for chopping — Ghirardelli, Lindt, or Baker’s chocolate all work beautifully and are available at most major grocery stores.
For extra visual appeal, press a few additional chocolate pieces onto the tops of the cookie balls just before baking — they’ll melt into gorgeous chocolate pools on top.
These cookies freeze beautifully both as baked cookies and as raw dough balls — freeze raw portions on a baking sheet, then transfer to a zip-lock bag and bake straight from frozen, adding 2 to 3 extra minutes to the bake time.
Serving and Storage
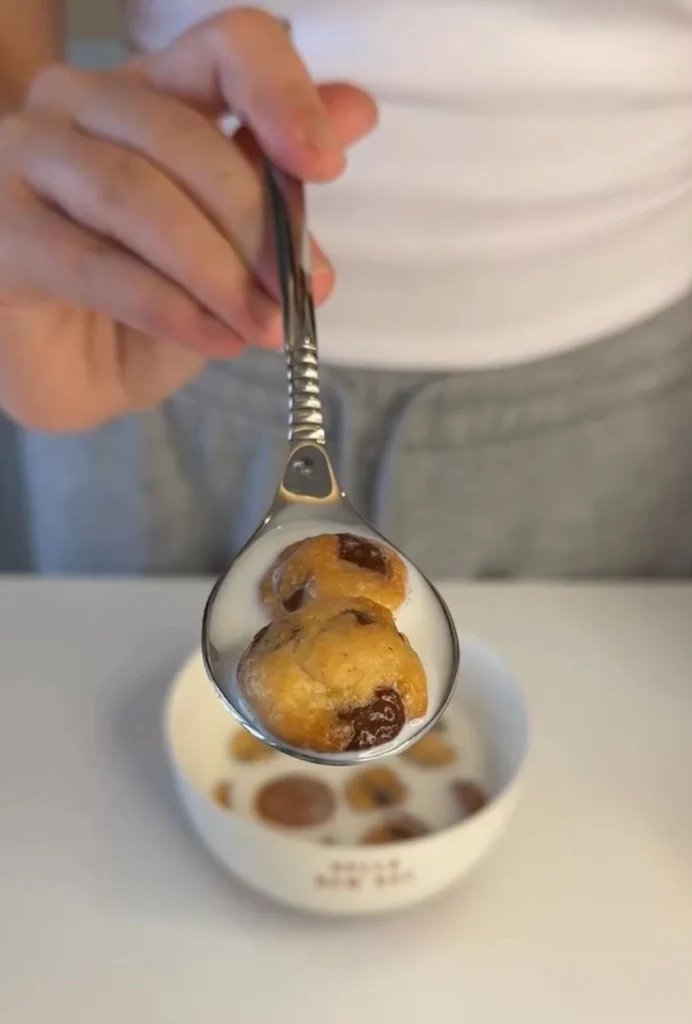
These XXS cookies are wonderful served slightly warm with a cold glass of milk classic for a reason. Arrange them in a small bowl or a lined tin for a gift that feels genuinely thoughtful and homemade.
Pack them into lunchboxes, holiday cookie tins, or treat bags. Store in an airtight container at room temperature for up to 5 days they actually get slightly chewier on day two as the moisture redistributes through the cookie.
For longer storage, freeze in an airtight container for up to one month and thaw at room temperature for 15 to 20 minutes before serving.
XXS Cookies The Tiny Chocolate Chip Cookies With a Big Personality That You Cannot Stop Eating at One
Ingredients
- 7 tablespoons unsalted butter fully softened to room temperature (100 grams)
- ½ cup granulated white sugar 100 grams
- 1 tablespoon pure molasses Grandma’s Original or Brer Rabbit brand recommended
- 1 large egg
- 1½ cups all-purpose flour spooned and leveled (not scooped directly from bag)
- 1 teaspoon baking powder
- 1 package semi-sweet or dark chocolate bar roughly chopped into irregular pieces (approximately 3.5 oz / 100 grams)
Instructions
- Preheat oven to 350°F (180°C) with both top and bottom heating elements active and allow to fully preheat before baking.
- Beat softened butter and granulated sugar together with a hand mixer or stand mixer on medium speed for 2–3 minutes until pale, fluffy, and noticeably lighter in color.
- Add molasses and mix until fully incorporated and dough turns a warm golden-brown color.
- Add egg and beat until smooth, combined, and uniform — scrape down sides of bowl with a spatula.
- Add flour and baking powder and mix on low speed just until flour disappears and no dry streaks remain — do not overmix.
- Fold in roughly chopped chocolate pieces with a spatula until evenly distributed throughout the dough.
- Line a baking sheet with parchment paper.
- Portion dough into very small balls approximately the size of a large marble or one rounded teaspoon using a mini cookie scoop or teaspoon.
- Place dough balls on lined baking sheet with 1.5 inches of space between each one.
- Bake on center rack for exactly 10 minutes until edges are just set and lightly golden — centers will look soft and slightly puffy, this is correct.
- Remove from oven and leave cookies on the hot pan to cool for 5–10 minutes — they will firm up completely during this cooling time.
- Transfer to a wire rack once set and serve.
Notes
Butter must be fully softened at room temperature not melted and not cold for proper creaming and correct cookie texture.
Always measure flour by spooning into the measuring cup and leveling off — scooping directly compacts flour and adds up to 20% more than needed resulting in dry crumbly cookies.
Do not overbake — cookies will look underdone when removed from oven but firm up perfectly as they cool on the hot pan.
Never move cookies off the pan immediately after baking — cooling on the pan is what sets the final texture.
Press a few extra chocolate pieces onto the tops of dough balls just before baking for visible melted chocolate pools on top.
Use good quality semi-sweet or bittersweet chocolate bar for chopping — Ghirardelli, Lindt, or Baker’s chocolate all work beautifully.
Refrigerate portioned dough balls for up to 48 hours before baking for deeper flavor and less spread.
Freeze raw portioned dough balls for up to 1 month — bake straight from frozen adding 2–3 extra minutes to bake time.
Store baked cookies in an airtight container at room temperature for up to 5 days — texture improves on day two as moisture redistributes.
Freeze baked cookies in an airtight container for up to 1 month — thaw at room temperature for 15–20 minutes before serving.
This is completely intentional and the most important thing to understand about this recipe. The cookies continue to cook and firm up on the hot pan after they come out of the oven — a process called carryover cooking. If they look perfectly done in the oven, they will be overbaked and hard once cooled. Pull them when the edges are just set and the centers look soft. Trust the process, let them cool on the pan, and they will be perfect.
Yes, standard semi-sweet chocolate chips work fine as a direct substitute. The difference is purely textural — chopped chocolate creates varied shard sizes that distribute differently through the dough, while chips maintain their uniform shape. Both result in a delicious cookie. Mini chocolate chips are an especially appropriate choice given the XXS size of these cookies.
Pure molasses is strongly recommended for the authentic flavor profile of this cookie. In a pinch, dark corn syrup or maple syrup can be substituted in equal amounts — they won’t provide the exact same depth of flavor but will maintain the moisture contribution. Honey can also work but will add a floral sweetness that slightly changes the flavor profile.
Absolutely. The dough can be made, portioned into balls, and refrigerated on a covered plate or baking sheet for up to 48 hours before baking. Chilled dough actually produces a slightly more flavorful, less-spread cookie. You can also freeze portioned dough balls for up to one month and bake straight from frozen — just add 2 to 3 extra minutes to the bake time.
The most common causes are butter that was too warm or melted rather than properly softened, or flour that was measured by scooping rather than spooning into the cup. Make sure your butter is softened but still holds its shape, and always measure flour by spooning into the measuring cup and leveling off. If the dough feels very soft before baking, refrigerate it for 20 to 30 minutes before portioning — this firms the fat and reduces spread.
Because these are XXS sized — approximately one rounded teaspoon of dough each — this recipe yields approximately 35 to 45 cookies depending on how small you portion them. They’re small enough that the yield feels generous and perfect for sharing, filling a cookie tin, or stashing in the freezer for future cravings.
Yes, this recipe doubles perfectly. Simply double all ingredients proportionally. Bake in multiple batches on separate parchment-lined sheets rotating the sheets halfway through if your oven has hot spots for consistent results across all batches.