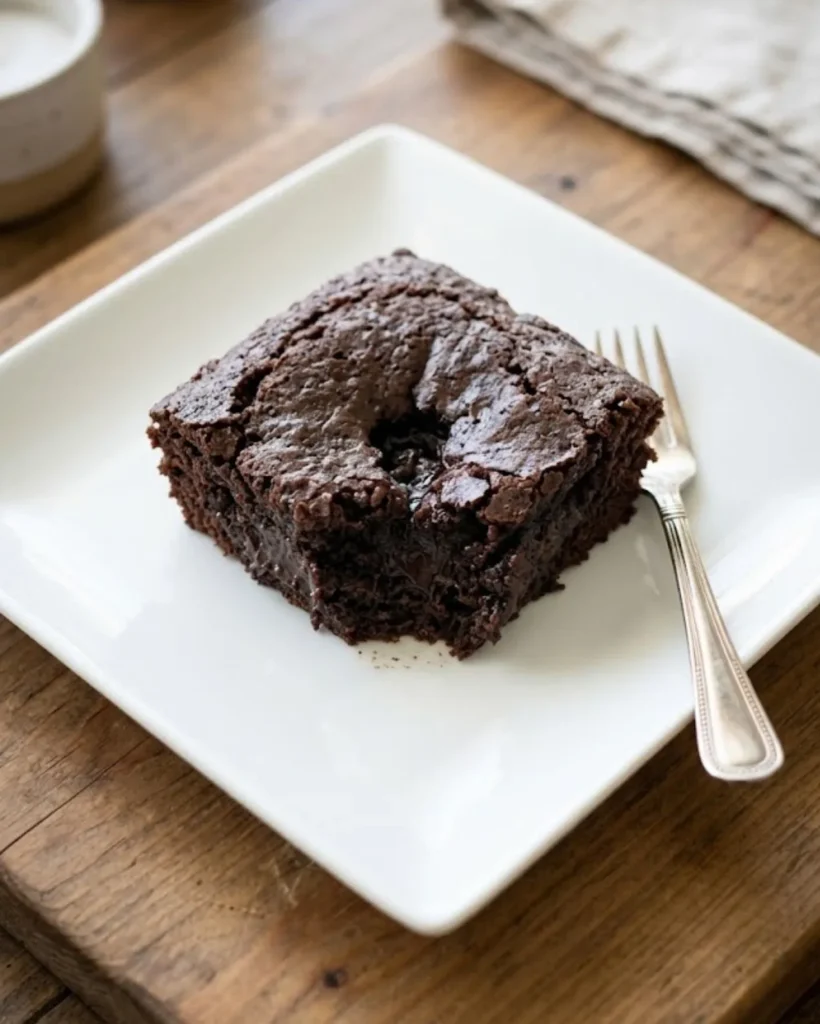
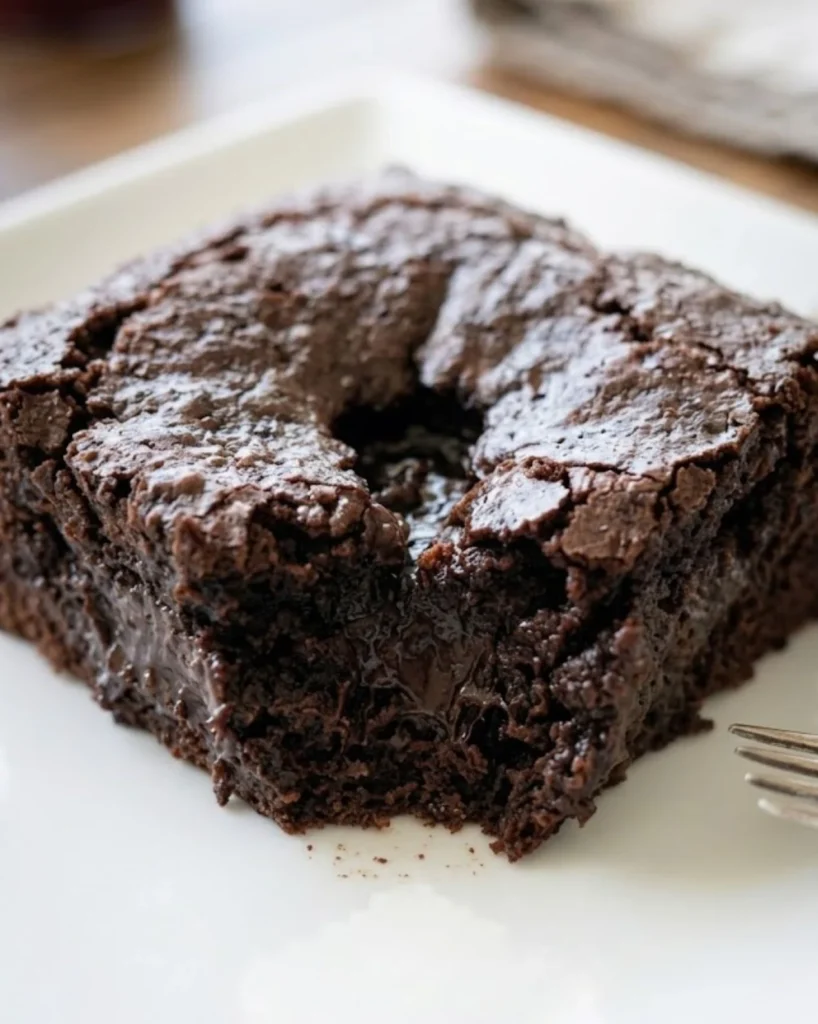
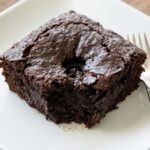
Some desserts do one thing well. This one does two things perfectly at the same time, in the same pan. The Viral Brownie Pudding has taken over home kitchens everywhere for one very good reason: it delivers a shatteringly crisp, crackled top crust and a warm, molten, fudgy pudding center in every single slice.
It’s the kind of dessert that makes guests stop mid bite, look up, and ask you for the recipe before they’ve even finished their serving.
And the most surprising part? It’s made with just six pantry staples and a water bath. No special equipment, no pastry training, no complicated techniques. Just a stand mixer, a baking dish, and a little patience and you’ll have the most impressive dessert you’ve ever pulled out of your oven.
What Exactly Is Brownie Pudding?
Brownie Pudding sits beautifully in the space between a classic fudge brownie and a warm chocolate lava cake.
The magic of this dessert comes entirely from the baking method. By placing the batter-filled dish inside a larger dish of hot water a technique known as a water bath or bain-marie the outer edges of the batter bake through while the center stays silky, warm, and pudding-soft.
Meanwhile, the top layer transforms into a paper-thin, glossy, crisp crust that shatters when you dip a spoon into it.
The result is a dessert with genuine contrast in every bite: crunch on top, warmth and fudge underneath. It’s theatrical, indulgent, and completely unforgettable. Which is exactly why it went viral.
Ingredients
This recipe uses simple, straightforward ingredients found in any American grocery store. One cup in this recipe measures 200 ml.
- 4 large eggs
- 2 cups granulated white sugar
- ¾ cup unsweetened cocoa powder
- ½ cup all-purpose flour
- 1 packet vanilla extract (or 1 teaspoon pure vanilla extract)
- 220 grams (about 1 cup / 2 sticks) unsalted butter, melted and cooled
- Hot water, for the water bath
Step by Step Instructions
Step 1: Beat the Eggs and Sugar Don’t Skip the Time
This is the single most important step in the entire recipe, and it cannot be rushed. Add the four eggs and two cups of granulated sugar to the bowl of a stand mixer or use a hand mixer with a large bowl.
Beat on medium high speed for a full six to seven minutes. This is not an approximation the full time is essential.
By the end of those six to seven minutes, the mixture should have transformed completely. It will have roughly tripled in volume, turned a pale, creamy ivory white color, and developed a thick, ribbon like consistency that falls slowly off the beater.
This aeration is what creates the crispy top crust. If you under beat this stage, the crust won’t form properly.
Step 2: Sift and Fold in the Dry Ingredients
Sift the unsweetened cocoa powder and all purpose flour directly into the beaten egg and sugar mixture. Add the vanilla extract.
Using a spatula or the mixer on its lowest setting, gently fold and mix until the cocoa and flour are fully incorporated and no dry streaks remain. Be careful not to overmix at this point you want to preserve as much of the air you built up in the previous step as possible.
Step 3: Add the Melted Butter
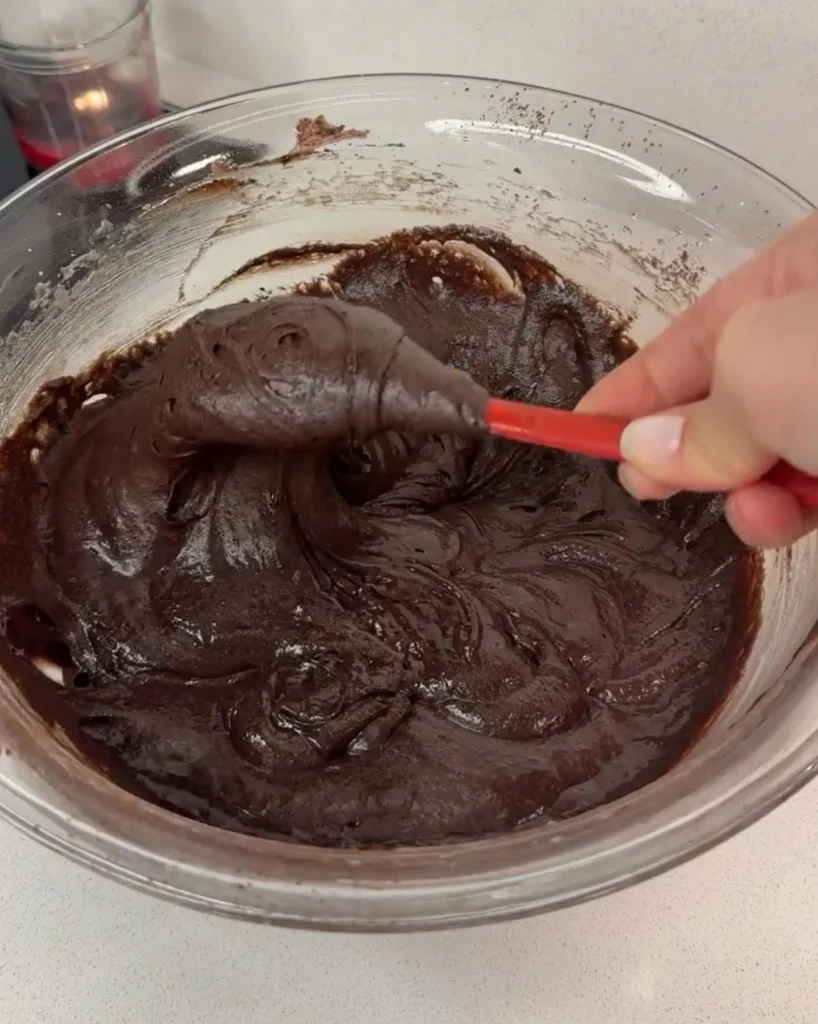
Pour in the melted and cooled butter and mix gently until fully combined. The butter must be cooled not hot before it goes in.
Adding hot butter to the egg mixture risks deflating the batter and scrambling the eggs, which would ruin the texture entirely. The batter at this stage should be smooth, glossy, and noticeably thick.
Step 4: Prepare the Water Bath
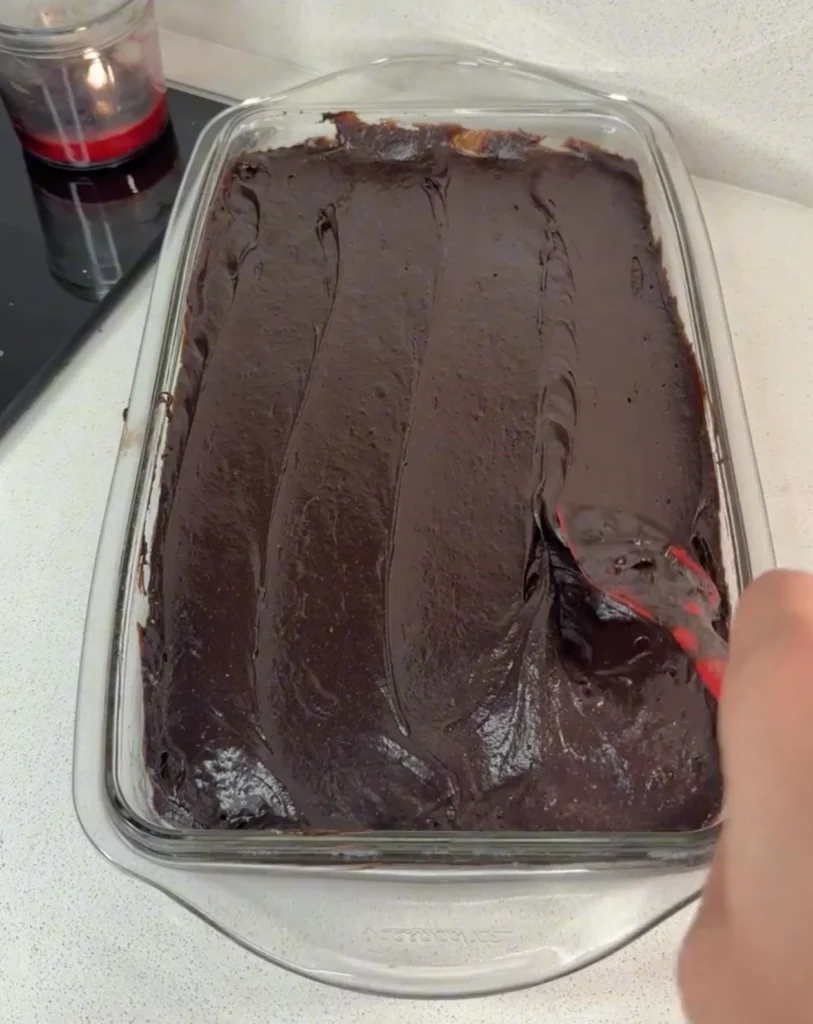
Pour your brownie pudding batter into your baking dish. Select a second, larger baking dish or roasting pan and place your filled baking dish inside it.

Carefully pour hot water into the outer dish until it reaches halfway up the sides of the inner baking dish. This water bath is the key to the pudding’s soft, molten center the steam and even, gentle heat from the surrounding water prevents the center from overbaking while the top crust forms above it.
Step 5: Bake Low and Slow
Carefully transfer the entire setup inner dish nested inside the outer water bath dish into a preheated oven set to 325°F.
Bake for one full hour. Do not open the oven door during baking if you can avoid it, as temperature fluctuations can affect how the crust forms.
After one hour, the top should look set, matte, and slightly crackled. The center will still have a gentle wobble when you shake the pan that’s exactly what you want.
Step 6: Let It Rest and Develop the Crust
Remove the brownie pudding from the oven and allow it to rest at room temperature until the initial heat has fully subsided.
As the dessert cools, the top layer undergoes its final transformation that soft, matte surface tightens and crisps into the signature paper thin, crackled crust that makes this dessert so iconic.
Do not rush this cooling step. The crust forms as it cools, not while it’s baking. Give it at least 20 to 30 minutes before serving.
Tips for the Best Results
Use a light colored or ceramic baking dish rather than a dark metal pan. Dark pans absorb more heat and can cause the edges to overbake before the center is done. A glass or ceramic baking dish distributes heat more evenly and gives you better control over the bake.
Make sure your butter is genuinely cooled before adding it to the batter. Melting the butter ahead of time and letting it sit for 15 to 20 minutes before you begin the recipe is the easiest approach.
Do not reduce the beating time in Step 1. The six to seven minute beat is the backbone of this entire recipe it is what creates the volume, the structure, and ultimately the crispy top crust. A hand mixer works fine, but a stand mixer makes this step effortless.
Serve this dessert warm, straight from the dish, with a scoop of vanilla ice cream or a dollop of fresh whipped cream alongside. The contrast of the cold cream against the warm, fudgy pudding center is an experience in itself.
Viral Brownie Pudding: The Most Magical Two Texture Dessert You’ll Ever Bake
Ingredients
- 4 large eggs
- 2 cups granulated white sugar
- 0.8 cups unsweetened cocoa powder
- 0.5 cups all-purpose flour
- 1 teaspoons pure vanilla extract
- 7.9 ounces unsalted butter melted and cooled
Instructions
- Beat Eggs & Sugar: Add 4 large eggs and 2 cups granulated white sugar to a stand mixer or large bowl. Beat on medium-high speed for a full 6–7 minutes until the mixture triples in volume, turns pale ivory-white, and falls in thick ribbons off the beater. Do not cut this time short — this step creates the signature crispy top crust.
- Add Dry Ingredients: Sift 0.8 cups unsweetened cocoa powder and 0.5 cups all-purpose flour directly into the beaten mixture. Add 1 teaspoons pure vanilla extract. Gently fold with a spatula on the lowest mixer setting until no dry streaks remain. Do not overmix — preserve the air built up in Step 1.
- Fold in Melted Butter: Pour in 7.9 ounces unsalted butter, melted and cooled — it must be melted and fully cooled before adding. Gently mix until smooth and glossy. Hot butter will deflate the batter and risk scrambling the eggs.
- Set Up the Water Bath: Pour the batter into an 8×8 inch baking dish. Place it inside a larger roasting pan. Carefully pour hot water into the outer pan until it reaches halfway up the sides of the inner dish. This water bath keeps the center soft and pudding-like while the top crust forms.
- Bake at 325°F: Place the entire setup into a preheated oven at 325°F (165°C). Bake for 60 minutes
- . Do not open the oven door during baking. After 1 hour, the top should look set and slightly crackled. The center will still have a gentle wobble — that’s perfect.
- Rest & Develop the Crust: Remove from the oven and allow to cool at room temperature for at least 20–30 minutes
- . The crispy crackled crust forms as it cools — not in the oven. Do not skip this resting step.
- Serve & Enjoy: Scoop warm into bowls directly from the baking dish. Serve with a scoop of vanilla ice cream, freshly whipped cream, or a light dusting of powdered sugar. Best enjoyed warm while the center is still soft and fudgy.
The crispy crust forms naturally from the heavily beaten egg and sugar mixture. When eggs and sugar are beaten together for six to seven minutes, the sugar partially dissolves into the egg foam and creates a meringue-like layer that rises to the surface during baking. As the dessert cools, this layer dries and crisps into that signature crackled crust no additional ingredients needed.
An 8×8 inch square baking dish or a similar-sized oval ceramic dish works well for this recipe. The key is choosing an inner dish that fits comfortably inside a larger roasting pan or baking dish with enough room around the sides for the water bath.
Brownie Pudding is at its absolute best served warm and fresh, when the center is still soft and the crust is at its crispiest. However, you can prepare the batter ahead of time and refrigerate it, then bake it when needed. Leftovers can be stored covered in the refrigerator for up to three days and warmed gently in the microwave before serving, though the crust will soften on reheating.
The most common cause is under-beating the eggs and sugar in Step 1. If the mixture wasn’t beaten long enough to become pale, white, and ribbon-like, the crust won’t develop properly. Another possible cause is opening the oven door during baking, which can cause the top to sink. Finally, make sure you’re allowing the dessert to cool sufficiently after baking the crust firms up during the cooling process, not in the oven.
Absolutely. Folding in a half cup of semi-sweet chocolate chips or roughly chopped walnuts or pecans before pouring the batter into the dish adds great texture and flavor. Just be mindful that heavy mix-ins may slightly affect how evenly the crust forms across the top.
Yes completely intentional and exactly right. The center of a properly baked Brownie Pudding will have a soft, pudding-like wobble when you remove it from the oven. It firms up slightly as it cools but remains gloriously soft and fudgy inside. If the center is fully set and firm, it has been overbaked and the pudding texture will be lost.
Yes. Substitute the all-purpose flour with a 1:1 gluten-free baking flour blend and the results are very similar. The half cup of flour in this recipe plays a relatively minor structural role, making it one of the more forgiving recipes to adapt for gluten-free baking.
Serve it warm, directly from the baking dish, scooped into bowls. A scoop of good vanilla ice cream, a drizzle of heavy cream, or a generous cloud of freshly whipped cream alongside turns it into a truly showstopping dessert. A light dusting of powdered sugar over the top just before serving adds a beautiful finishing touch.
Notes
Prep Time: 15 minutes | Cook Time: 1 hour | Rest Time: 20–30 minutes | Total: ~1 hour 45 minutes
Serving Size: 8 servings (scoop directly from the dish)
Cup Measurement: 1 cup = 200 ml for this recipe.
Key Success Tips:
- Beat eggs & sugar the full 6–7 minutes — no shortcuts. This is what creates the crispy top.
- Butter must be cooled before adding or it will deflate the batter.
- Use a light-colored ceramic or glass baking dish — dark metal pans overbake the edges.
- Do not open the oven during baking — temperature drops cause the top to sink.
- The wobbly center when it exits the oven is intentional — it firms into fudgy pudding as it cools.
Storage: Cover and refrigerate for up to 3 days. Reheat gently in the microwave. Note: the crust will soften after storing.
Gluten-Free Option: Swap all-purpose flour with a 1:1 gluten-free baking flour blend.
Optional Mix-ins: Fold in ½ cup semi-sweet chocolate chips or chopped walnuts/pecans before baking.