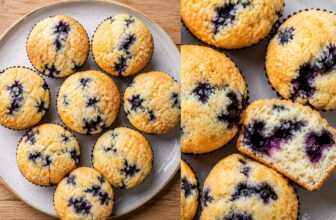
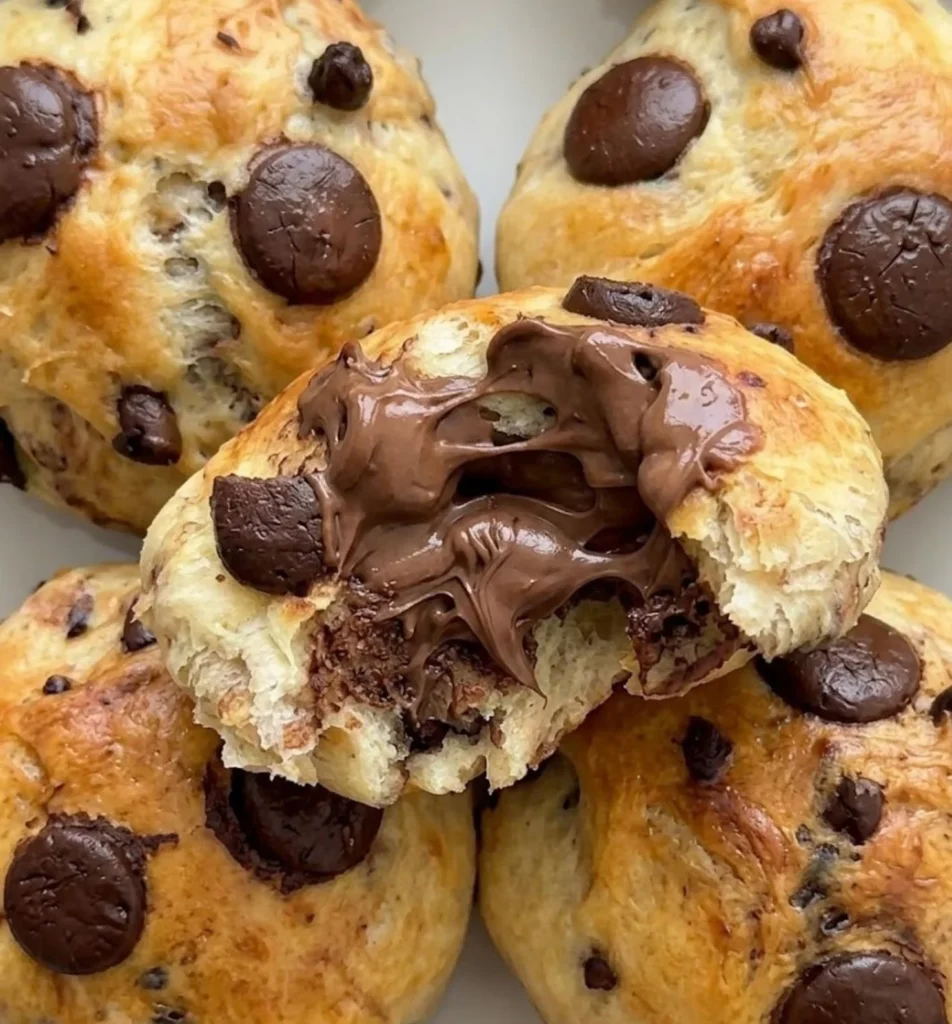
Have you ever stood at a bakery counter, torn between a decadent chocolate chip muffin and a soft, buttery dinner roll? We certainly have. That’s why we’ve perfected the Chocolate Chip Muffin Bun. This recipe takes a traditional yeast-leavened dough and infuses it with the comfort of a muffin.
Unlike standard muffins that rely on chemical leaveners like baking powder, these buns use instant yeast. This results in a “pull-apart” texture that is light, airy, and far less crumbly than a cake based muffin.
Whether you’re serving these at a Sunday brunch or packing them in a lunchbox, they are guaranteed to be the star of the show.
Quick Stats
Prep Time: 20 mins (plus 1 hour 15 mins rising time)
Cook Time: 20–25 mins
Total Time: Approx. 2 hours
Servings: 12 Large Buns
The Shopping List
To get that perfect “bakery fresh” result, ensure your ingredients are fresh and at the right temperature.
1.5 Cups Warm Whole Milk: Aim for about 105°F–110°F. If it’s too hot, it will kill the yeast; too cold, and it won’t activate.
1 Packet Instant Dry Yeast: This is usually 0.25 oz or 10 grams.
4 Tablespoons Granulated Sugar: Just enough to feed the yeast and add a subtle sweetness to the dough.
1 Teaspoon Salt: Essential for balancing the sweet chocolate.
1 Large Egg: Room temperature is best for even mixing.
1/2 Cup Vegetable or Canola Oil: This provides the “fat” that keeps the buns soft for days.
4 Cups All-Purpose Flour: You may need an extra 2–3 tablespoons if your dough feels too sticky.
1 Cup Semi-Sweet Chocolate Chips: Or milk chocolate if you prefer a sweeter profile.
Optional: Chocolate hazelnut spread (like Nutella) for filling the centers after baking.
The Baking Method: Step By Step
1. The Yeast Activation (The Bloom)
In a large mixing bowl (or the bowl of your stand mixer), combine the warm milk, sugar, salt, and the packet of instant yeast. Stir gently and let it sit for about 10 minutes. You’ll know it’s ready when you see a foamy, bubbly layer on top that’s the yeast coming to life!
2. Mix the Dough
Add the egg and the oil to your yeast mixture. Gradually add the 4 cups of all-purpose flour. Using a dough hook or a sturdy wooden spoon, mix until a shaggy dough forms.
3. The Knead
Turn the dough out onto a lightly floured surface. Knead the dough for about 5–8 minutes until it is smooth, elastic, and “soft to the touch.” If the dough sticks to your hands, sprinkle a tiny bit more flour, but be careful too much flour will make the buns heavy.
4. The First Rise
Lightly grease a bowl with oil, place the dough inside, and cover it with plastic wrap or a damp kitchen towel. Leave it in a warm, draft-free spot for 1 hour, or until it has doubled in size.
5. Incorporate the Chocolate
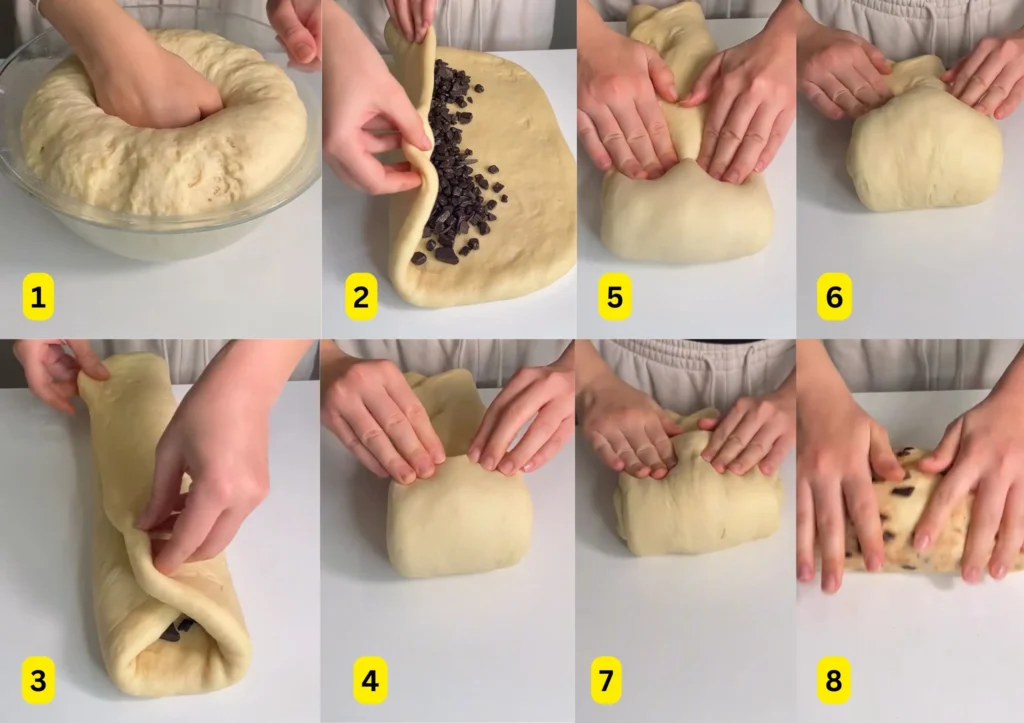
Once risen, punch the dough down to release the air. Pour your chocolate chips over the dough and knead them in gently until they are evenly distributed.
6. Shape and Second Rise
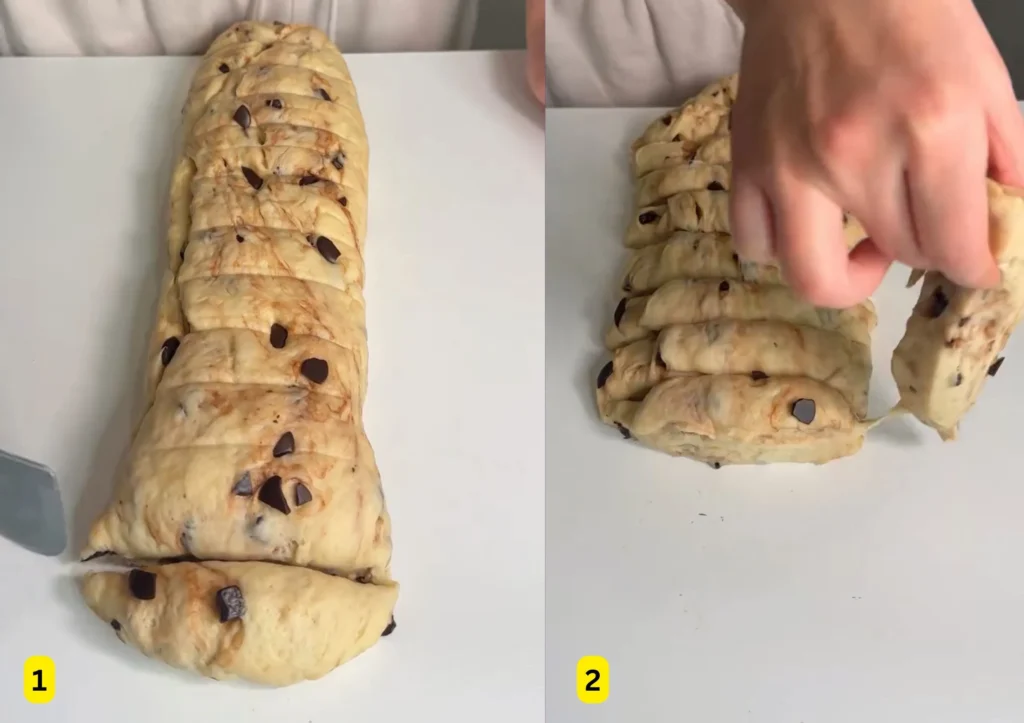
Divide the dough into 12 equal pieces. Roll each piece into a smooth ball. Place each ball into a greased muffin tin (or use paper liners). Cover them again and let them rise for a final 15 minutes. This “second proof” ensures they are extra fluffy.
7. The Milk Wash and Bake
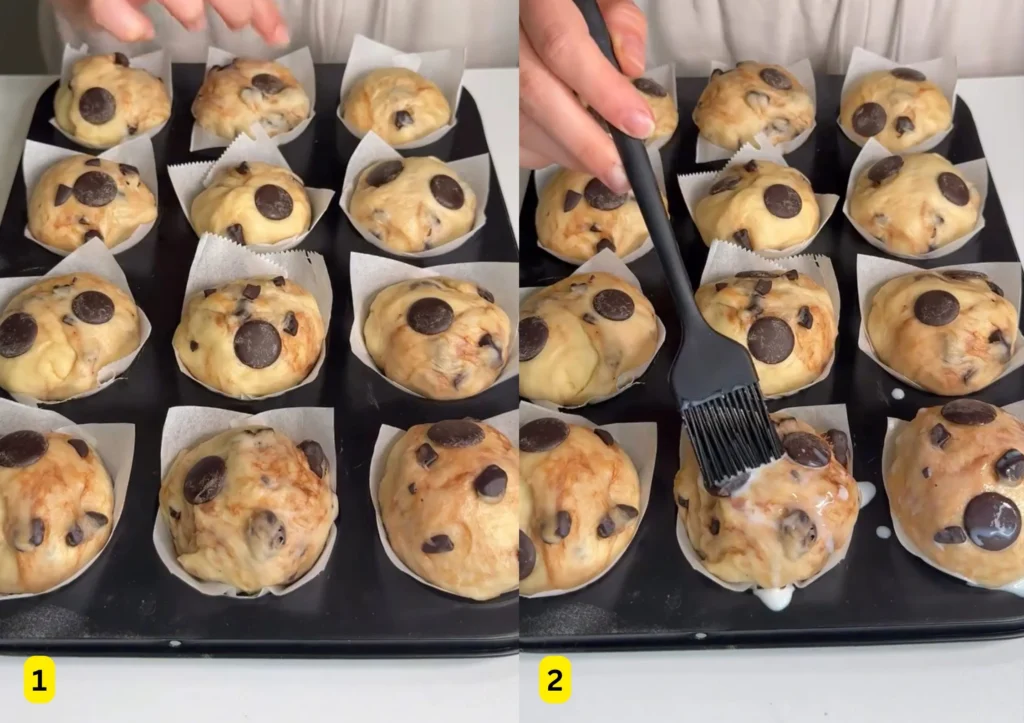
Preheat your oven to 350°F (180°C). Just before sliding the pan into the oven, lightly brush the tops of the dough balls with a little bit of milk. This gives them a beautiful, soft golden crust. Bake for 20–25 minutes or until the tops are golden brown.
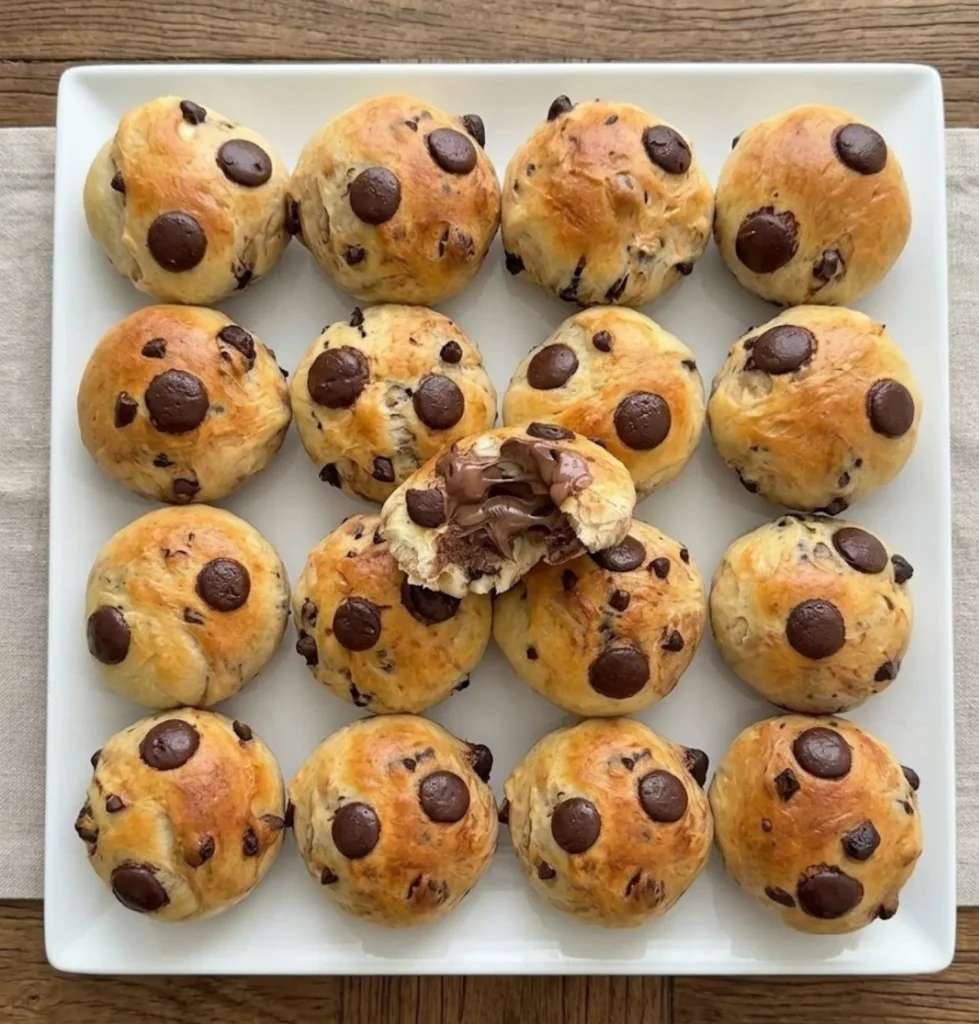
8. The Secret Center (Optional)
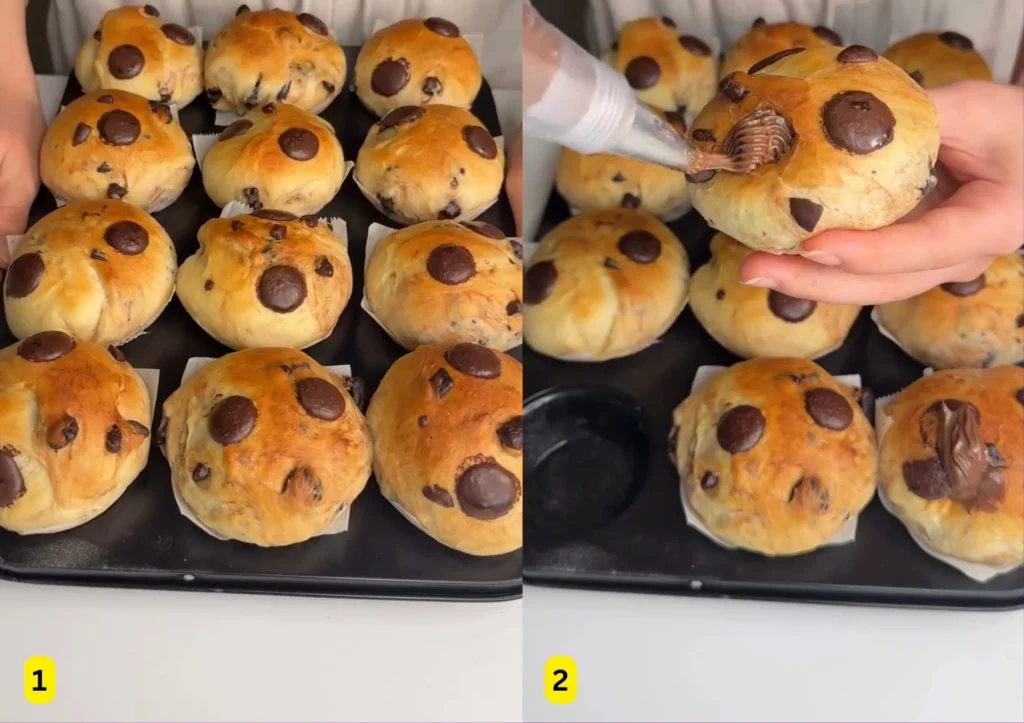
Once the buns have cooled slightly, you can use a piping bag with a small tip to inject chocolate hazelnut spread into the center for a molten chocolate surprise!
Pro Tips for Success
Don’t Rush the Rise: Yeast is a living organism! If your kitchen is cold, the dough will take longer to rise. You can place the bowl in an unlit oven with the oven light turned on to create a warm environment.
Flour Measurement: When measuring your 4 cups of flour, use the “spoon and level” method rather than scooping directly from the bag to avoid packing too much flour into the cup.
Chocolate Quality: Use high-quality “morsels” or even chopped chocolate bars. Chopped bars will create beautiful “pools” of chocolate throughout the dough.

Make Chocolate Chip Muffin Buns
Ingredients
- Warm Milk: 1.5 cups 105°F–110°F
- Sugar: 4 tbsp granulated
- Salt: 1 tsp
- Yeast: 1 packet 10g instant dry yeast
- Egg: 1 large
- Oil: ½ cup vegetable or canola oil
- Flour: 4 cups all-purpose plus extra for kneading
- Chocolate Chips: 1 cup semi-sweet
- Optional: Chocolate hazelnut spread for filling
Instructions
- Activate Yeast: Combine warm milk, sugar, salt, and yeast in a bowl. Let sit for 10 minutes until foamy.
- Mix Dough: Add egg and oil to the yeast mixture. Gradually stir in flour until a dough forms.
- Knead: Knead on a floured surface for 5–8 minutes until smooth and elastic.
- First Rise: Place dough in a greased bowl, cover, and let rise in a warm spot for 1 hour (until doubled).
- Add Chocolate: Punch down the dough, add chocolate chips, and knead gently to distribute.
- Shape & Second Rise: Divide into 12 equal pieces. Roll into balls and place in a greased muffin tin. Cover and rise for 15 minutes.
- Bake: Brush tops with milk. Bake in a preheated oven at 180°C (350°F) for 20–25 minutes until golden brown.
- Finish: Once cooled slightly, core the center and fill with chocolate spread if desired.
Yes! Bread flour has a higher protein content, which will make the buns slightly chewier and more “bread-like.” All-purpose flour keeps them closer to a soft muffin texture.
Keep them in an airtight container at room temperature for up to 2 days, or in the refrigerator for up to 5 days. We recommend a 10-second zap in the microwave before eating to remelt the chocolate.
Yes. You can let the dough do its first rise in the refrigerator overnight. The cold environment slows down the yeast, which actually develops a deeper flavor. Just let it come to room temperature before adding the chocolate chips.
This usually happens if the dough was over-kneaded or if too much flour was added. The dough should feel like a soft pillow, not a rubber ball.