When it comes to hosting a dinner party or game night, the perfect appetizer needs to hit three main criteria: it must be portable, it must be cheesy, and it must have an explosion of flavor. While standard tacos and sliders are great, they can sometimes feel a bit predictable.
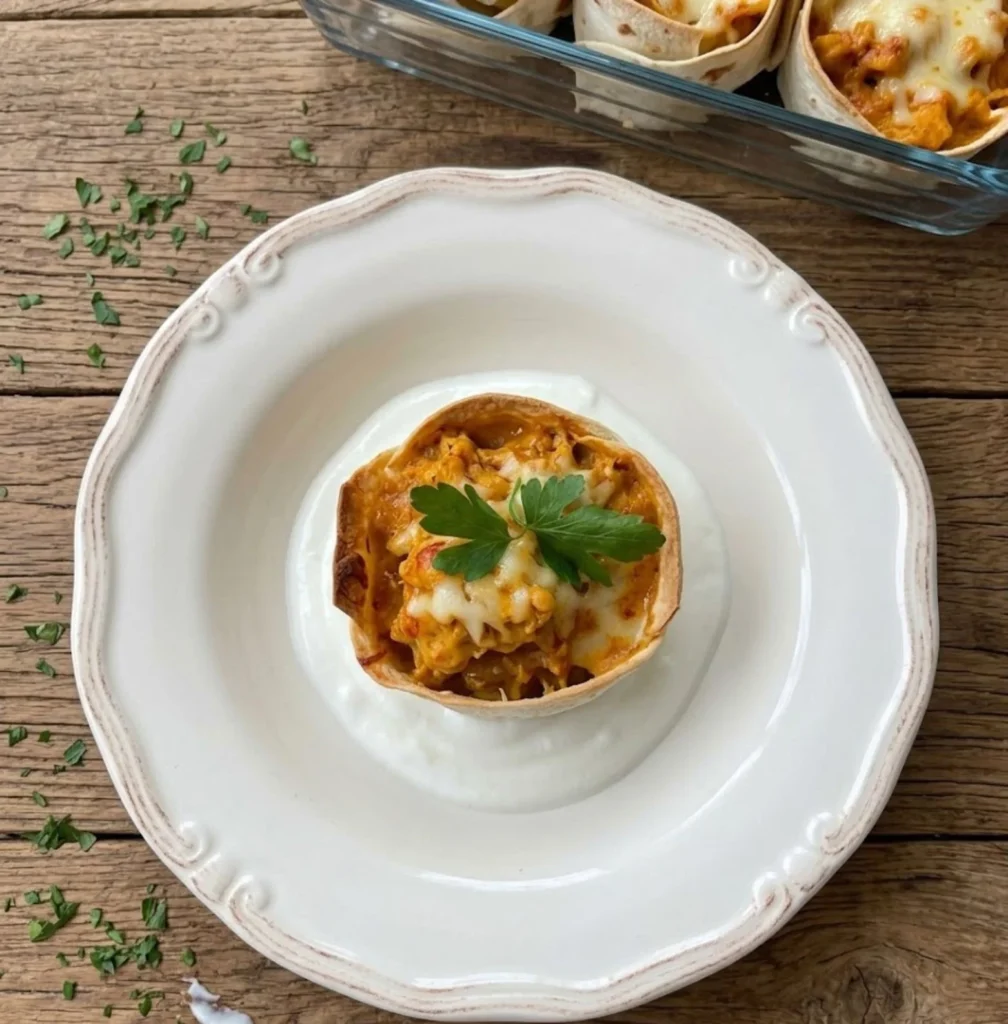
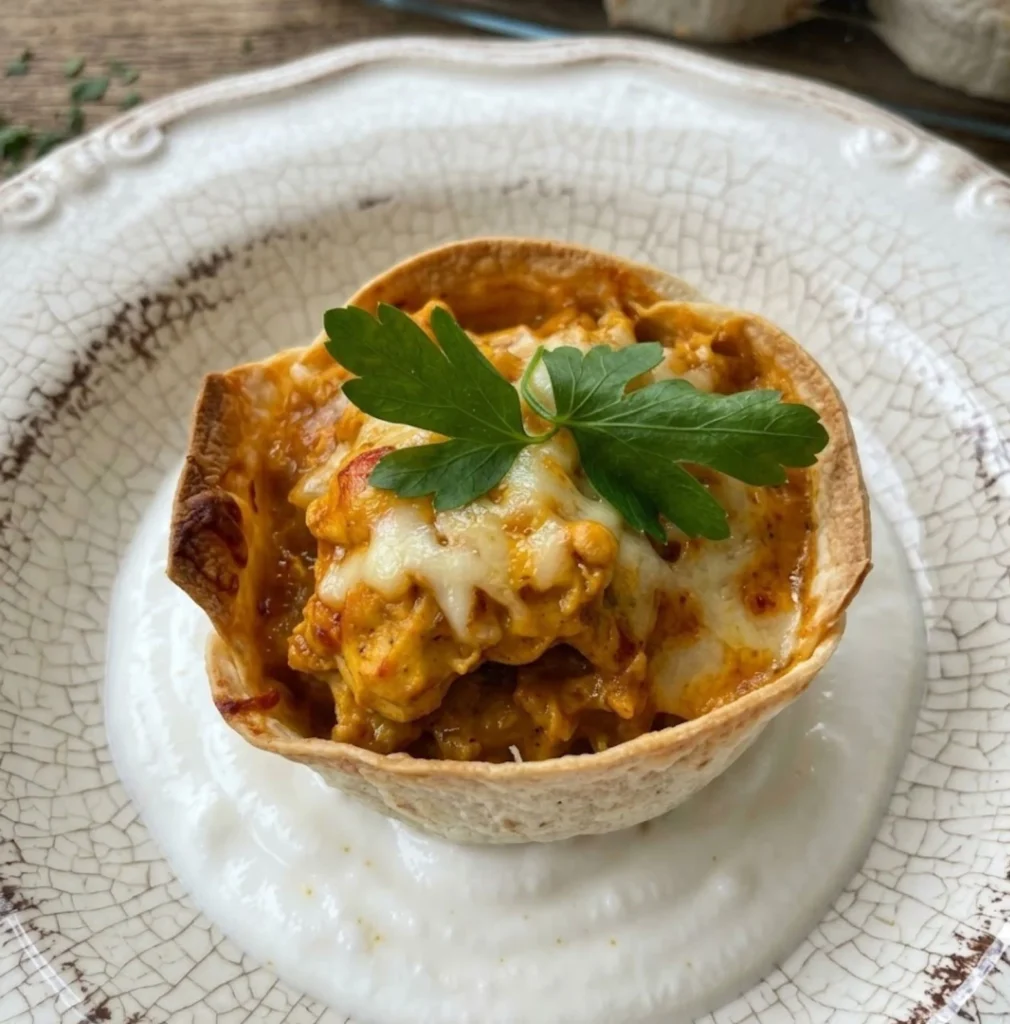
Enter the Cheesy Curry Chicken Tortilla Cup. This recipe is a masterclass in culinary “hacks.” It takes a simple flour tortilla and transforms it into a golden, crispy edible bowl that holds a rich, creamy, and spiced chicken filling.
By using a clever “flour cement” to seal the cups, you get a beautiful, consistent shape every time. These are as impressive to look at as they are delicious to eat.
Why These Tortilla Cups Work
The beauty of this dish lies in the contrast of textures. You have the crunch of the baked tortilla shell paired with a velvety curry cream sauce inside.
The Shell: Instead of deep-frying, we bake the shells at a high temperature, which yields a lighter, crispier result.
The “Cement” Seal: The 1:3 ratio of flour to water is a kitchen secret that allows you to fold and pleat your tortillas into a cup shape without them unfolding in the oven.
The Flavor Profile: The combination of curry powder and red pepper powder provides a warm, aromatic depth that pairs perfectly with the rich cream and melted cheese.
Ingredients
For the Edible Cups:
Flour Tortillas: 8 large (approx. 8–10 inches).
The Sealant: 1 tablespoon all-purpose flour mixed with 3 tablespoons water (your “culinary cement”).
For the Creamy Curry Filling:
Chicken Breast: 14 oz (approx. 400g), diced into small bite-sized pieces.
Onion: 1 medium, finely chopped.
Red Bell Pepper: 1 large, diced.
Garlic: 3 cloves, minced.
Red Pepper Powder (or Smoked Paprika): 1 teaspoon.
Black Pepper: 1 teaspoon.
Curry Powder: 1 teaspoon.
Heavy Cream: 1 cup.
Shredded Cheese: 1 cup of Mozzarella or Monterey Jack (Kashar cheese is traditional, but these are excellent U.S. substitutes).
The Step by Step Method
1. Constructing the Cups
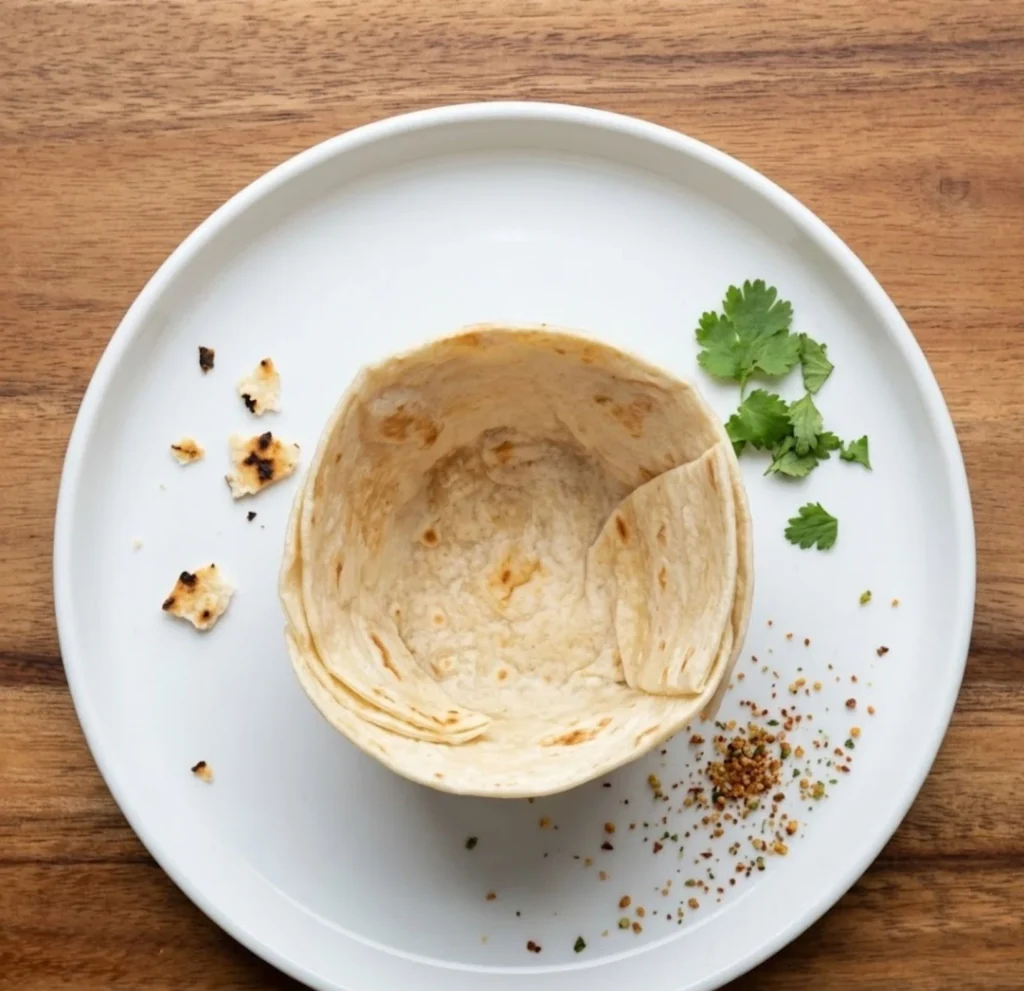
Cut your tortillas from the center to the edge (one slit). Apply your flour-water “cement” to the overlapping edges and pleat the tortilla until it forms a sturdy cup shape.
2. The Sauté Phase
In a large skillet over medium-high heat, sauté the diced chicken until golden brown. Add the chopped onions, red bell peppers, and minced garlic. Cook until the vegetables are soft and the onions are translucent.
3. Spice and Cream
Stir in the red pepper powder, black pepper, and curry powder. Once the spices are fragrant, pour in the heavy cream. Let the mixture simmer on low for 3–5 minutes until it thickens into a rich, golden sauce that clings to the chicken.
4. Assembly
Place your tortilla cups into a baking dish (this helps them keep their shape). Spoon a generous amount of the creamy chicken mixture into each cup. Top each one with a handful of shredded cheese.
5. The Golden Bake
Preheat your oven to 375°F (190°C). Bake the cups for 12–15 minutes, or until the edges of the tortillas are browned and crispy and the cheese on top is bubbly and golden.

Party Appetizer: Cheesy Curry Chicken Tortilla Cups
Ingredients
- The Tortilla Cups:
- 8 Large Flour Tortillas
- The Sealant: 1 tbsp All-purpose flour mixed with 3 tbsp water thick paste
- The Creamy Curry Filling:
- 14 oz 400g Chicken Breast (finely diced)
- 1 cup Heavy Cream
- 1 cup Shredded Cheese Mozzarella or Monterey Jack
- 1 medium Onion finely chopped
- 1 Red Bell Pepper diced
- 3 cloves Garlic minced
- The Spice Blend:
- 1 tsp Curry Powder
- 1 tsp Red Pepper Powder or Smoked Paprika
- 1 tsp Black Pepper
- Salt to taste
Instructions
- Construct the Edible Cups
- The Cut: Make one single slit from the center of each tortilla out to the edge.
- The Seal: Apply the flour-water “cement” paste generously along the edge of the slit.
- The Fold: Overlap the edges and pleat the tortilla until it forms a sturdy cup shape with a flat bottom. Press the seal for 5 seconds to secure.
- Sauté the Filling
- Chicken: In a skillet over medium-high heat, sauté the diced chicken until golden.
- Veggie Base: Add the onions, red peppers, and garlic. Cook until soft and fragrant.
- Spice: Stir in the curry powder, red pepper powder, and black pepper.
- Simmer to Thicken
- Cream: Pour in the heavy cream and a pinch of salt.
- Reduce: Simmer on low heat for 3–5 minutes until the sauce is thick and velvety, coating the chicken thoroughly.
- Fill and Top
- Assembly: Place the tortilla cups into a baking dish. Spoon the creamy chicken mixture into each cup.
- Cheese: Top each cup with a generous amount of shredded cheese.
- The Golden Finish
- Bake: Place in a preheated oven at 375°F (190°C).
- Time: Bake for 12–15 minutes until the tortilla edges are crispy and the cheese is bubbly and golden-brown.
Flour tortillas are much more pliable and hold the “sealant” better. Corn tortillas tend to crack when folded into this specific cup shape. If you must use corn, ensure they are steamed and very warm before folding.
Ensure your cream sauce has thickened significantly in the pan before filling the cups. If the sauce is too watery, the tortilla will absorb the liquid. You can also sprinkle a tiny bit of cheese at the very bottom of the cup before adding the chicken to create a “fat barrier.”
Yes! You can make the curry chicken filling up to 24 hours in advance. Just reheat it slightly before filling the cups and baking.
Absolutely. Replace the chicken with a mix of chickpeas and sautéed mushrooms. The curry cream sauce works beautifully with plant-based proteins.
Make sure the paste is thick (like a heavy glue). If it’s too runny, add a pinch more flour. Apply it generously to the edges and hold the pleat for 5 seconds to ensure it “grabs” the tortilla.
Pro Tip
To ensure the bottom stays crispy, sprinkle a thin layer of shredded cheese into the cup before adding the wet chicken mixture. The cheese melts to create a moisture barrier for the tortilla.