Hard boiled eggs are arguably the most essential “power tool” in any kitchen. They are a nutritional powerhouse, a budget-friendly protein, and a versatile foundation for everything from a quick breakfast to elegant deviled eggs. However, the difference between a rubbery, overcooked egg with a gray green ring and a perfectly cooked egg with tender whites and a creamy yolk comes down to minutes and method.
This foolproof technique removes the guesswork, ensuring that whether you want a runny “dipping” egg or a firm yolk for meal prep, you get consistent, easy to peel results every single time.
Why This Method is the Gold Standard
Reliability: By removing the eggs from the direct heat source to sit, you avoid the violent boiling that often cracks shells and overcooks the outer whites.
Efficiency: It is the ultimate meal prep hack. Spend 15 minutes on Sunday, and you have healthy snacks for the entire week.
Precision: This guide provides specific time stamps for different yolk textures, allowing you to customize your eggs to your exact preference.
Silky Eggplant Beef Rolls Beyti Style
Three Creative Breakfast Toast Toppers
The Anatomy of the Perfect Cook
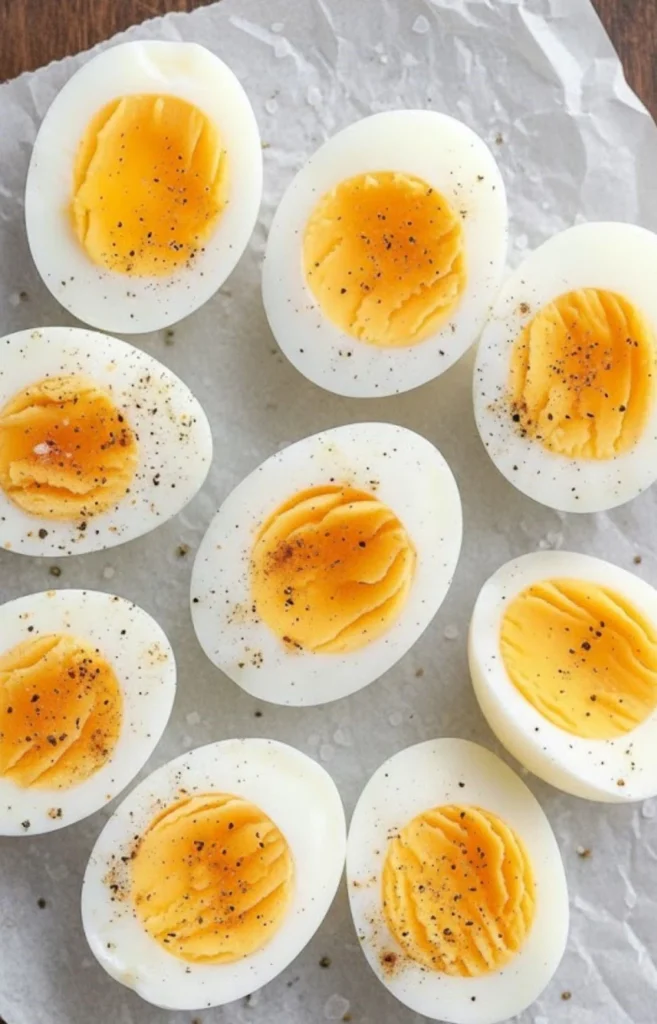
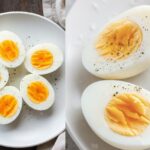
- 6–7 Minutes: Soft-boiled with a liquid, runny yolk.
- 8–9 Minutes: “Jammy” eggs with a custard-like, fudgey center.
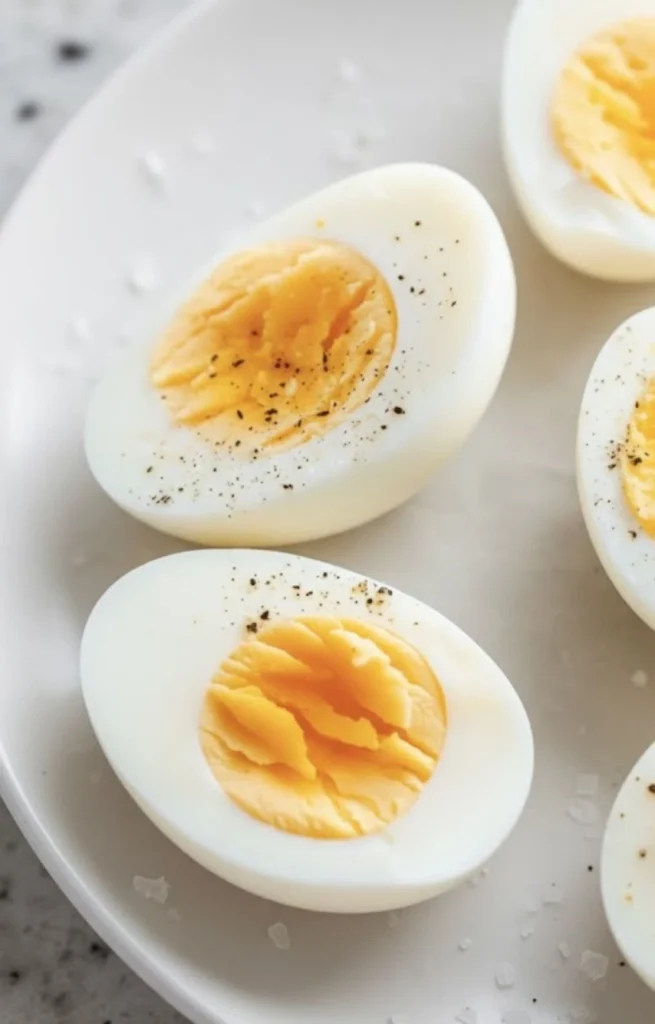
- 10–12 Minutes: Classic hard-boiled with a fully set, creamy yellow yolk.
Ingredients & Tools
- Eggs: As many as you need (Russet or older eggs are actually better for peeling!).
- Cold Water: To cover.
- Ice: For the essential ice bath.
Step by Step Instructions
The Cold Start: Place your eggs in a single layer at the bottom of a saucepan. Pour in cold water until the eggs are covered by at least 1 inch. Starting cold ensures the eggs heat evenly and don’t crack from a temperature shock.
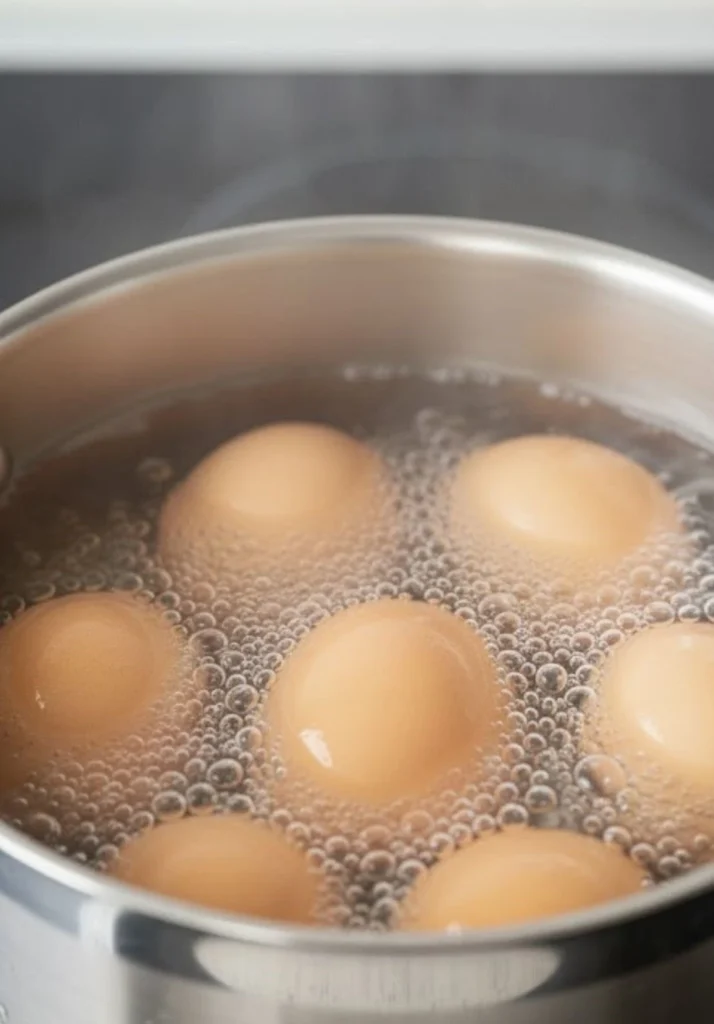
The Rolling Boil: Place the pot over medium-high heat. Bring the water to a full, rolling boil.
The “Off-Heat” Simmer: As soon as the water boils, remove the pan from the heat and cover it tightly with a lid. This is where the magic happens. Let them sit undisturbed for your desired time (refer to the “Anatomy” section above).
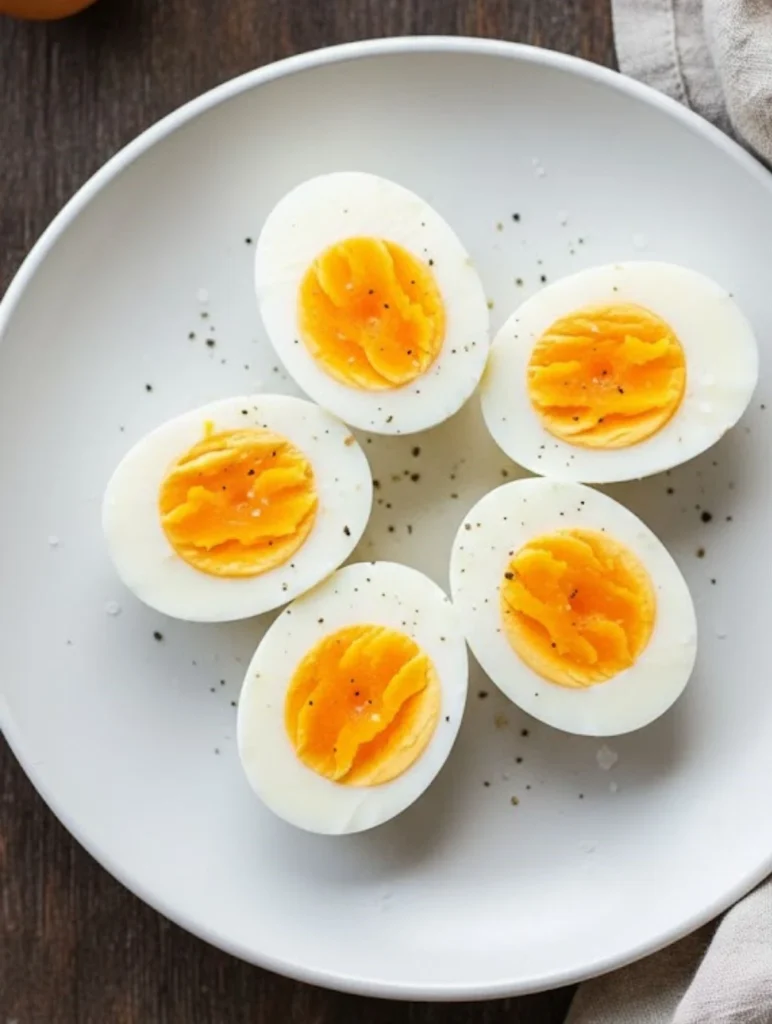
The Ice Bath Shock: This is the most important step for easy peeling. Immediately transfer the eggs to a bowl filled with ice and cold water. This “shocks” the egg, stopping the cooking process and causing the egg membrane to pull away from the shell. Let them chill for at least 5 minutes.
The Perfect Peel: Gently tap the egg on a hard surface and roll it under your palm to create fine cracks. Peel the shell away ideally under a thin stream of running water to help the shell slide off effortlessly.
Expert Tips for Success
** pH Matters:** Fresh eggs are delicious, but slightly older eggs (about a week old) have a higher pH level, which makes the shell much less likely to stick to the white.
Avoid the Green Ring: That unappealing green/gray ring around the yolk is caused by a reaction between sulfur and iron when an egg is overcooked. The ice bath is your best defense against this!
The Baking Soda Trick: If you only have very fresh eggs, add a pinch of baking soda to the water. This increases the alkalinity and aids in a cleaner peel.
Storage & Serving Suggestions
In the Shell: Keep unpeeled hard-boiled eggs in the fridge for up to 7 days.
Peeled: Store in an airtight container with a damp paper towel for up to 3 days.
Pairings: Slice them over avocado toast, toss them into a Niçoise salad, or marinate peeled eggs in soy sauce for a savory, “ramen-style” snack.
Master the Perfect Hard-Boiled Egg
Ingredients
- Eggs: As many as you need Russet or older eggs are actually better for peeling!.
- Cold Water: To cover.
- Ice: For the essential ice bath.
Instructions
- The Cold Start: Place your eggs in a single layer at the bottom of a saucepan. Pour in cold water until the eggs are covered by at least 1 inch. Starting cold ensures the eggs heat evenly and don’t crack from a temperature shock.
- The Rolling Boil: Place the pot over medium-high heat. Bring the water to a full, rolling boil.
- The “Off-Heat” Simmer: As soon as the water boils, remove the pan from the heat and cover it tightly with a lid. This is where the magic happens. Let them sit undisturbed for your desired time (refer to the “Anatomy” section above).
- The Ice Bath Shock: This is the most important step for easy peeling. Immediately transfer the eggs to a bowl filled with ice and cold water. This “shocks” the egg, stopping the cooking process and causing the egg membrane to pull away from the shell. Let them chill for at least 5 minutes.
- The Perfect Peel: Gently tap the egg on a hard surface and roll it under your palm to create fine cracks. Peel the shell away—ideally under a thin stream of running water to help the shell slide off effortlessly.
Try the “Float Test.” Place an egg in a bowl of water; if it sinks and lays flat, it’s very fresh. If it stands upright on the bottom, it’s perfect for boiling. If it floats to the top, it’s past its prime and should be discarded.
Add a teaspoon of vinegar to the water. The acid helps the egg white coagulate faster, which can seal up small cracks before the mess escapes into the pot.
Yes! Use the “5-5-5” method: 5 minutes on high pressure, 5 minutes of natural release, and 5 minutes in an ice bath.
You can freeze the yolks (perfect for mashing into deviled egg filling), but avoid freezing the whites, as they become tough and watery upon thawing.